

 cosmin
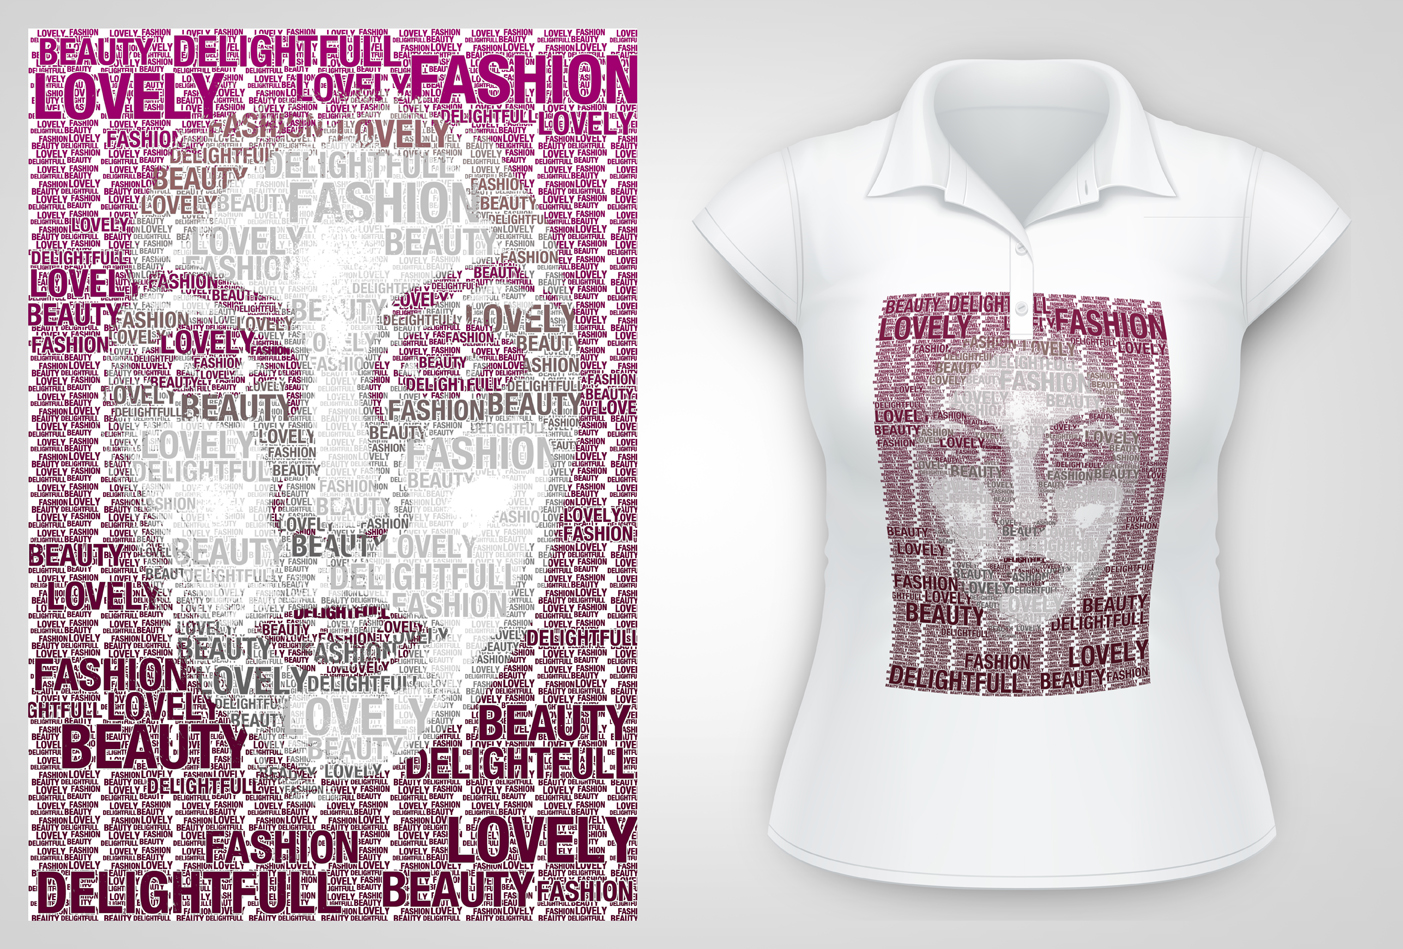
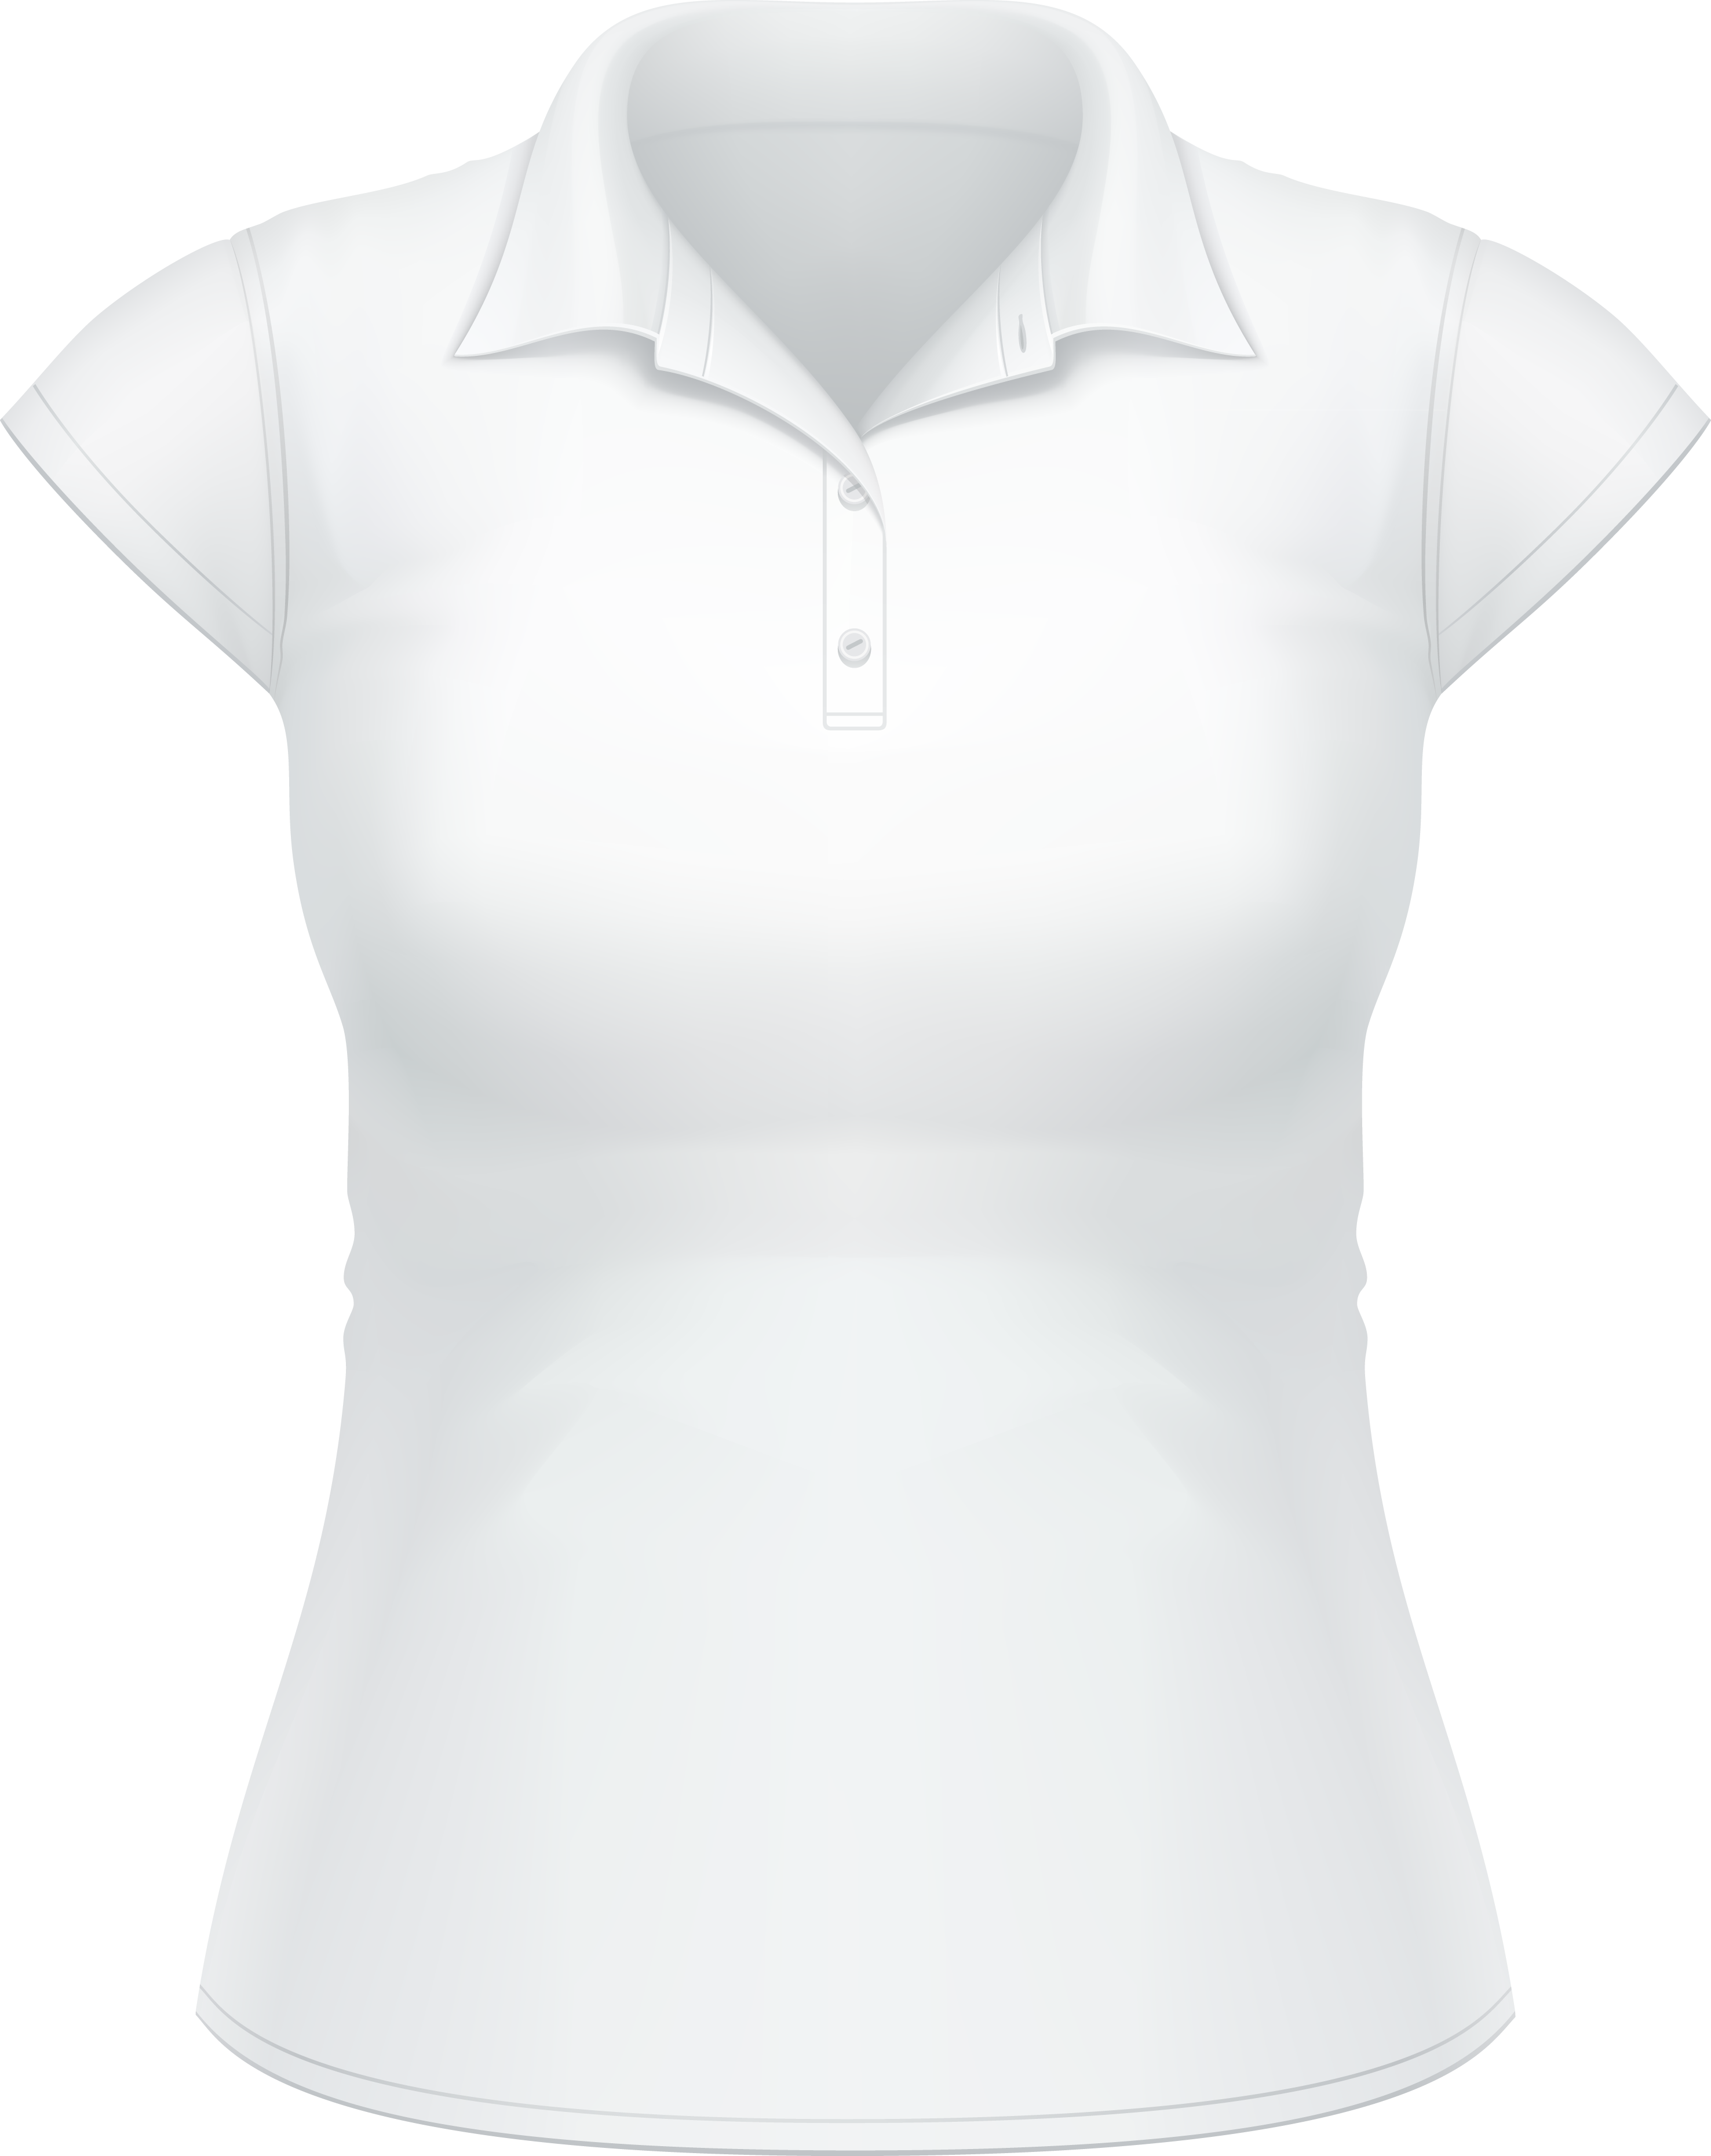
I'm going to show you how to design your own T-shirt using a nice typography portrait. You can use the portrait I've provided, but i suggest to use your own image. This is a good idea for a gift:)
 cosmin
 cosmin
 cosmin
 cosmin
 cosmin
 cosmin
 cosmin
 cosmin
 cosmin
 cosmin
 cosmin
 cosmin
 cosmin
 cosmin
 cosmin
 cosmin
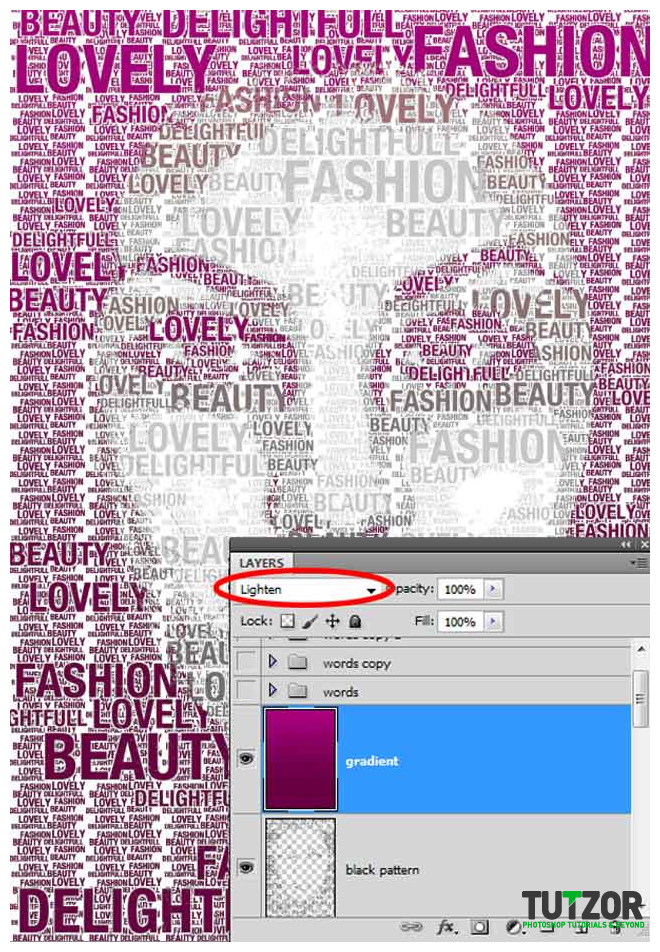 cosmin
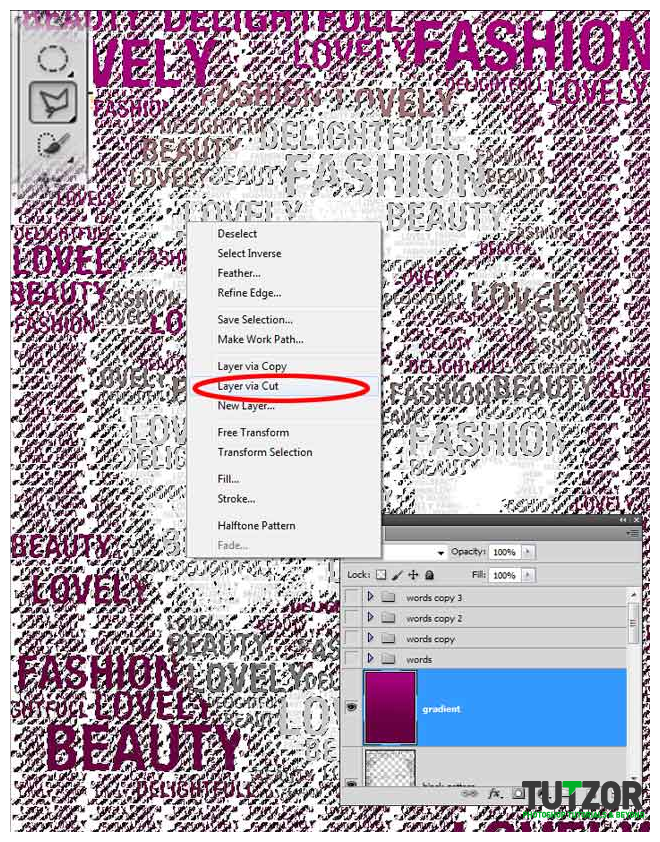 cosmin
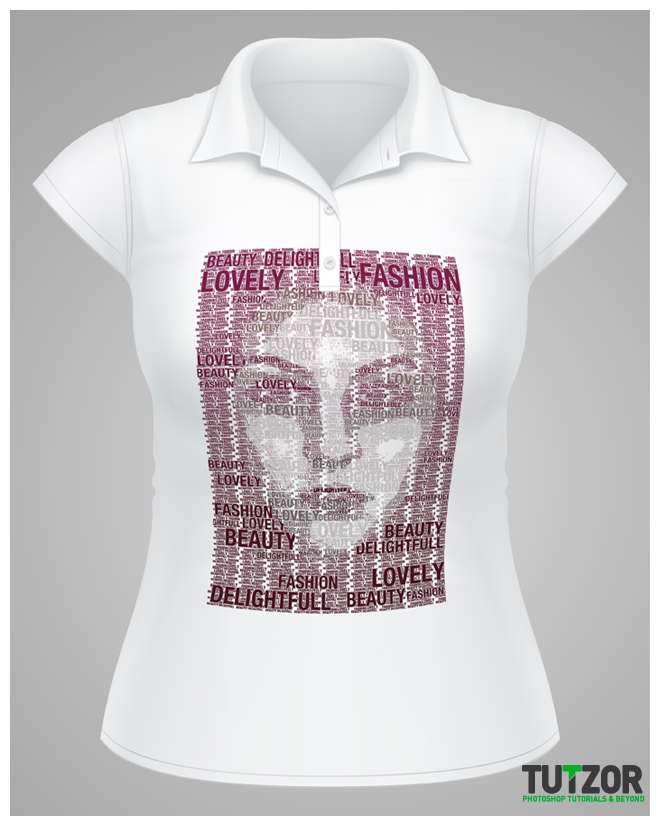 cosmin
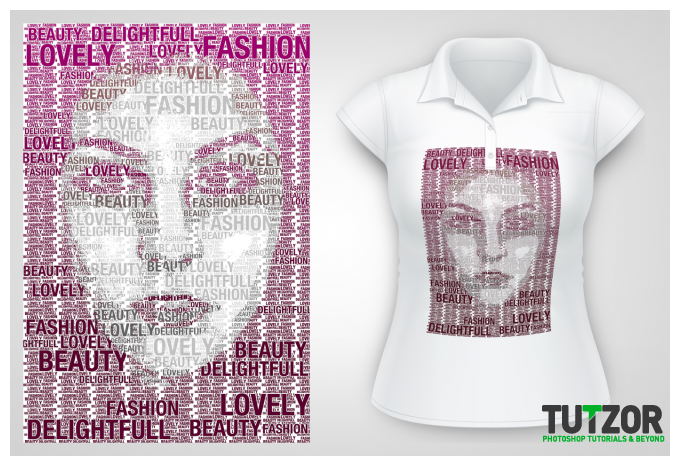
Copyright© 2012 Tutzor All Rights Reserved | Developed by: Iceous Design


Comments
Re: Design your own T-shirt with a typography portrait
thanks a lot,
really nice, very well explained, being a beginner i learned it very quickly,
produced same output as of yours...
once again thanks a lot ... :)
Re: Design your own T-shirt with a typography portrait
Thanks for the tut. It's amazing and what i want(^^)
Re: Design your own T-shirt with a typography portrait
I love this tutorial ! I will stay longer on this website !
Re: Design your own T-shirt with a typography portrait
T-shirt design from hundreds designers around the world.Great Resources for designers for make a great design. Keep posting
Re: Design your own T-shirt with a typography portrait
Sweet tutorial really like this technique and will try it out for sure.
Thanks so much!
Re: Design your own T-shirt with a typography portrait
Thank you very much.very usefull
www.photoshopcu.net