

 cosmin
Hi Everyone,
This time, I want to share with you guys a "Modern warfare" tutorials.
Here are the the following images I used:
 cosmin
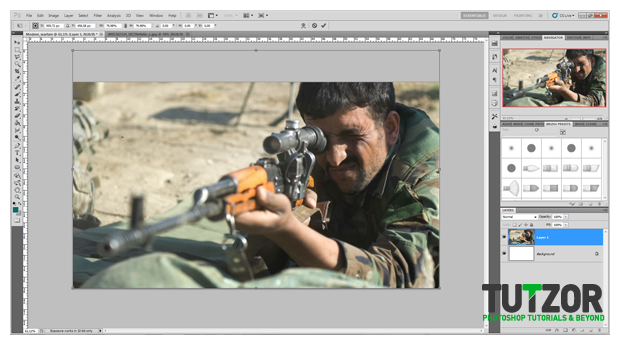
First we’ll going to do the background , start by creating a new document 1920x1080 (Standard Full HD resolution) and paste the sniper soldier image into our document and resize it to fit de canvas (CTRL+T)
 cosmin
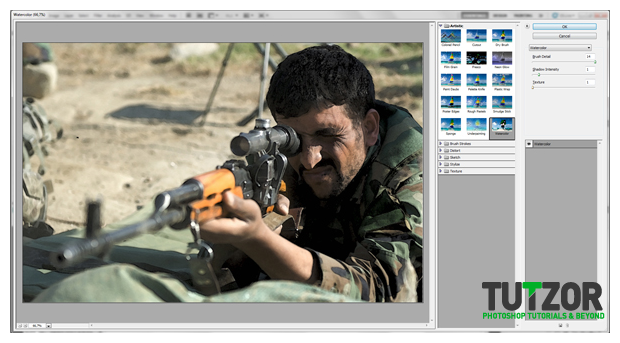
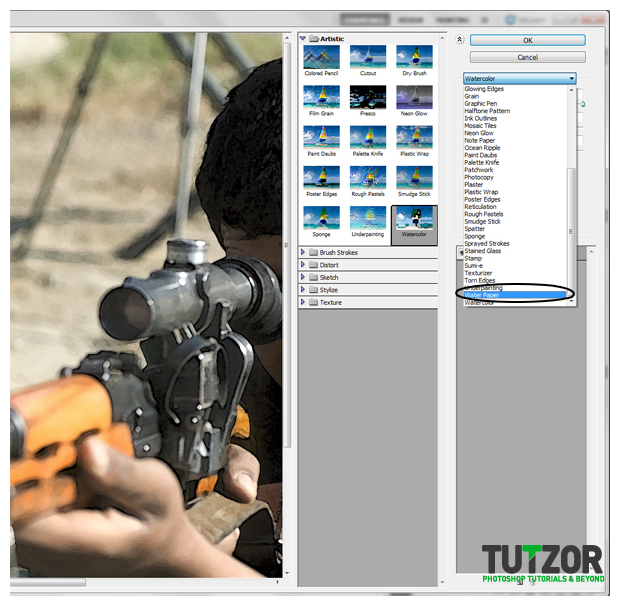
Rename the new Layer “Soldier” and the duplicate it twice. The top layer name it “watercolor”, and the second one “water paper”. Select the “water color” layer and go to Filter > Artistic > Watercolor an use this settings: Brush Detail 14, Shadow Intensity 1, Texture 1.
 cosmin
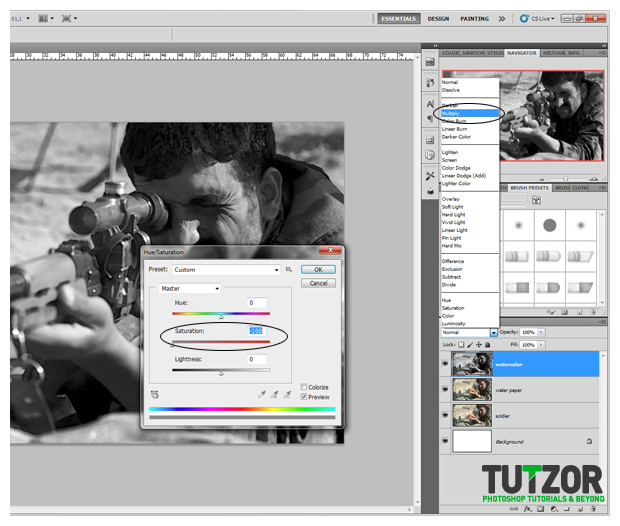
Now we’re going to desaturate the watercolor. Hit CTRL+U or go to Image > Adjustments > Hue/Saturation. Set my value, Saturation -100 and then set the layer blending to Multiply.
 cosmin
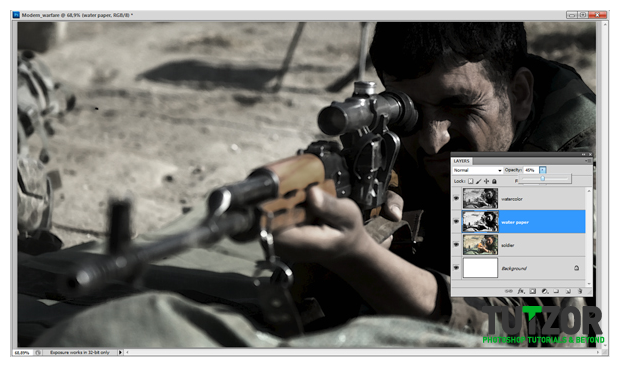
For the “water paper” layer we will use almost the same settings. Select the layer and go again to Filter > Artistic > Watercolor and select water paper and use this values: Fiber Length 15, Brightness 60, Contrast 80.
 cosmin
Now desaturate the water paper layer as you did with the watercolor layer and set the blending mode also to multiply and the opacity to 45%. You should get something like I did.
 cosmin
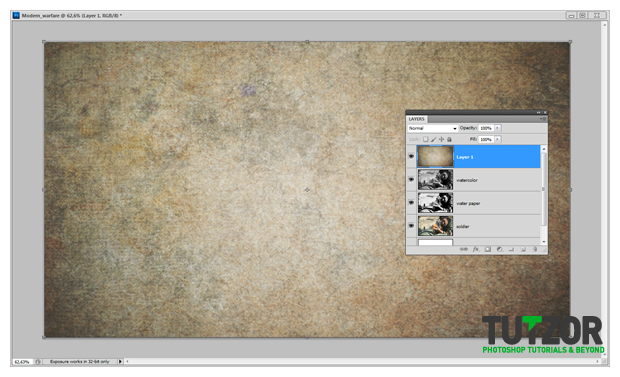
Paste the grunge texture image into the document and scale it to fit the canvas. You don’t need to keep the proportions. Rename the layer to “texture”.
 cosmin
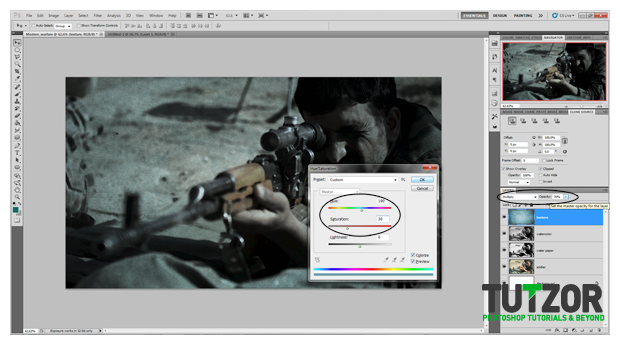
Make sure that the texture layer is on top, set the blending mode to multiply and the opacity to 70%. Press CTRL+U, check the colorize box and set this values: Hue 190, Saturation 30 and lightness 0.
 cosmin
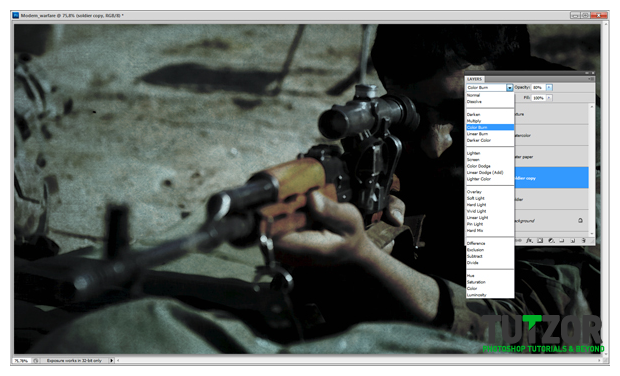
I think we need to add a little more color to the soldier. So duplicate the soldier layer and set the blending to color burn and the opacity to 80%
 cosmin
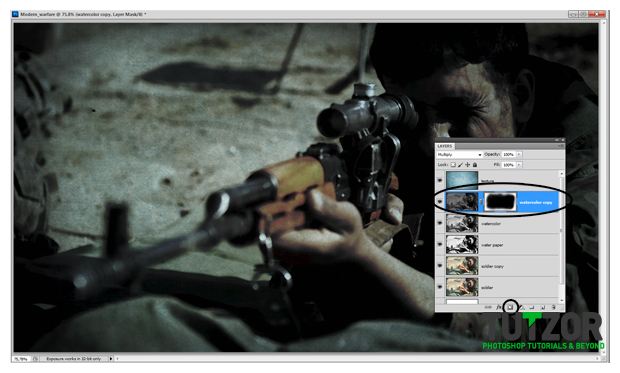
Now we’re going to make the edges of the canvas a little darker. Duplicate the Watercolor layer and make it a little darker by pressing CTRL+U and setting the lightness to -50. Lets add a layer mask to it. Press the “add layer mask” button and using a soft rounded brush paint the mask as I did.
 cosmin
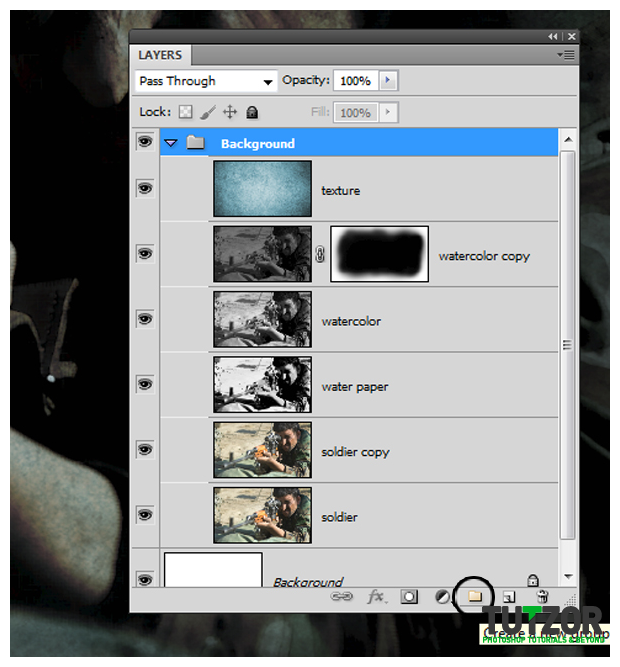
The background it’s done for now, make a group, name it Background and move all the layers there.
 cosmin
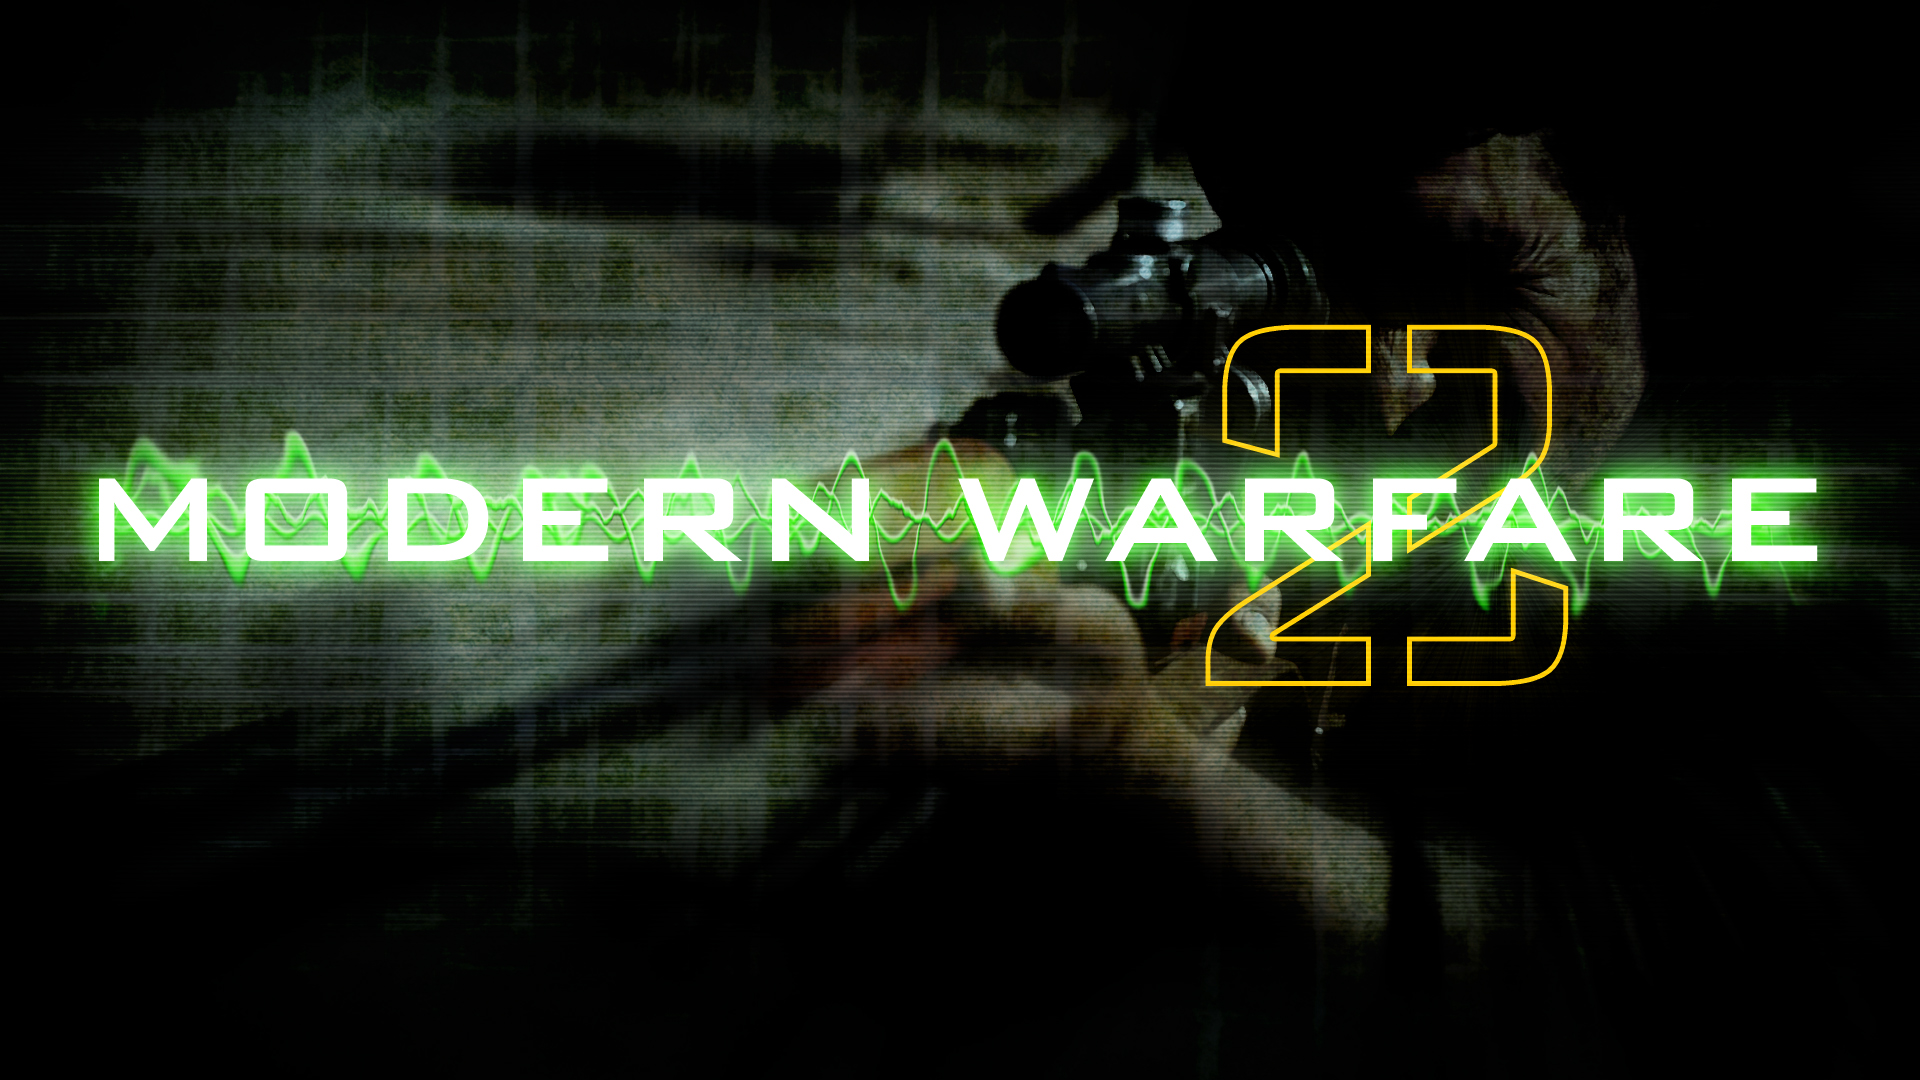
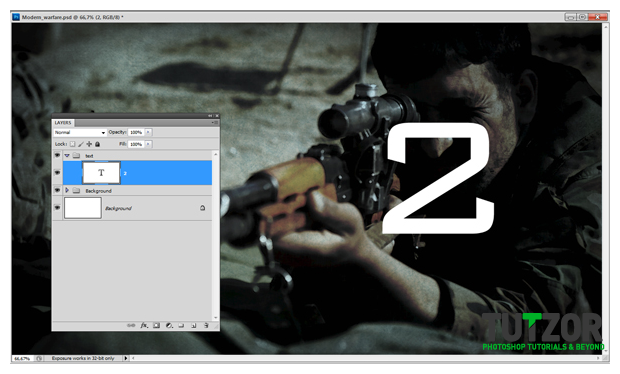
Create a new group and name it “text”. Using Bank Gothic font (very much alike the original) type “2” an place it like I did.
 cosmin
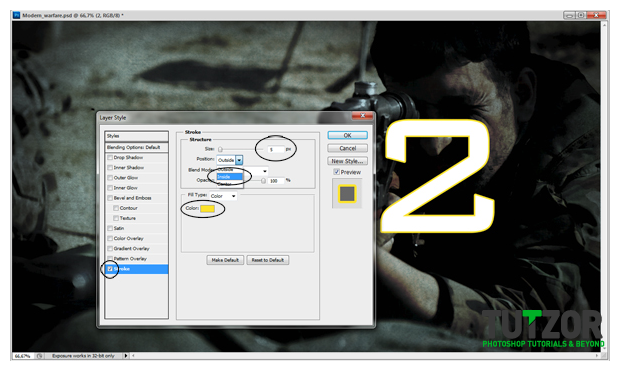
Now double click the “2” layer for “layer style”. First we’ll add a stroke to the number. First change the color of the stroke to #ffdb13, set the size to 5 and the position inside. Don’t click ok because we have something else to do here.
 cosmin
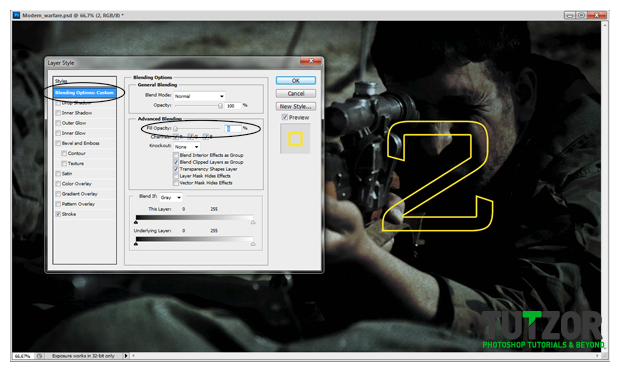
Because we want to see only the stroke click on blending options on top and set the fill opacity to 0.
 cosmin
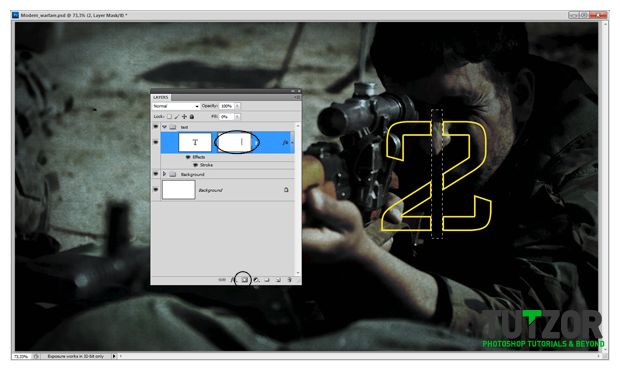
Add a layer mask and paint a stroke in the middle of the 2. You should get something like I did.
 cosmin
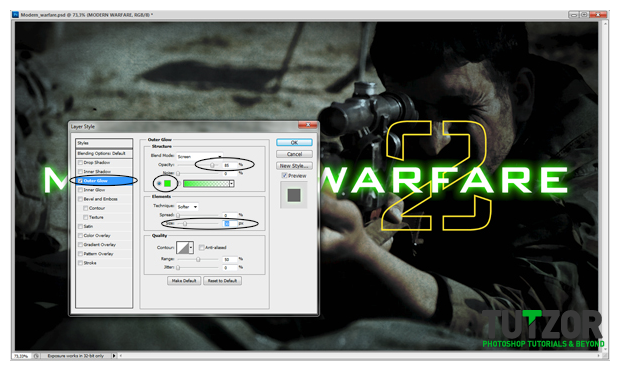
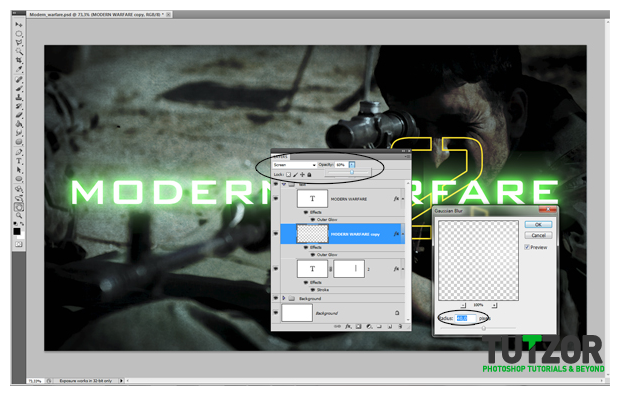
Now type “MODERN WARFARE” like I did, using bank gothic medium and place it in the middle. Open the layer style again and we will start by adding outer glow. First change the color to # 16ee00, then set the opacity to 85% and the size to 30.
 cosmin
We need to add a little more glow. So duplicate the modern warfare layer and rasterize it. Go to Filter > Blur > Gaussian Blur (make sure the layer is under the original one) and set the radius to 40% then set the layer opacity to 60% and the blending mode to screen. Also double click it for layer style and in the outer glow section change the color to #9dff93
 cosmin
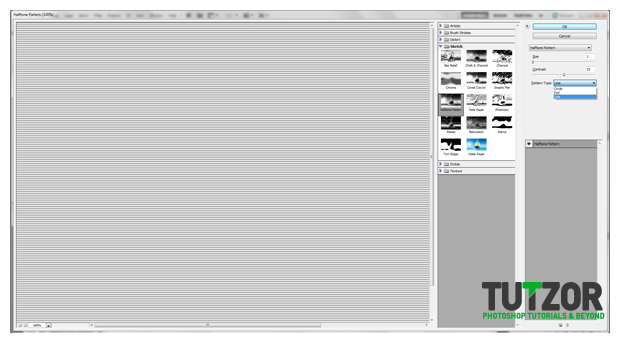
Make a new layer above the text group and name it halftone. Fill it with #909090 and go to Filter > Sketch > Halftone pattern and set my values: Size 1, Contrast 25 and pattern type: line.
 cosmin
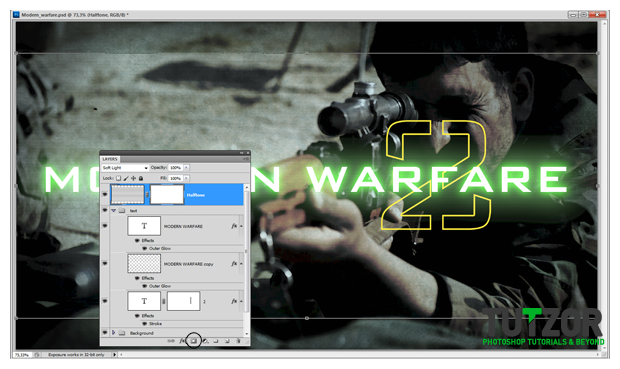
Now go to Filter > Pixelate > Fragment and set the layer blending mode to Soft light. Scale down the halftone a bit from the top and bottom (ctrl+t) and then add a layer mask to the layer.
 cosmin
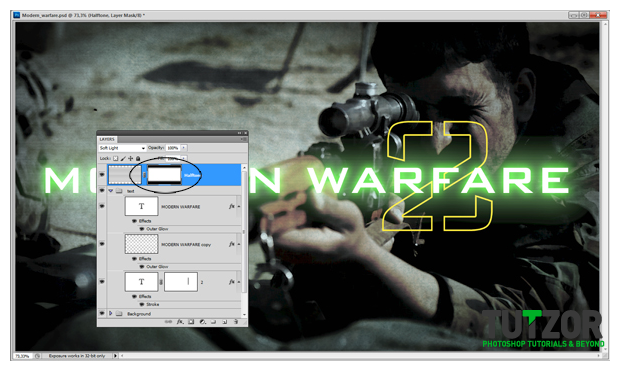
Using the “line gradient” with “Foreground to Transparent”, paint into the mask like I did, on top and bottom.
 cosmin
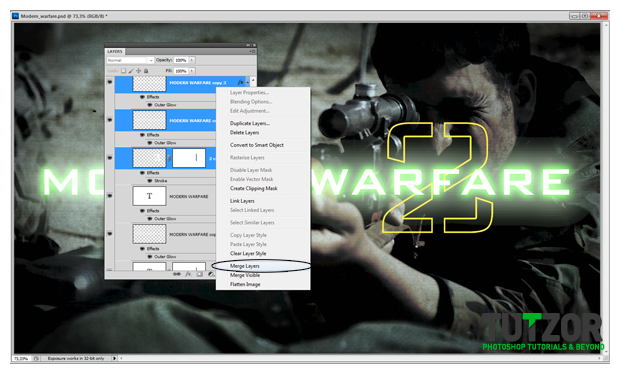
Lets go back to the text group. Duplicate all the layers there, rasterize and then Merge them (Right click > merge layers) and move the new layer under the text group (on top of the background)
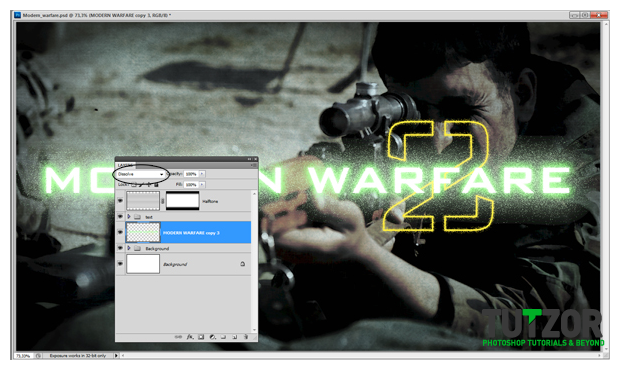
 cosmin
Now go to Filter > blur > Gaussian Blur and set the radius to 4, then set the layer blending mode to dissolve. You should get my result.
 cosmin
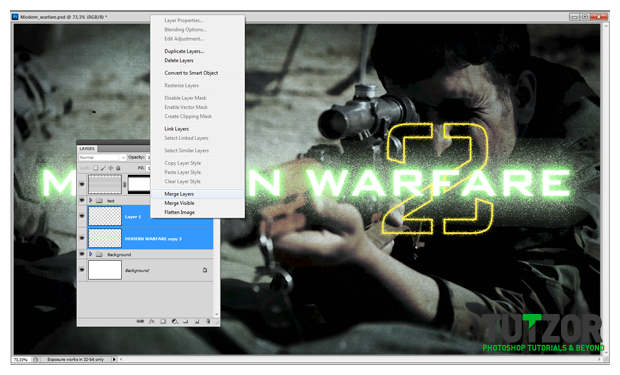
Create a new layer above the dissolved one and merge them together, this will set our layer back to normal but I will keep the look.
 cosmin
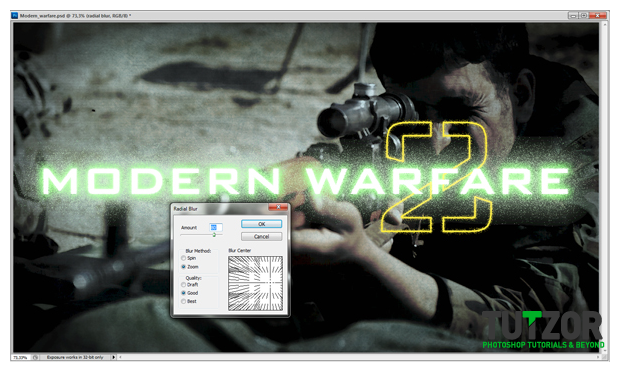
You can rename the layer now to “radial blur” and go to Filter > Blur > Radial blur and set the method to zoom the quality to good, the amount to 80 and try to move to move the blur center somewhere where the number is. Click ok and the reapply this (CTRL+F). Set the opacity of the layer to 50%
 cosmin
Lets try to make that green pulse line. Start by creating a new layer under the text group and name it Pulse line. Use the same color from the text outer glow # 16ee00 (you should place the line under the text in middle like I did). It’s ok if your line has different sizes.
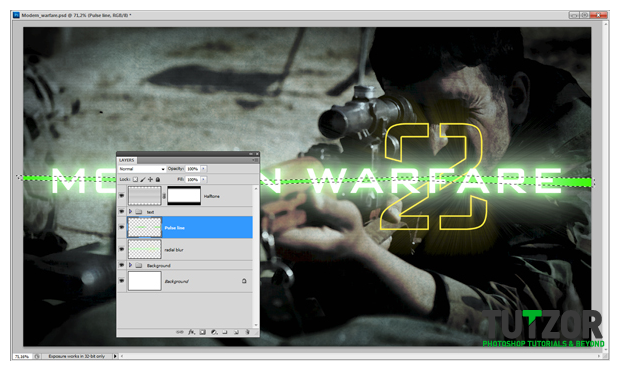 cosmin
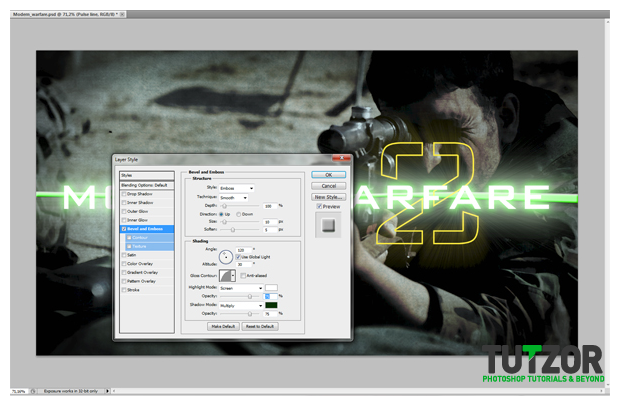
Double click the layer for styles and go to bevel and emboss. Set the style to emboss, technique smooth, size 10 and soften 5, gloss contour to half round and for the shadow mode use this color #011d00.
Copyright© 2012 Tutzor All Rights Reserved | Developed by: Iceous Design


