cosmin
Hi Everyone,
This time, I want to share with you guys a "Modern warfare" tutorials.
Here are the the following images I used:
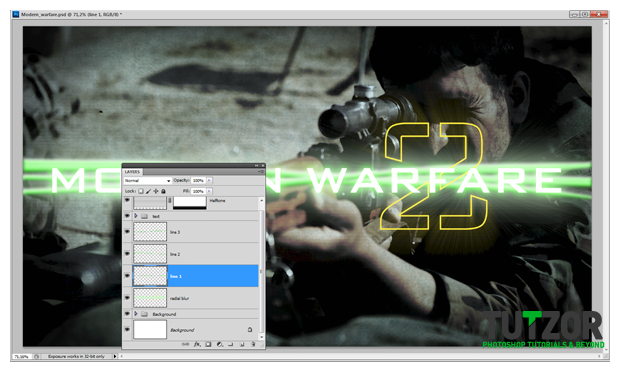
cosminMake a new layer above the line and merge them together (as you did for radial blur layer) to keep only the visible effect. Now duplicate the line layer twice and play a little with the transform tool, scale them, flip them, wrap them (be creative). After that add a radius of 4 Gaussian blur for each line (Filter > Blur > Gaussian blur) You can name the layers line 1, line 2, line 3.
 cosmin
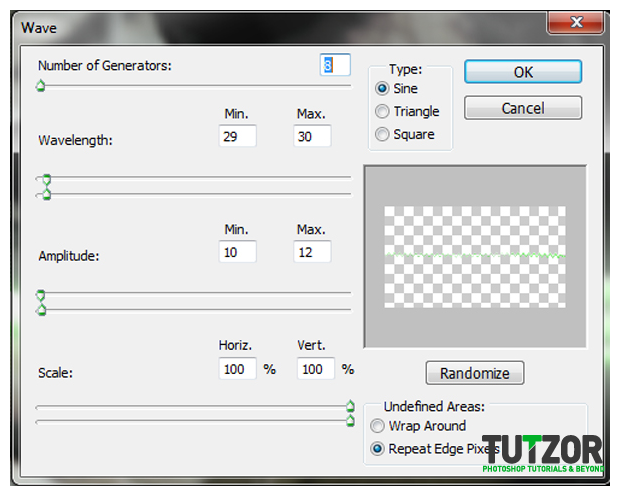
Click on the line 1 layer (the most straight one) and go to Filter > distort > Wave. This one will not be so distorted. Use my settings.
 cosmin
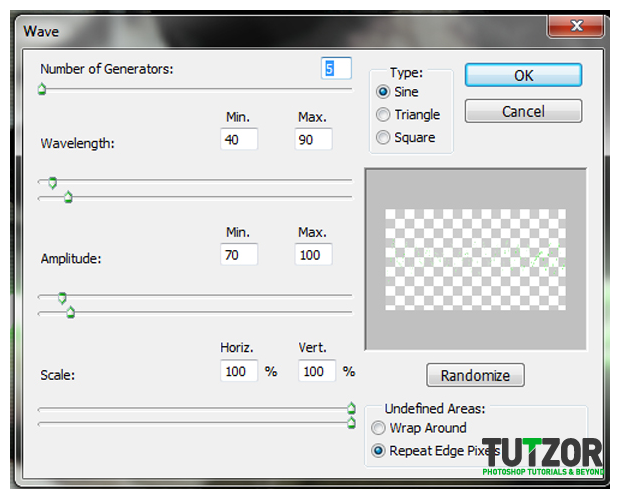
For the next line go again to wave and use this settings.
 cosmin
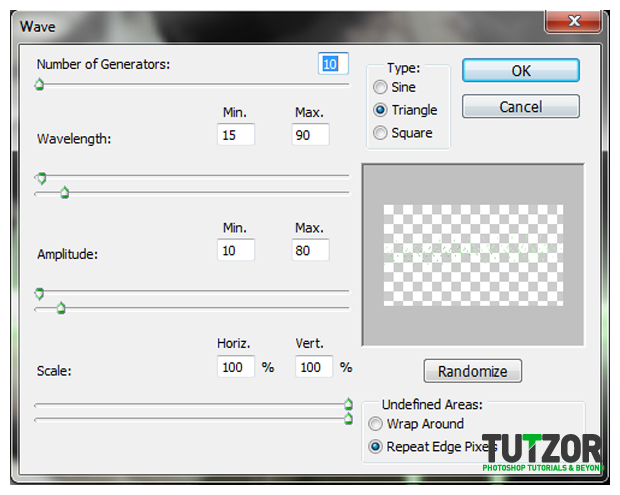
Use this settings for the last line
 cosmin
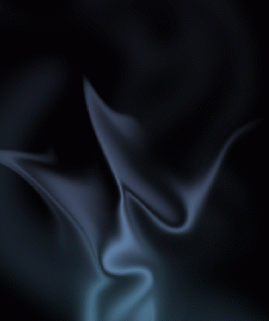
Now using the smudge tool “play” a bit with each line, just be creative. Take a look at what I achieved.
 cosmin
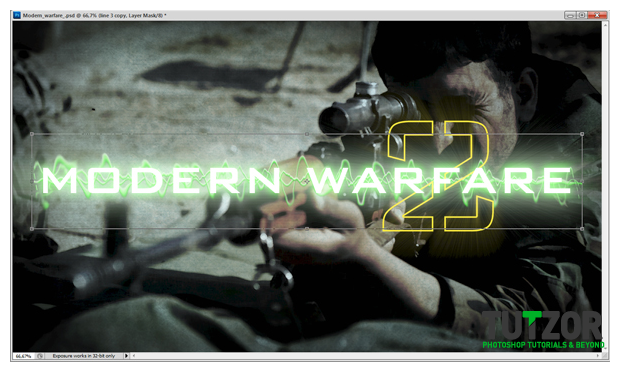
Merge the 3 layers and add a little more Gaussian blur, between 2 an 6 radius, is your choice. Then resize the layer as I did.
 cosmin
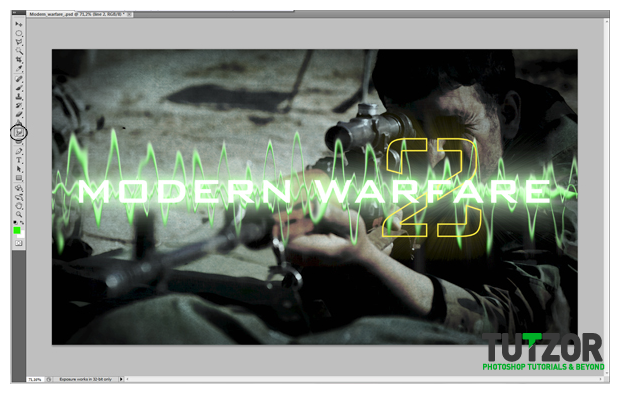
Duplicate the layer and set the blending mode to overlay and you can merge them again and set the opacity to 75%. Next add a layer mask and using linear gradient, foreground to transparent, paint into the mask left and right as I did.
 cosmin
Make a new layer on top of the other ones and fill it with black. Set the blending mode to soft light and the opacity to 90%, you should get something like I did.
 cosmin
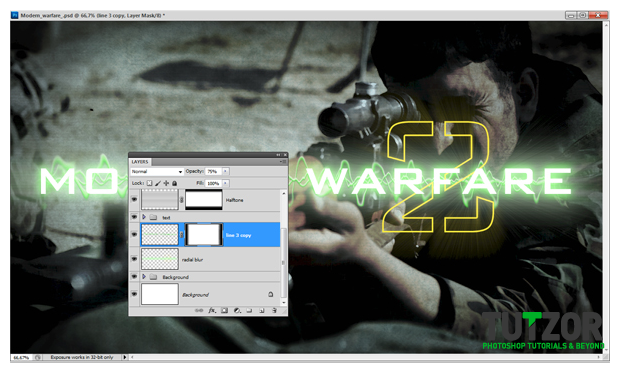
We’re reaching the end of the tutorial. Paste into the document the “special texture” I created for this tutorial (be sure the layers is on top). Set the new layer blending to Color burn and the opacity to 80%.
 cosmin
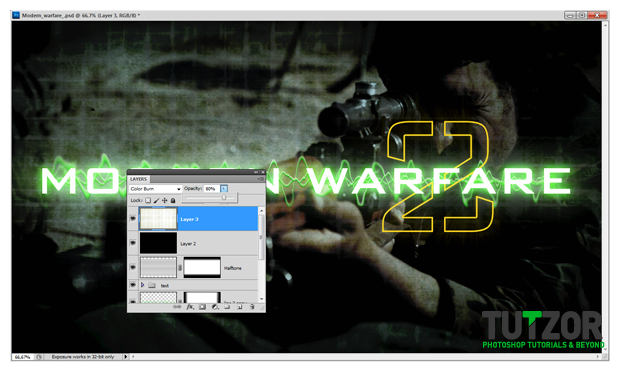
I think the background really needs a final touch. Go to the background group and duplicate the layers with the soldier then merge them.
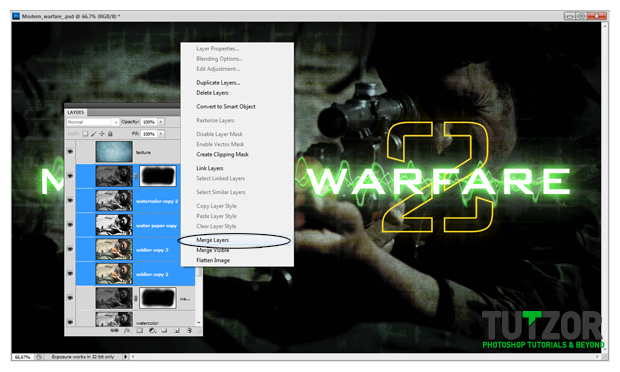 cosmin
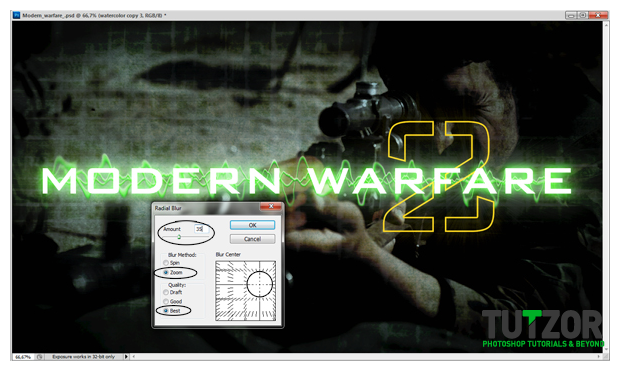
Go to Filter > Blur > Radial blur and use my settings. Amount 35% Blur method zoom, quality best and try to set the blur center to the soldier’s eyes.
 cosmin
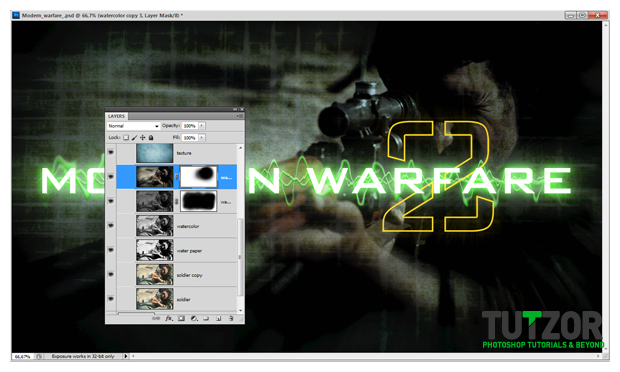
The final step is to add a layer mask to the layer we just blurred. So click add mask layer and try to paint like I did, so the eyes will be sharp. Use a soft rounded brush with different sizes and opacity to achieve a very faded blur.
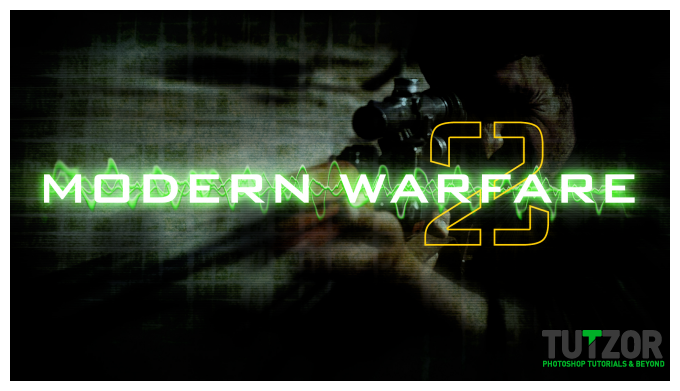
That’s all, you are free to explore some more. I hope this tutorial was clear enough for you.
Copyright© 2012 Tutzor All Rights Reserved | Developed by: Iceous Design