Designing Loox Pocket PC - PART 1
 Cpotorac
Member since:
Cpotorac
Member since:
Aug 2010
I have prepared for you a nice tutorial that will show you guys how to create an interesting Pocket PC using only Photoshop.
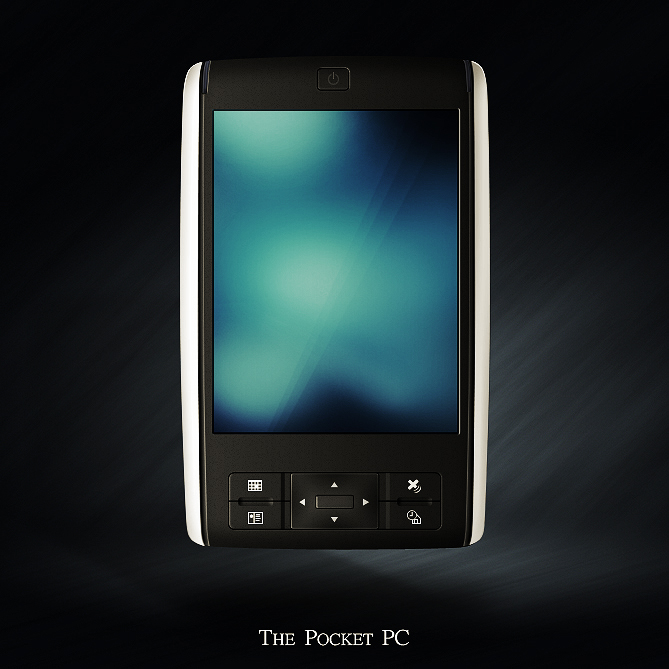
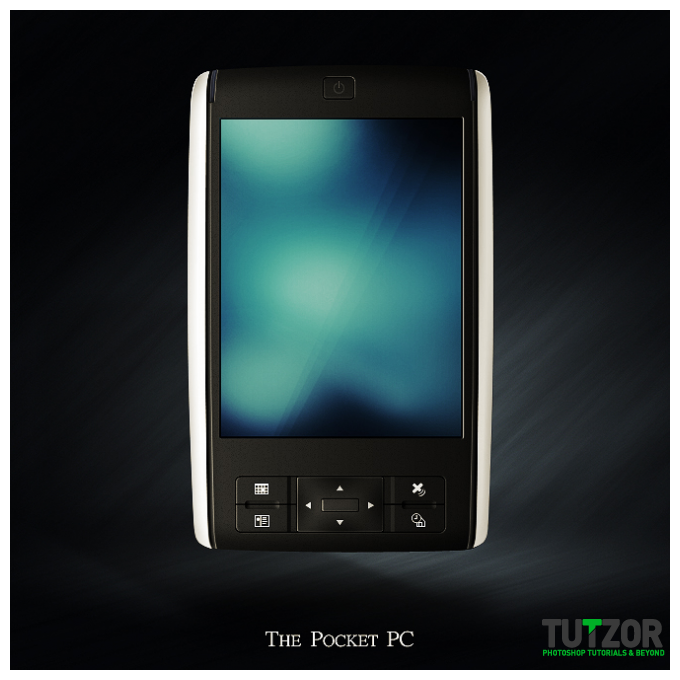
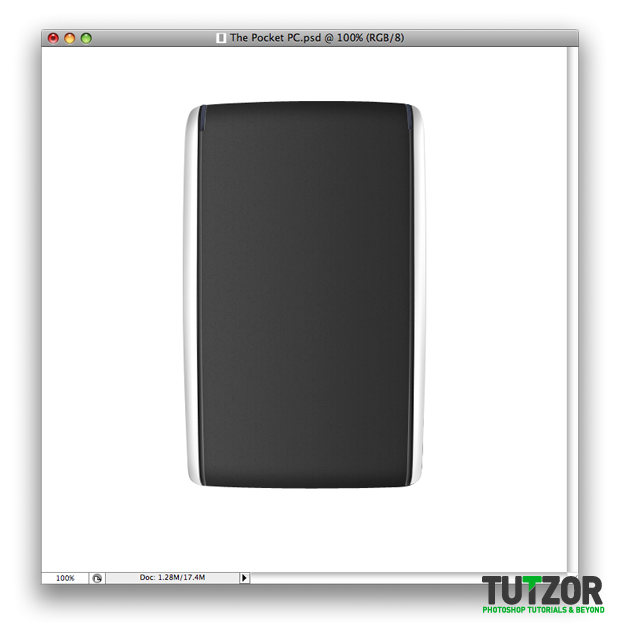
Final Image
Cpotorac
Member since:
Aug 2010
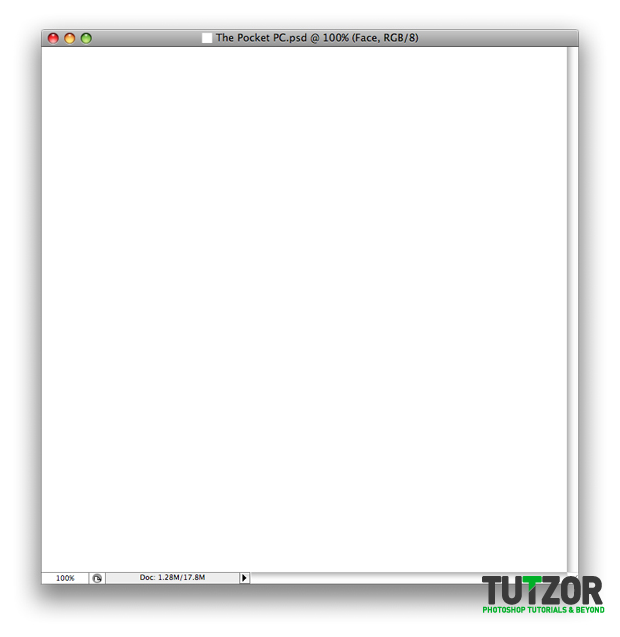
Start with a new white document. Mine is 669×669.
Cpotorac
Member since:
Aug 2010
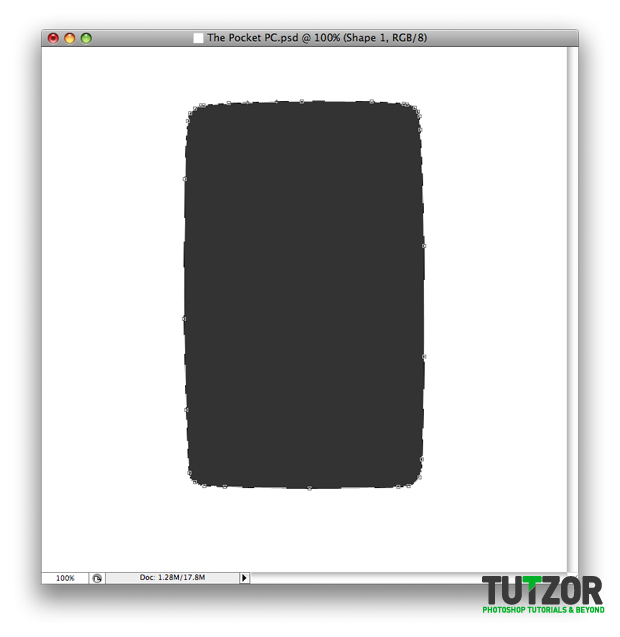
Using the Pen Tool draw a shape as I did. Also the color I used is: #303030. The shape will automatically create a new layer. Name it Phone Base.
Cpotorac
Member since:
Aug 2010
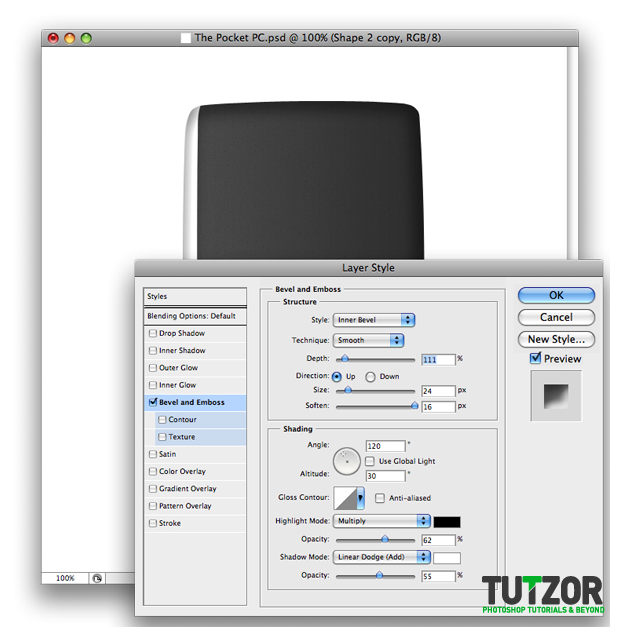
Double click on the layer to open up the Blending Options and use these settings:

Cpotorac
Member since:
Aug 2010
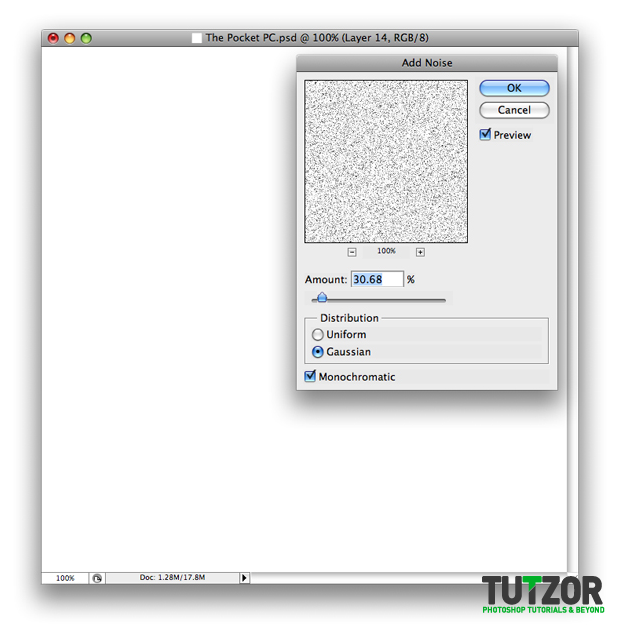
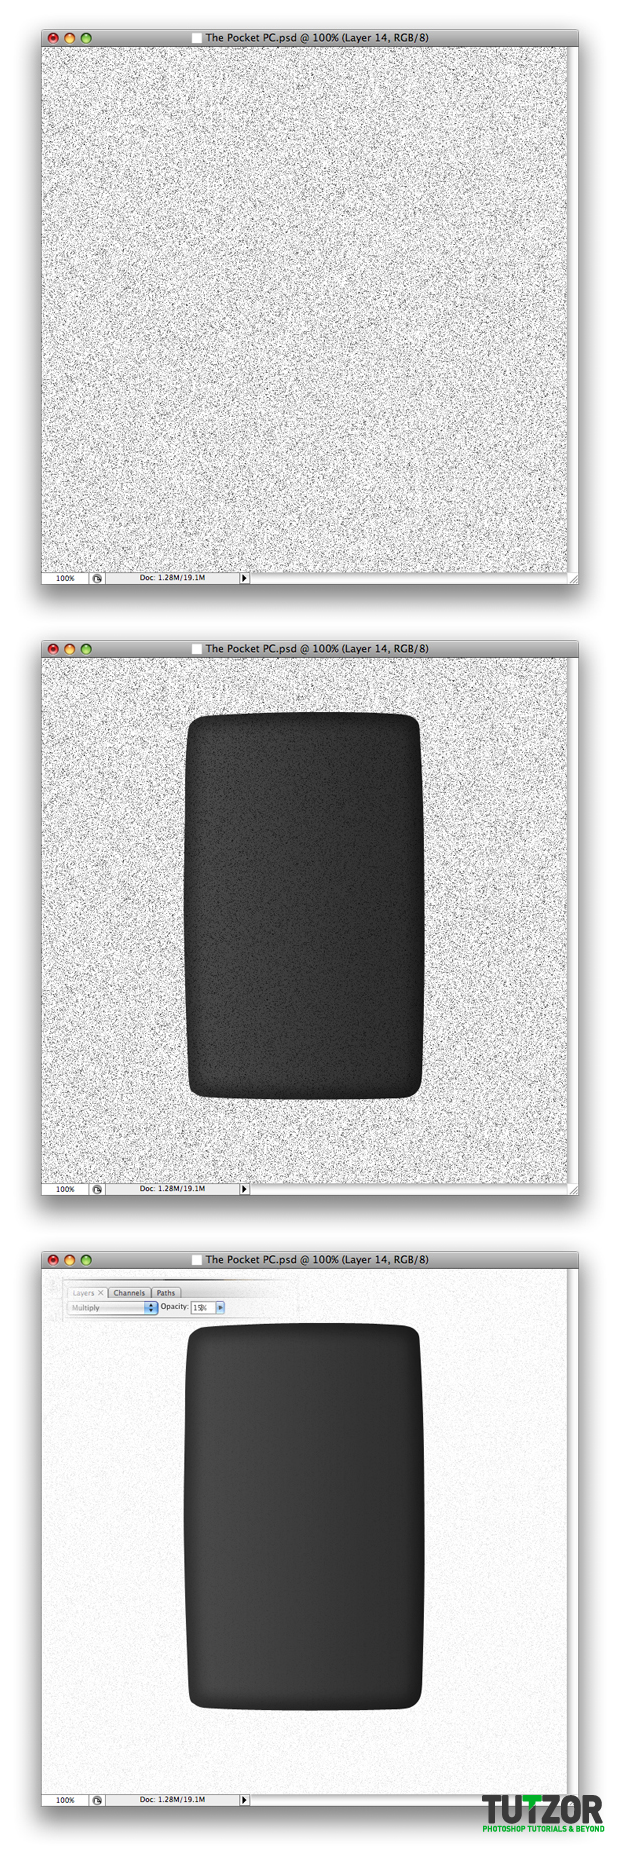
Create a new layer over the Phone base layer and name it noise. Fill it with White, than go to Filter – Noise – Add Noise. Use my settings than click ok.
Cpotorac
Member since:
Aug 2010
Set the Noise layer to Multiply and Opacity to 15%.
Cpotorac
Member since:
Aug 2010
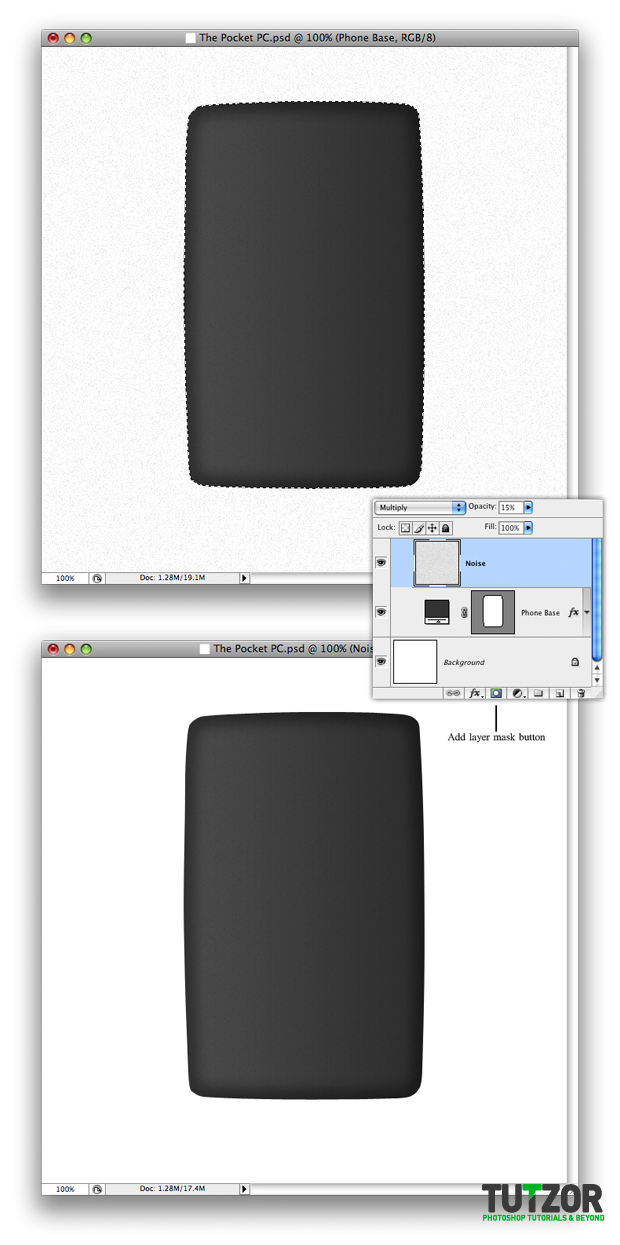
Next, we need to mask the Noise layer to cover only the base. To do this, Ctrl + Click on the Phone Base layer to make a selection, but in the same time you must make sure that you don’t select it and have the noise layer selected, than click on the Add layer mask button. This will hide the part of the Noise you don’t want.
Cpotorac
Member since:
Aug 2010
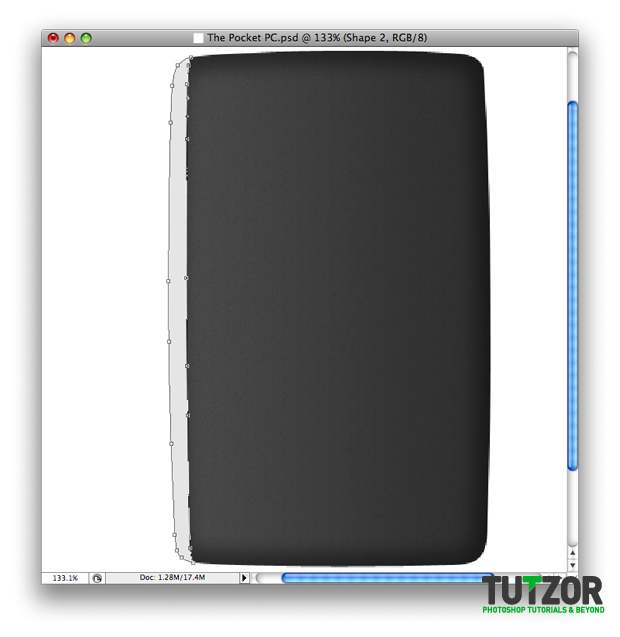
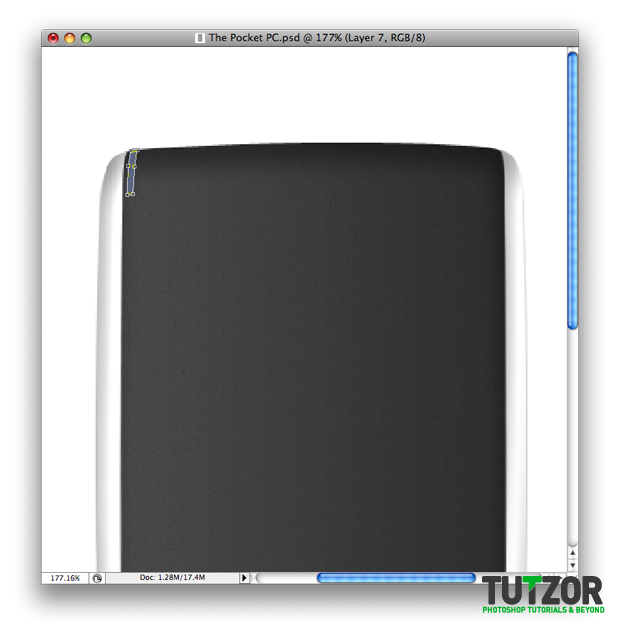
The base of the phone is finished. We will continue now with the sides of the Phone. Start with the left one.
Using the Pen Tool draw a shape as I did. Again this will automatically create a layer. Name it Left side. Also use this color: #e6e6e6.
Cpotorac
Member since:
Aug 2010
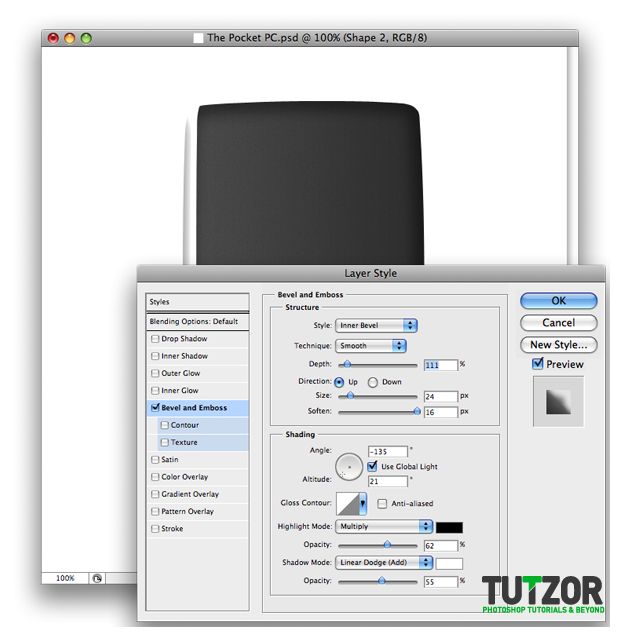
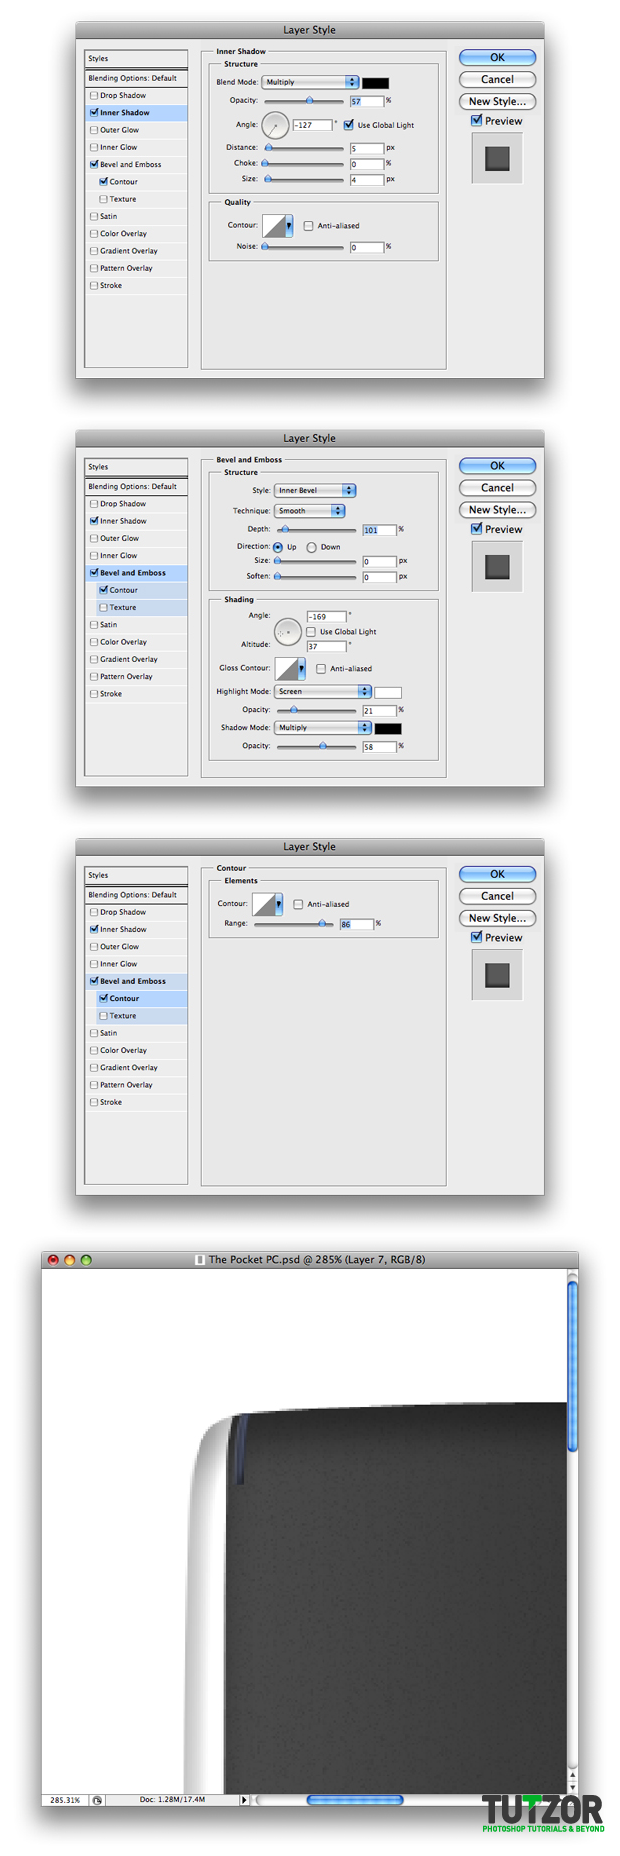
Double click on the Left Side layer to enter the Blending Options and use my settings.
Cpotorac
Member since:
Aug 2010
Duplicate the Left Side layer and place it above the first one. For the Blending Options use these settings:
Cpotorac
Member since:
Aug 2010
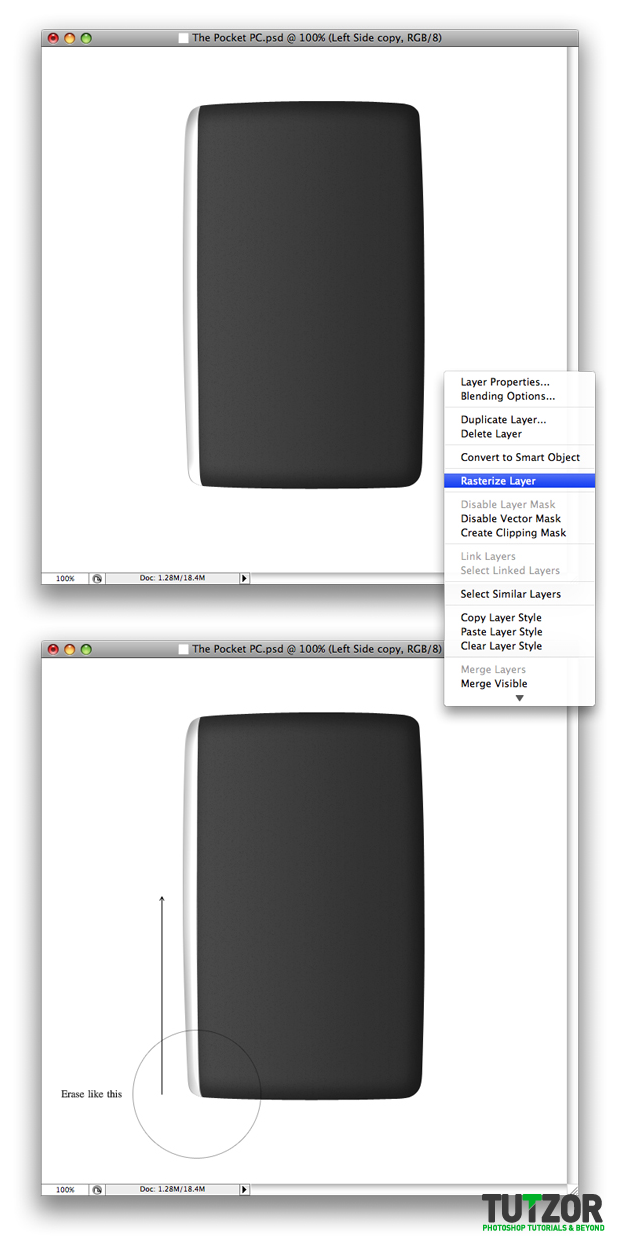
What you need to do now is to Right + Click on the Left Side Copy layer and select Resterize Layer. Than simply erase a half of the shape starting from the bottom. Also you need to make sure that your brush is set to 0% Hardness to make a smooth transaction between the first shape and this one.
Cpotorac
Member since:
Aug 2010
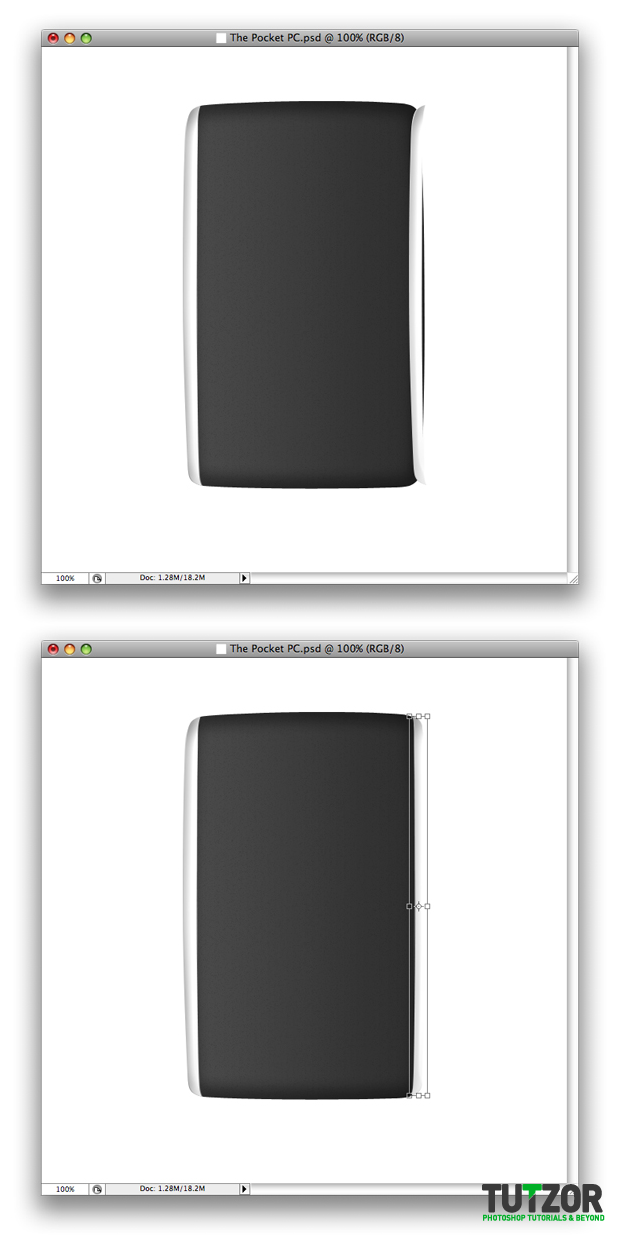
The next step is to duplicate those 2 layers and name them as the others Right Side and Right Side copy. Also move them in the right side of the phone and transform them in place.
Cpotorac
Member since:
Aug 2010
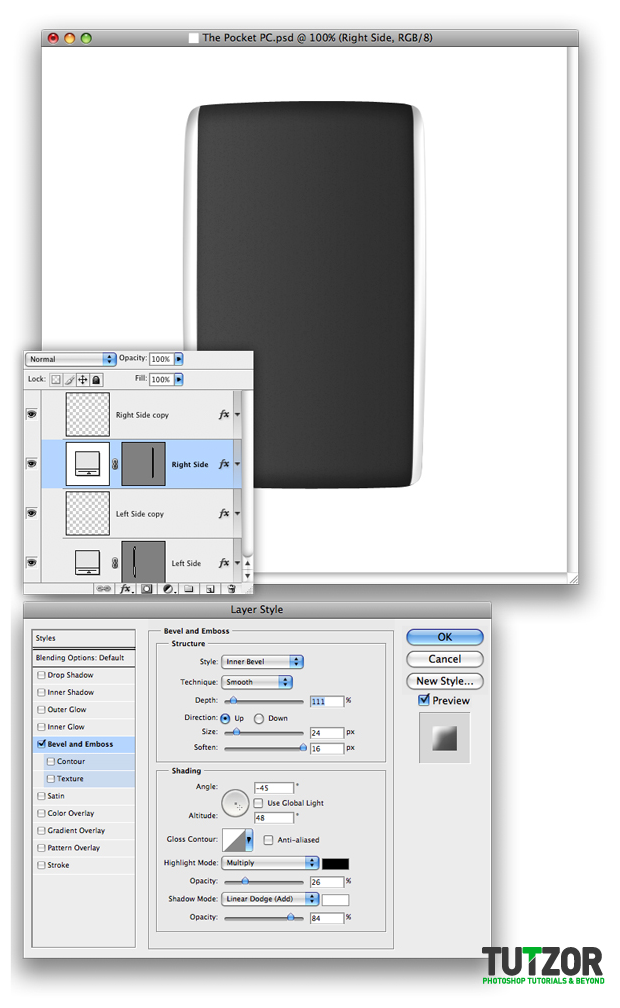
Now you need to change some settings for the Right Side. Double click on the layer to enter the Blending Options and use these settings:
Cpotorac
Member since:
Aug 2010
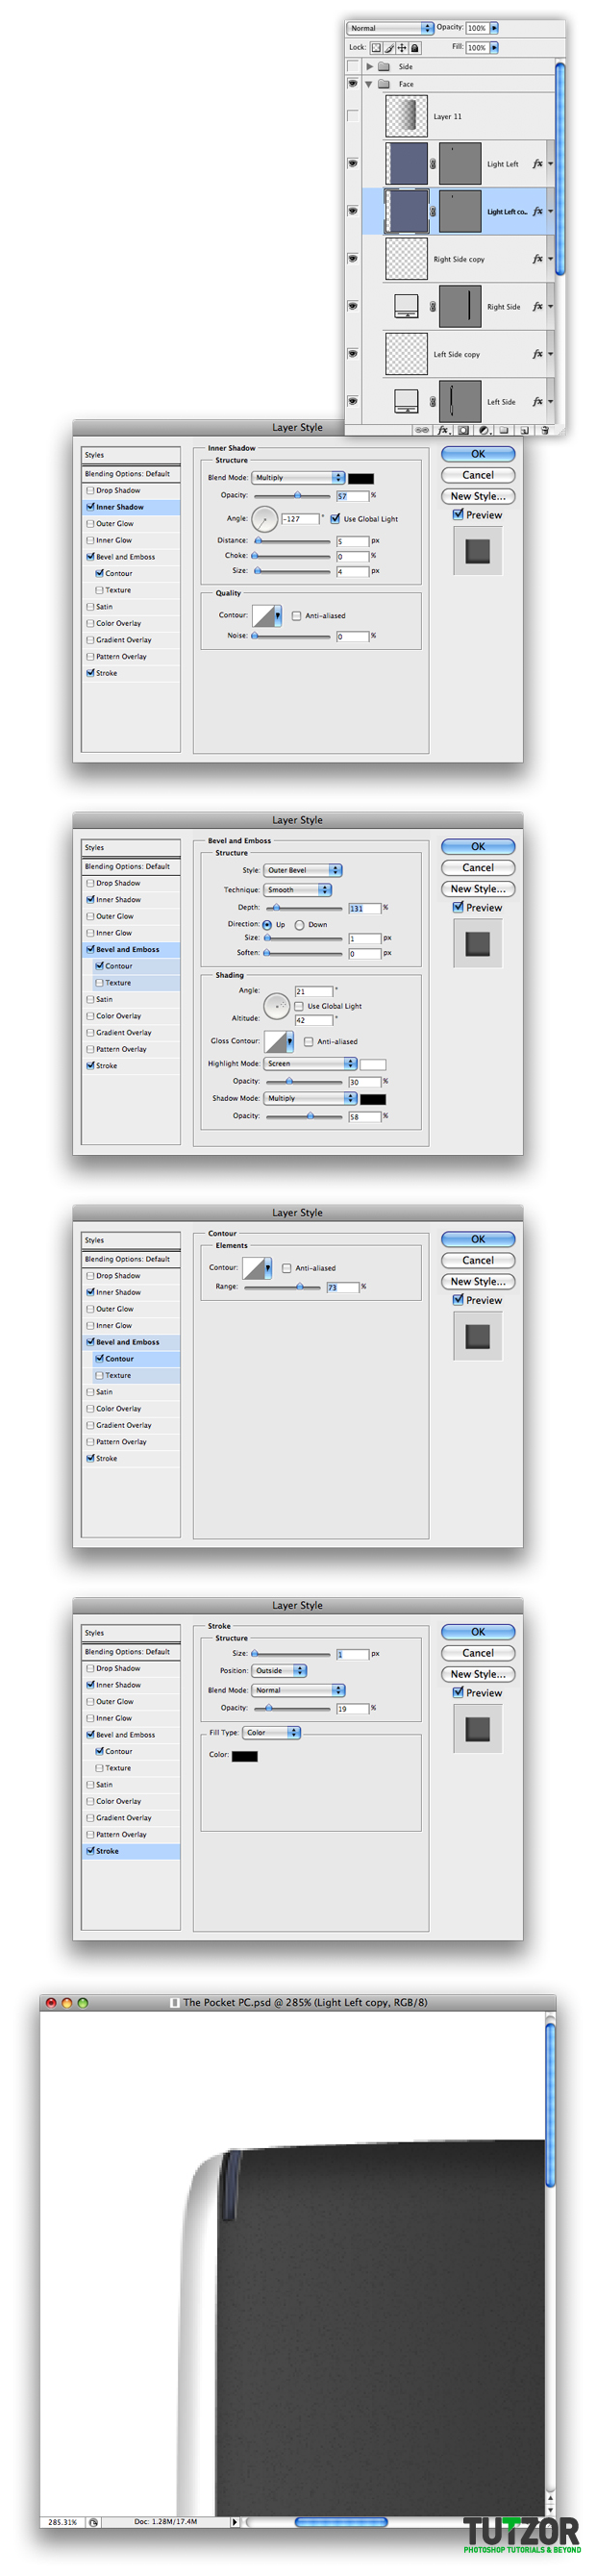
Now I will make some details. Zoom on the top of the phone. Using the Pen Tool, draw a small shape like I did and use this color: #5a6584. Also name it Left Light.
Cpotorac
Member since:
Aug 2010
Double click on the Left Light layer and this will bring the Blending options up. Use my settings:
Cpotorac
Member since:
Aug 2010
Now duplicate this layer and move it lower than the first one. It should be named Left Light copy. Also you need to change the Blending Options. Use my settings again:
Cpotorac
Member since:
Aug 2010
Next duplicate these 2 layers and name them Right Light and Right Light copy as they should be called. Than move them to they’re side and also transform them as they should be using the Transform Tool.
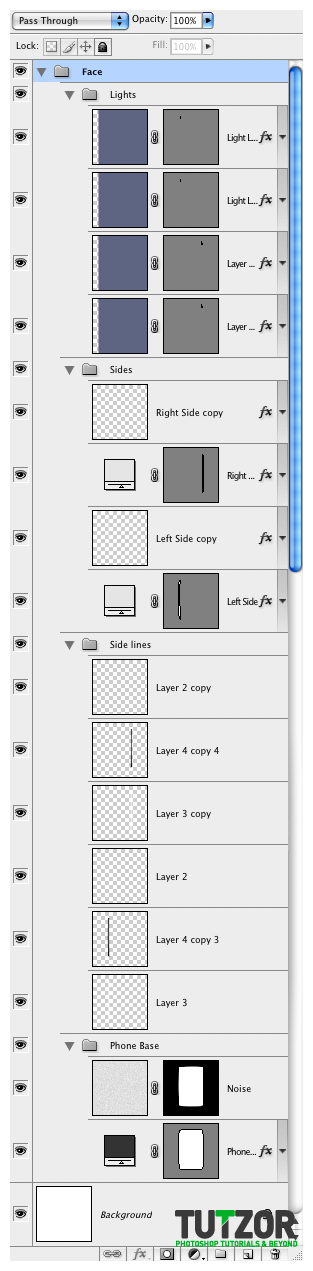
Also you can make a folder and call it Lights and move these 4 layers in there to keep thinks organized.

Cpotorac
Member since:
Aug 2010
Make a new Folder and move it lower than the Lights folder. Name it Side Lines.
In the next image you will see how I have arranged my layers.
Cpotorac
Member since:
Aug 2010
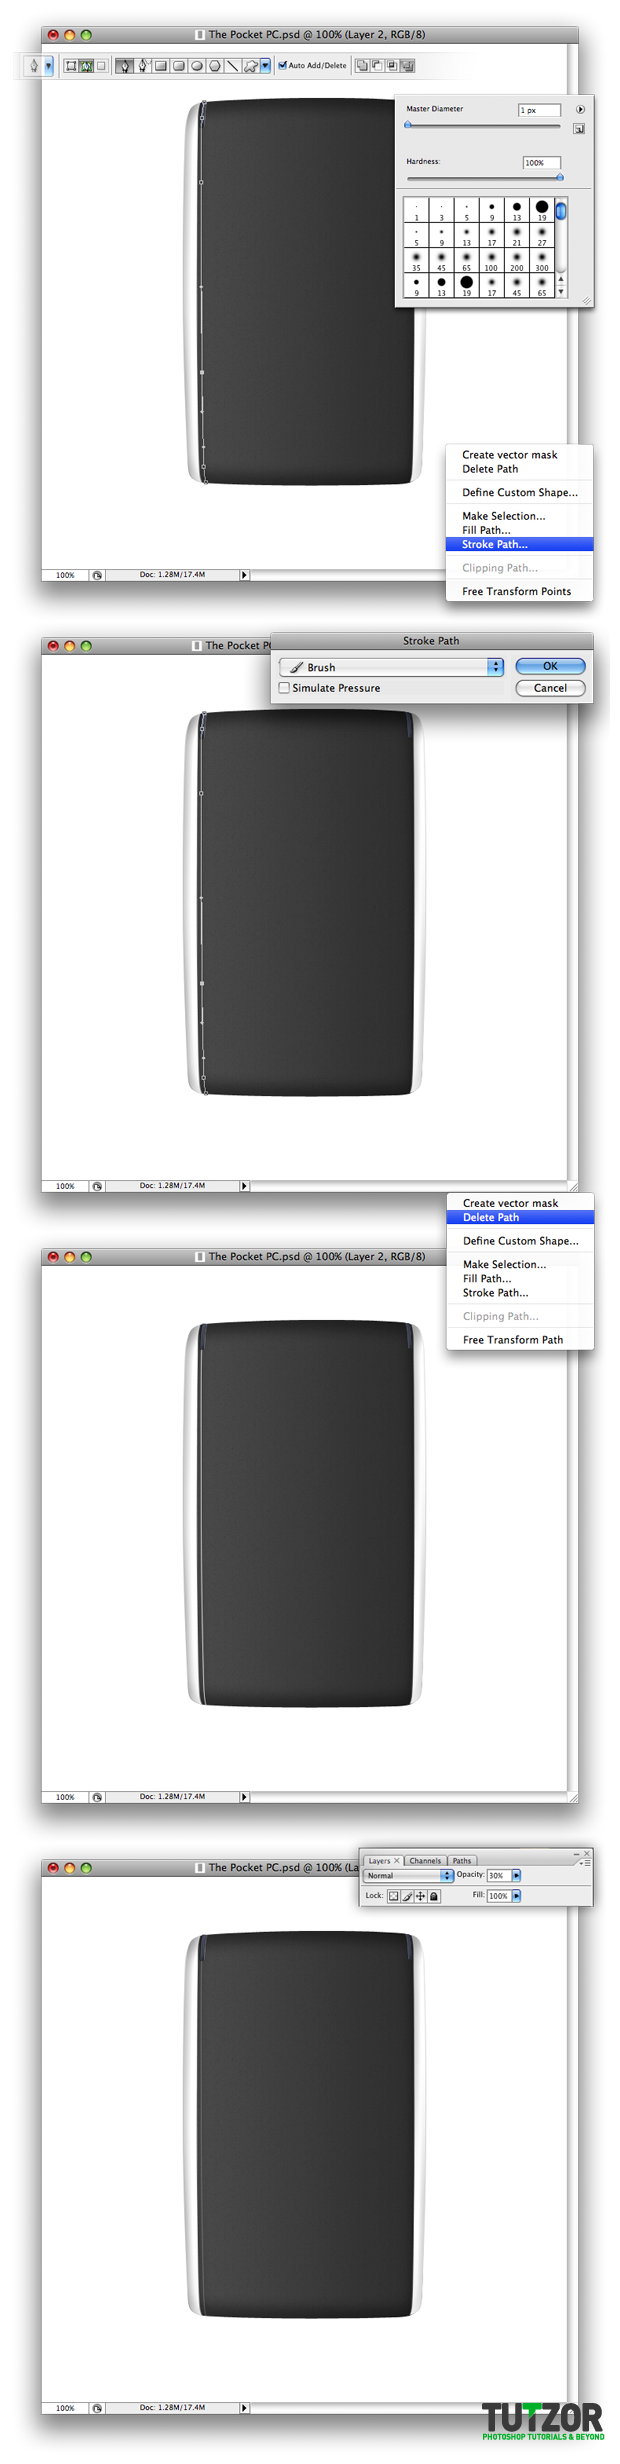
Create a new blank layer. Using the Pen Tool make a line like I did. Also before you make the line you need to make sure that you have the Path button selected.
Make sure that the foreground is set to white and the brush to 100% Hardness and 1px Diameter.
Now make sure you have the Pen Tool selected. Right click anywhere on the screen and select Stroke Path. A screen will poop up, don’t select the Simulate Pen Pressure and click ok.
In the end delete the path and set the strip line to 30% Opacity.
Cpotorac
Member since:
Aug 2010
Make a new layer and name it shadow. Ctrl + Click the Left Side layer to make a selection. Fill the layer you just created with black and move it 5px right.
Cpotorac
Member since:
Aug 2010
Have the shadow layer selected and go to Filter – Blur Gaussian Blur and use a 4.6 radius.

Cpotorac
Member since:
Aug 2010
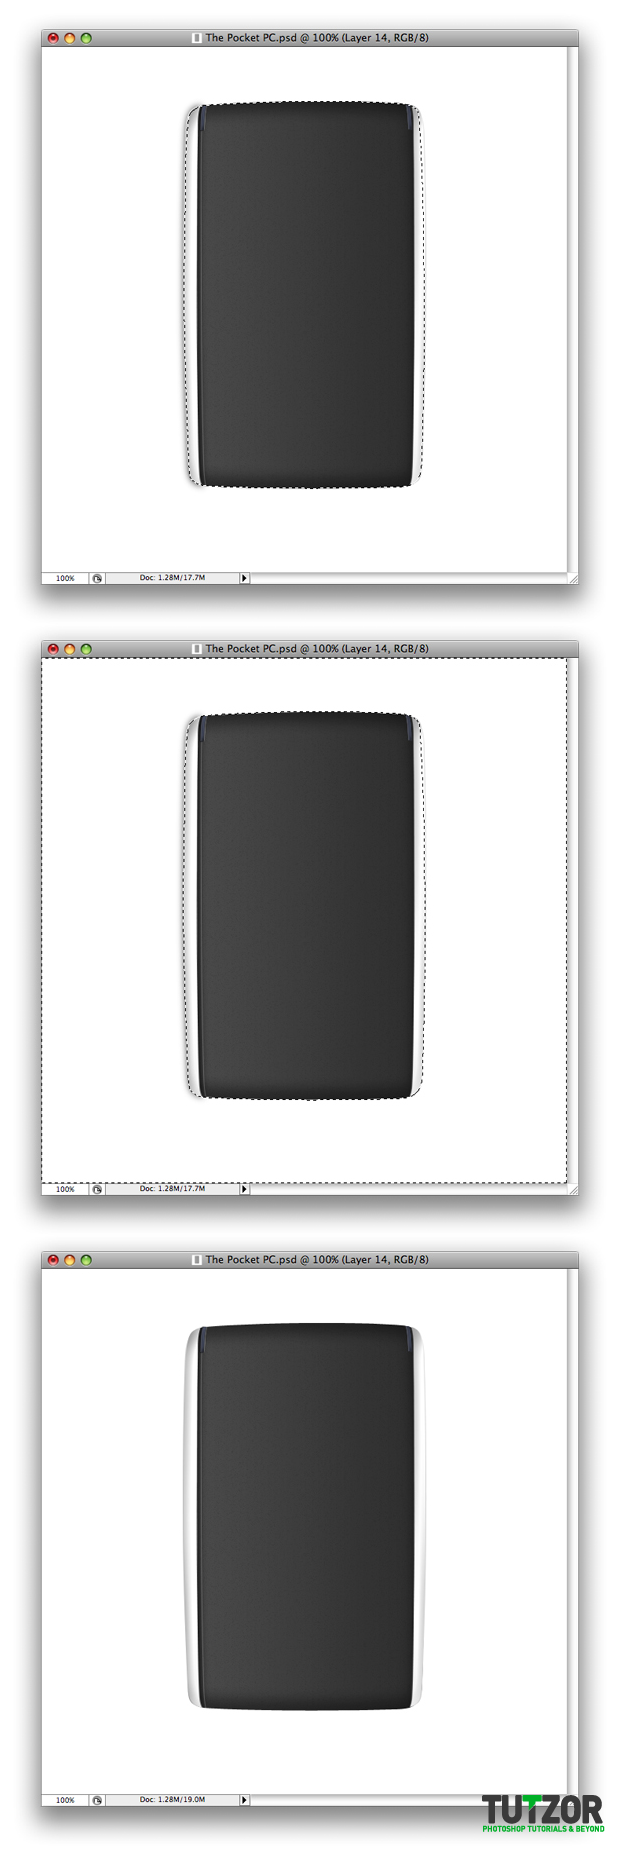
Now you need to make a selection of the base of the phone but still have the shadow layer selected. Than invert the selection by clicking Ctrl + Shift + I than simply erase some of the shadow by clicking backspace.
Cpotorac
Member since:
Aug 2010
Next make a selection as I did using the Pen Tool than Press Ctrl + Enter to make a selection.

Cpotorac
Member since:
Aug 2010
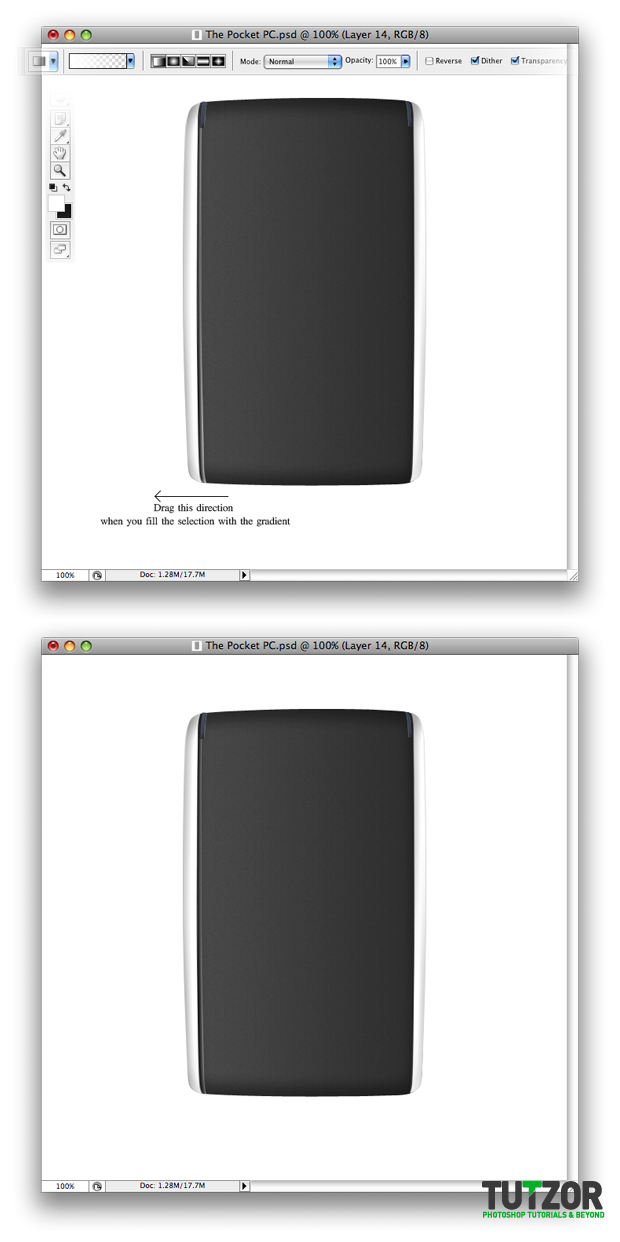
Make a new layer. Using the Gradient Tool you need to fill this selection.
Before you start filling you need to have the foreground White and the Gradient Option set to Linear Gradient and Foreground to Transparent.
Than fill the selection as I did and set the Opacity to 30%.
Cpotorac
Member since:
Aug 2010
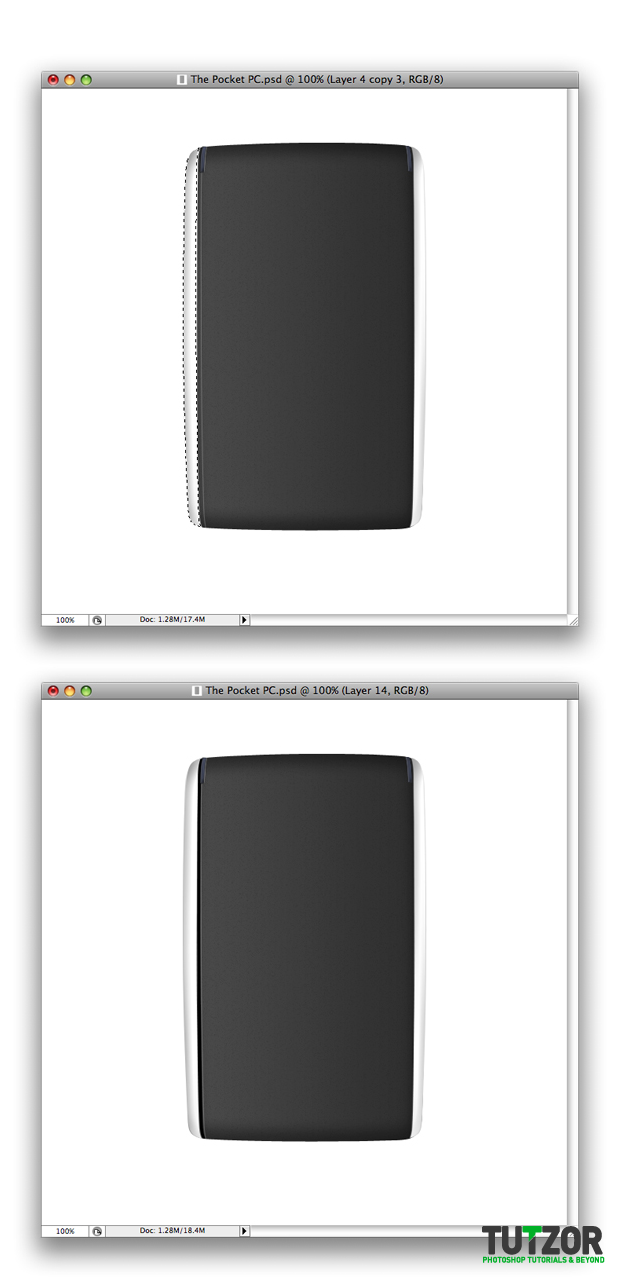
Now simply duplicate these 3 layers and move them to the right side and also transform them by holding Shift and Alt keys to make a perfect transformation. It should look like this:
Cpotorac
Member since:
Aug 2010
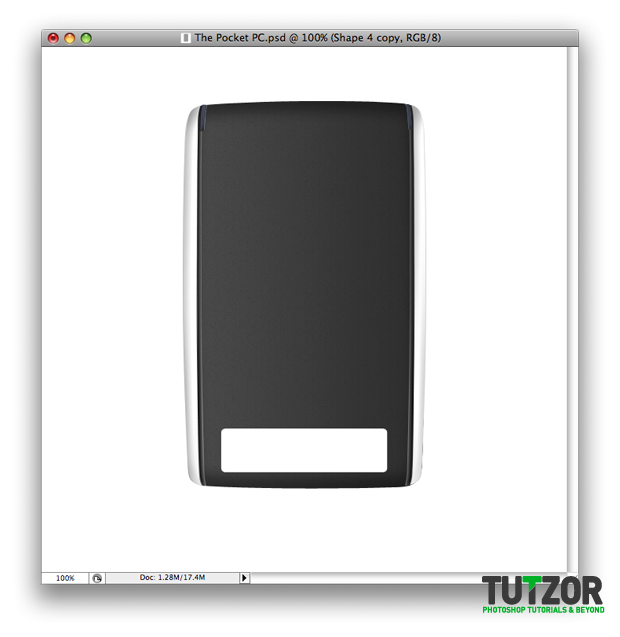
Make a new folder and name it Buttons. This will stand for the lower button set.
Make a shape as I did using the Rounded Rectangle Tool. It does not matter the color you use, as we will hide it.
40款高质量的手机PSD源文件下载 - 大杂烩
Member since:
Jun 2010
[...] Loox Pocket PC [...]
40+ Photoshop Tutorials for Creating Gadget Designs | Dzinebook blog | Inspirational design resource for Web design - development - freelancer tips
Member since:
Jun 2010
[...] Designing Loox Pocket PC [...]
34 Realistic Gadget Design Tutorials - Wsblogz.com – Web design magazine
Member since:
Jun 2010
[...] Designing Loox Pocket PC [...]
27 Best Photoshop Gadget Design Tutorials to Design Realistic Gadgets | DzineBook
Member since:
Jun 2010
[...] 2. Designing loox Pocket PC [...]
pratham
Member since:
May 2010
excellent photoshop work
http://www.scrapsforever.com
Source – 40 Detailed and High Quality Mobile Phone .psd Source Files | Software Source Update
Member since:
Apr 2010
[...] Loox Pocket PC [...]
40+ Excellent 3D Effects Photoshop Tutorials
Member since:
Apr 2010
[...] Designing Loox Pocket PC [...]
30+ Realistic Gadget Design Photoshop Tutorials
Member since:
Apr 2010
[...] Loox Pocket PC Here is a tutorial to create a Loox Pocket PC in photoshop and boost your PhotoShop creativity. [...]
60 Excellent Gadget Photoshop and Illustrator Tutorials | iDESIGN
Member since:
Mar 2010
[...] Designing a Loox Pocket PC (Photoshop) [...]
دانلود ۴۰ فایل لایه باز فتوشاپ (PSD) موبایل با کیفیت بالا » اینترنت یکجا دانلود کنید
Member since:
Mar 2010
[...] Loox Pocket PC [...]
48 Extremely Helpful Vector Tutorials | Junkiee.Net
Member since:
Mar 2010
[...] Designing Loox Pocket PC [...]
syed
Member since:
Mar 2010
excellent.
great work.
thanks
40 Ayrıntılı ve Kaliteli Cep Telefonu PSD Dosyaları |
Member since:
Feb 2010
[...] Loox Pocket PC [...]
Tutorial Design Gadget (Peralatan Elektronik) Menggunakan Adobe Photoshop dan Illustrator — Malaysia Web Designer | Malaysia Web Developer | Kelantan Web Designer Baloot's Blog
Member since:
Feb 2010
[...] Designing a Loox Pocket PC (Photoshop) [...]
40 Detailed and High Quality Mobile Phone .psd Source Files | Free graphic design,Wordpress themes , Templates ,Scripts,Background,Wallpapers,Icons,Brush
Member since:
Feb 2010
[...] Loox Pocket PC [...]
Archivos PSD para quien diseña aplicaciones para móviles
Member since:
Feb 2010
[...] Loox Pocket PC [...]
40 Detailed and High Quality Mobile Phone .psd Source Files
Member since:
Feb 2010
[...] Loox Pocket PC [...]
40 Detailed and High Quality Mobile Phone .psd Source Files - Speckyboy Design Magazine
Member since:
Feb 2010
[...] Loox Pocket PC [...]
60 Excellent Gadget Photoshop and Illustrator Tutorials | Afif Fattouh - Web Specialist
Member since:
Feb 2010
[...] Designing a Loox Pocket PC (Photoshop) [...]
60 Excellent Gadget Photoshop and Illustrator Tutorials » IMvsMI blog
Member since:
Feb 2010
[...] Designing a Loox Pocket PC (Photoshop) [...]