

 cosmin
Hello,
Because Christmas is close, I tought you'll like to do your own Christmas cards this year. So I'll show you how to create a card front and back, ready for print.
Also please download this image
http://www.sxc.hu/browse.phtml?f=download&id=1321208
And by the way..
Merry Christmas and a Happy New year!
 cosmin
 cosmin
 cosmin
 cosmin
 cosmin
 cosmin
 cosmin
 cosmin
 cosmin
 cosmin
 cosmin
 cosmin
 cosmin
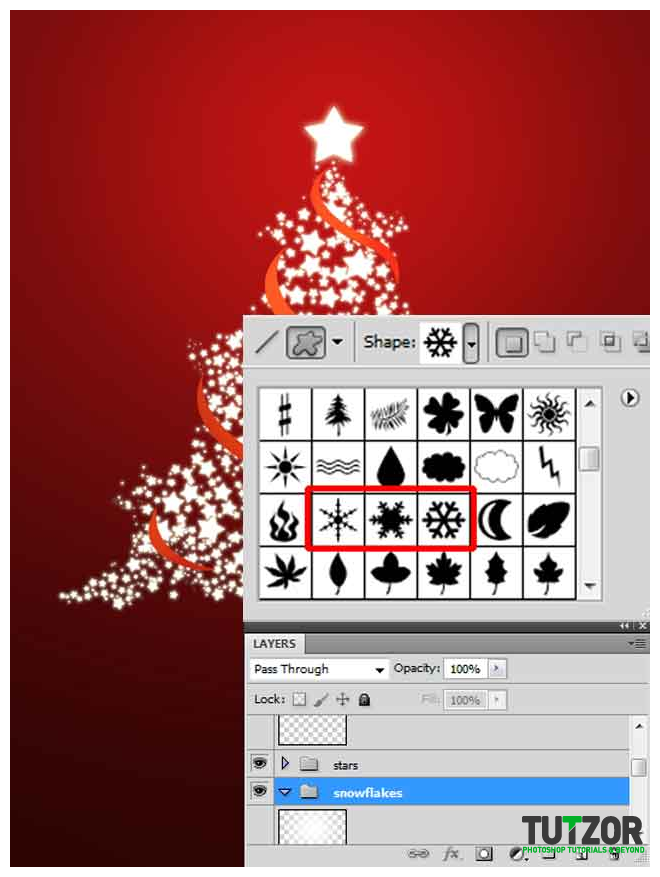 cosmin
 cosmin
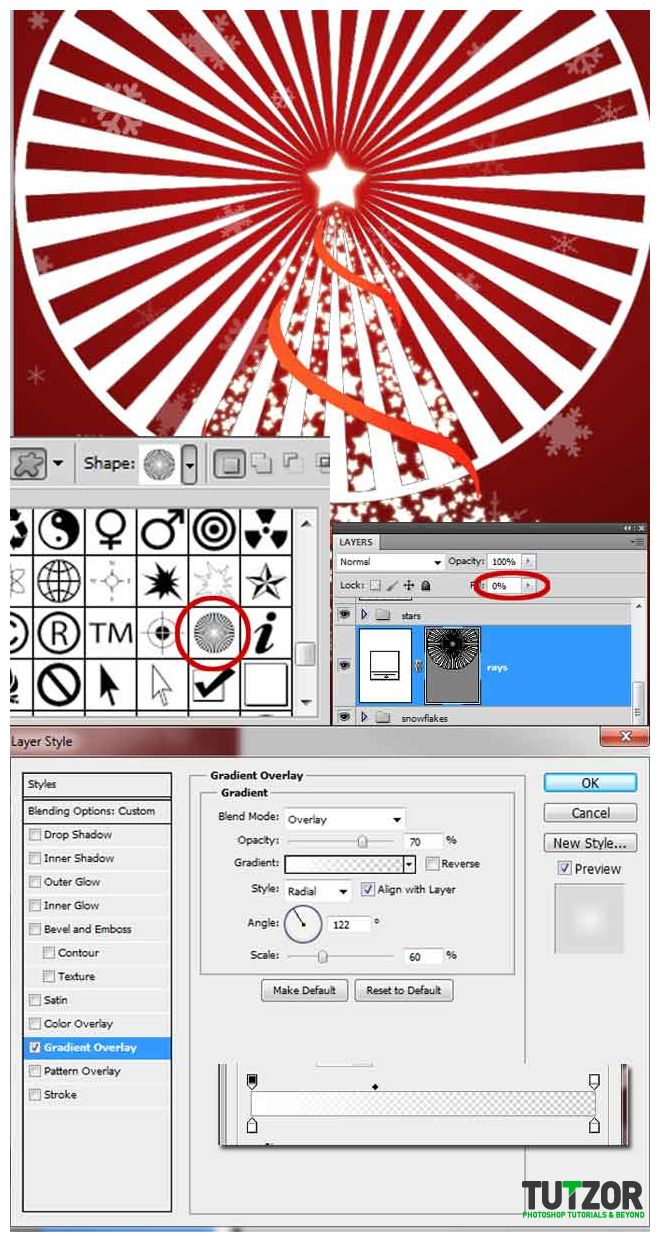 cosmin
 cosmin
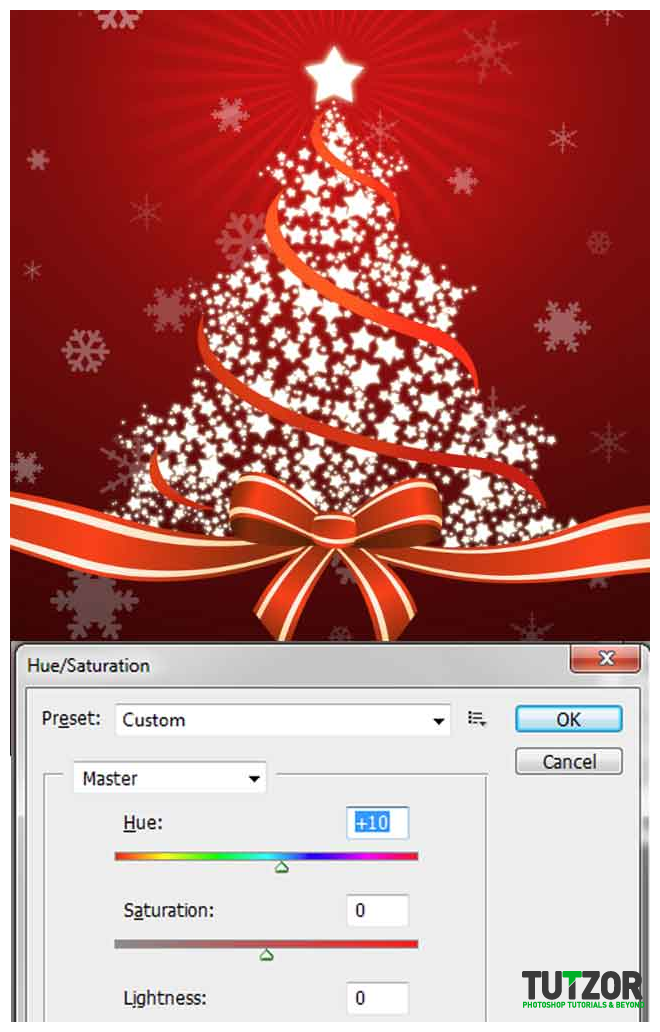 cosmin
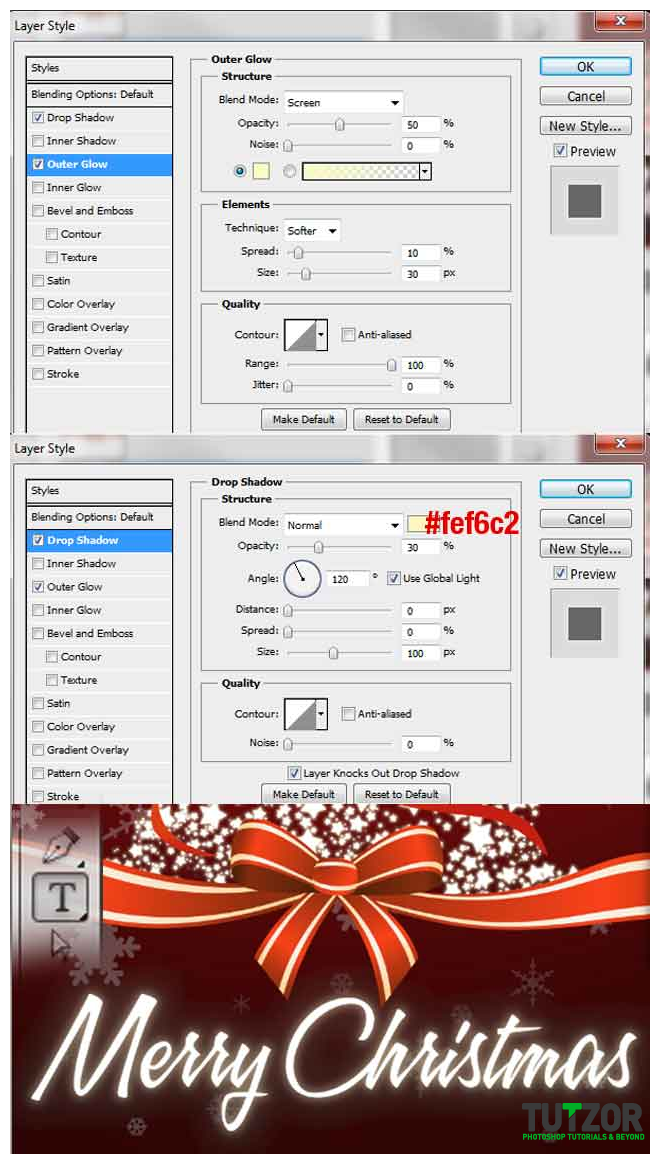 cosmin
 cosmin
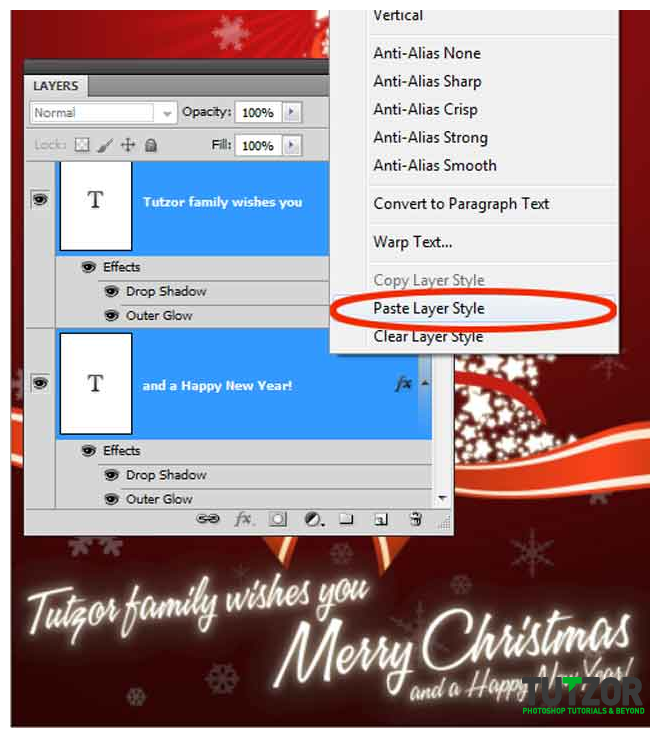 cosmin
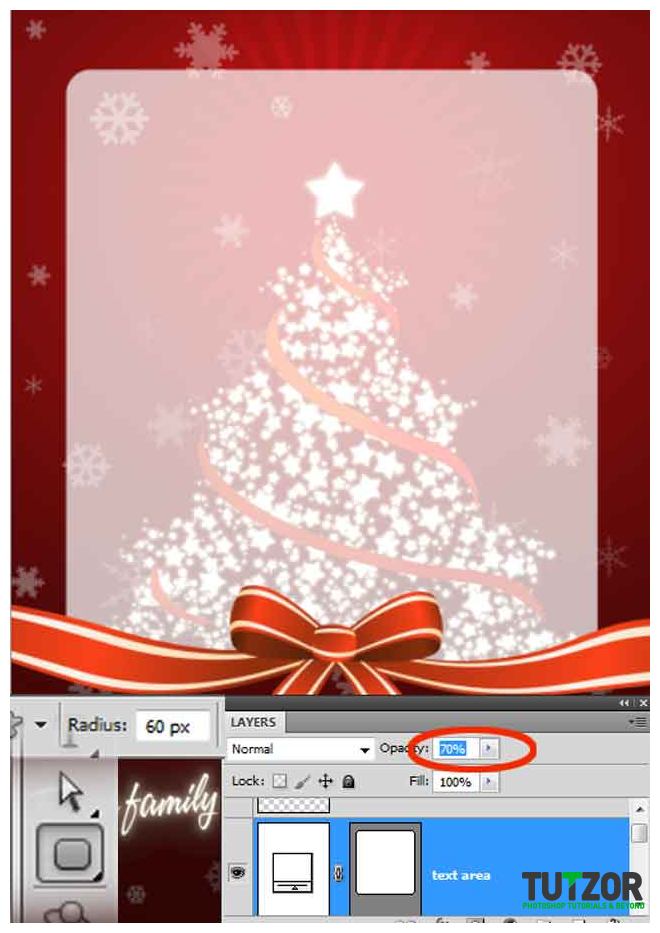 cosmin
Copyright© 2012 Tutzor All Rights Reserved | Developed by: Iceous Design


Comments
Re: How to create your own Christmas card, ready for print
What a cracking tutorial for this time of year! Really nice and simple for those that are unaccustomed to the tool mentioned here.
Lots of scope to develop your own ideas here.
Thanks for taking time to post. Really nice job.
Best wishes for Christmas and New year!
Nice tutorial
Nice tutorial, I like it ;)