

 Cpotorac
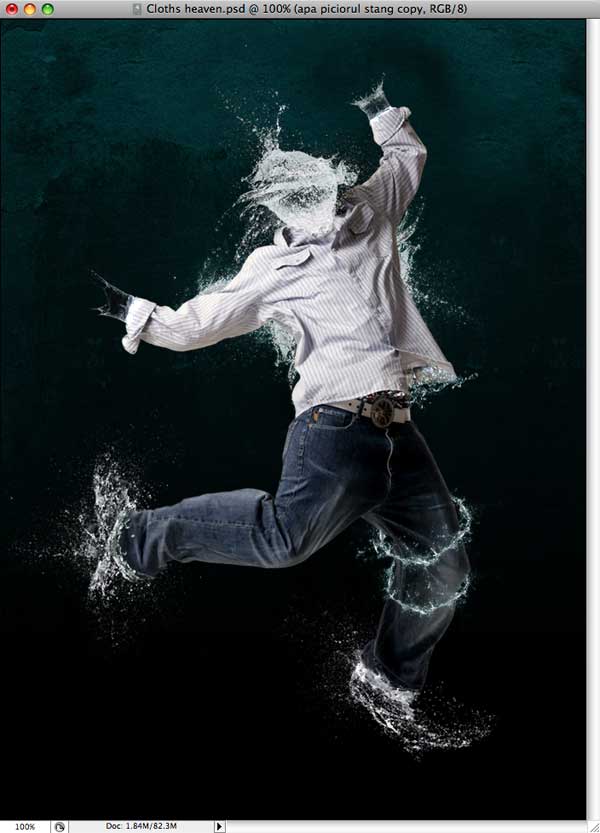
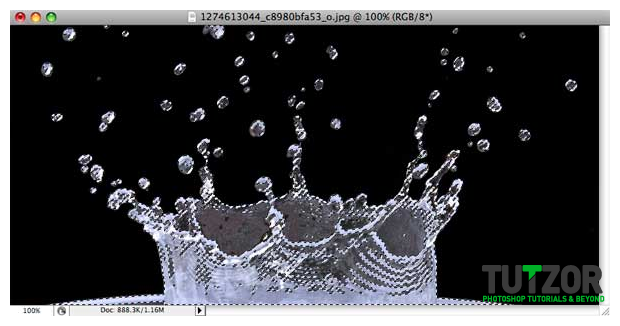
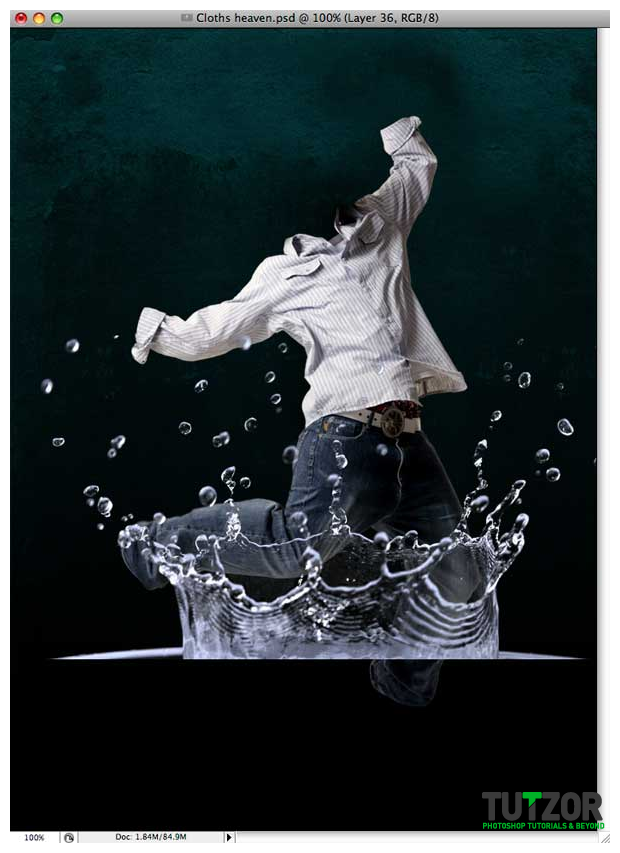
I have seen something really interesting on the net a few days that was made by Nik Ainley but I found the tutorial too small. So here is a more detailed one for those who think of using this great technique.
 Cpotorac
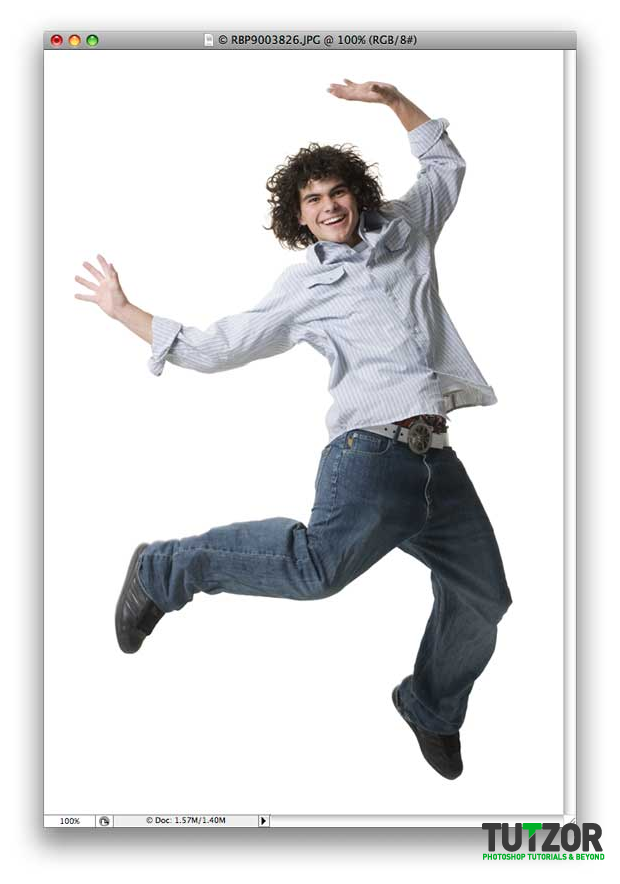 Cpotorac
 Cpotorac
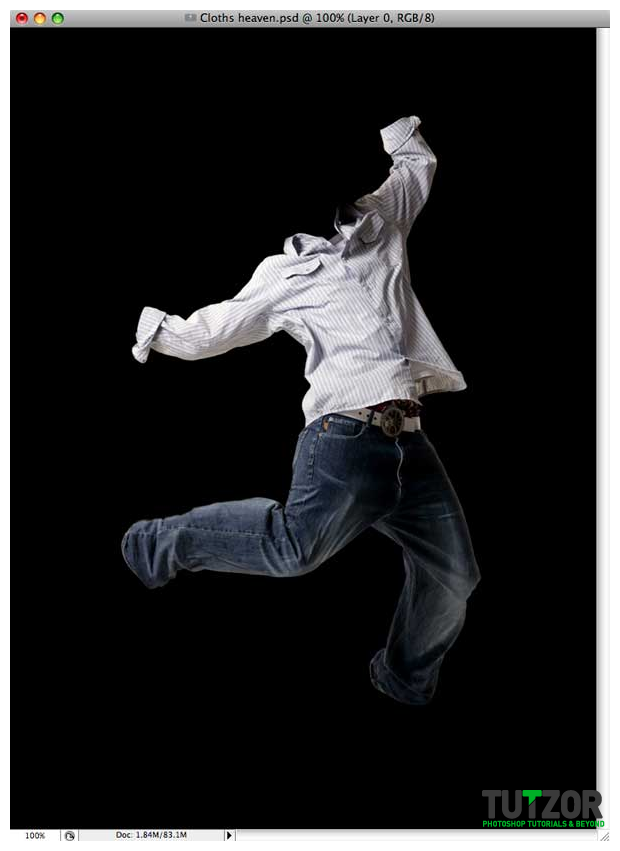 Cpotorac
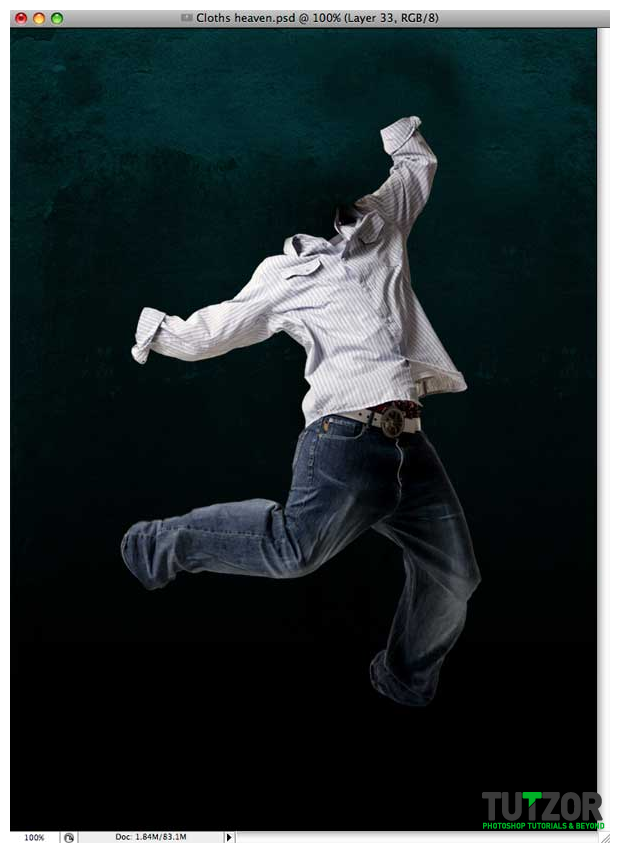 Cpotorac
 Cpotorac
 Cpotorac
 Cpotorac
 Cpotorac
 Cpotorac
 Cpotorac
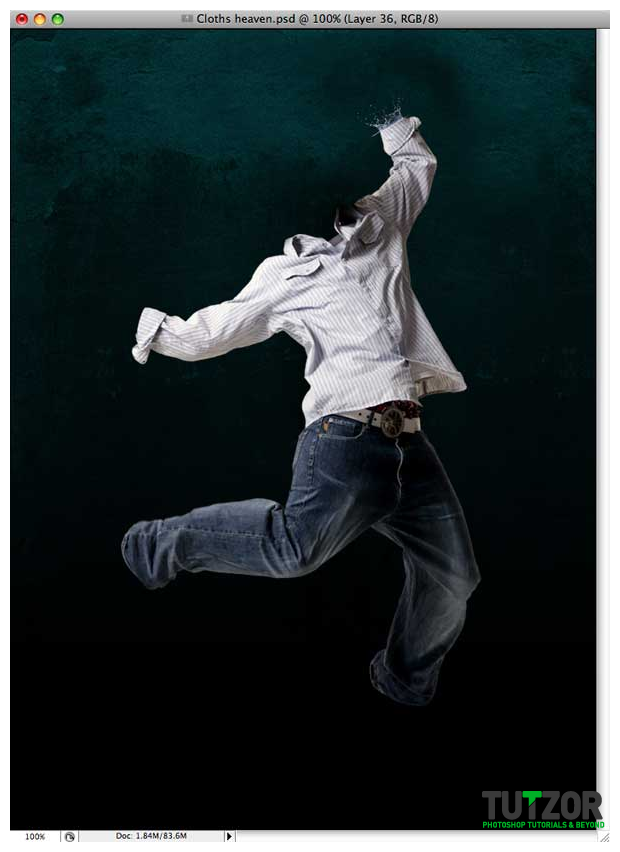 Cpotorac
 Cpotorac
 Cpotorac
 Cpotorac
 Cpotorac
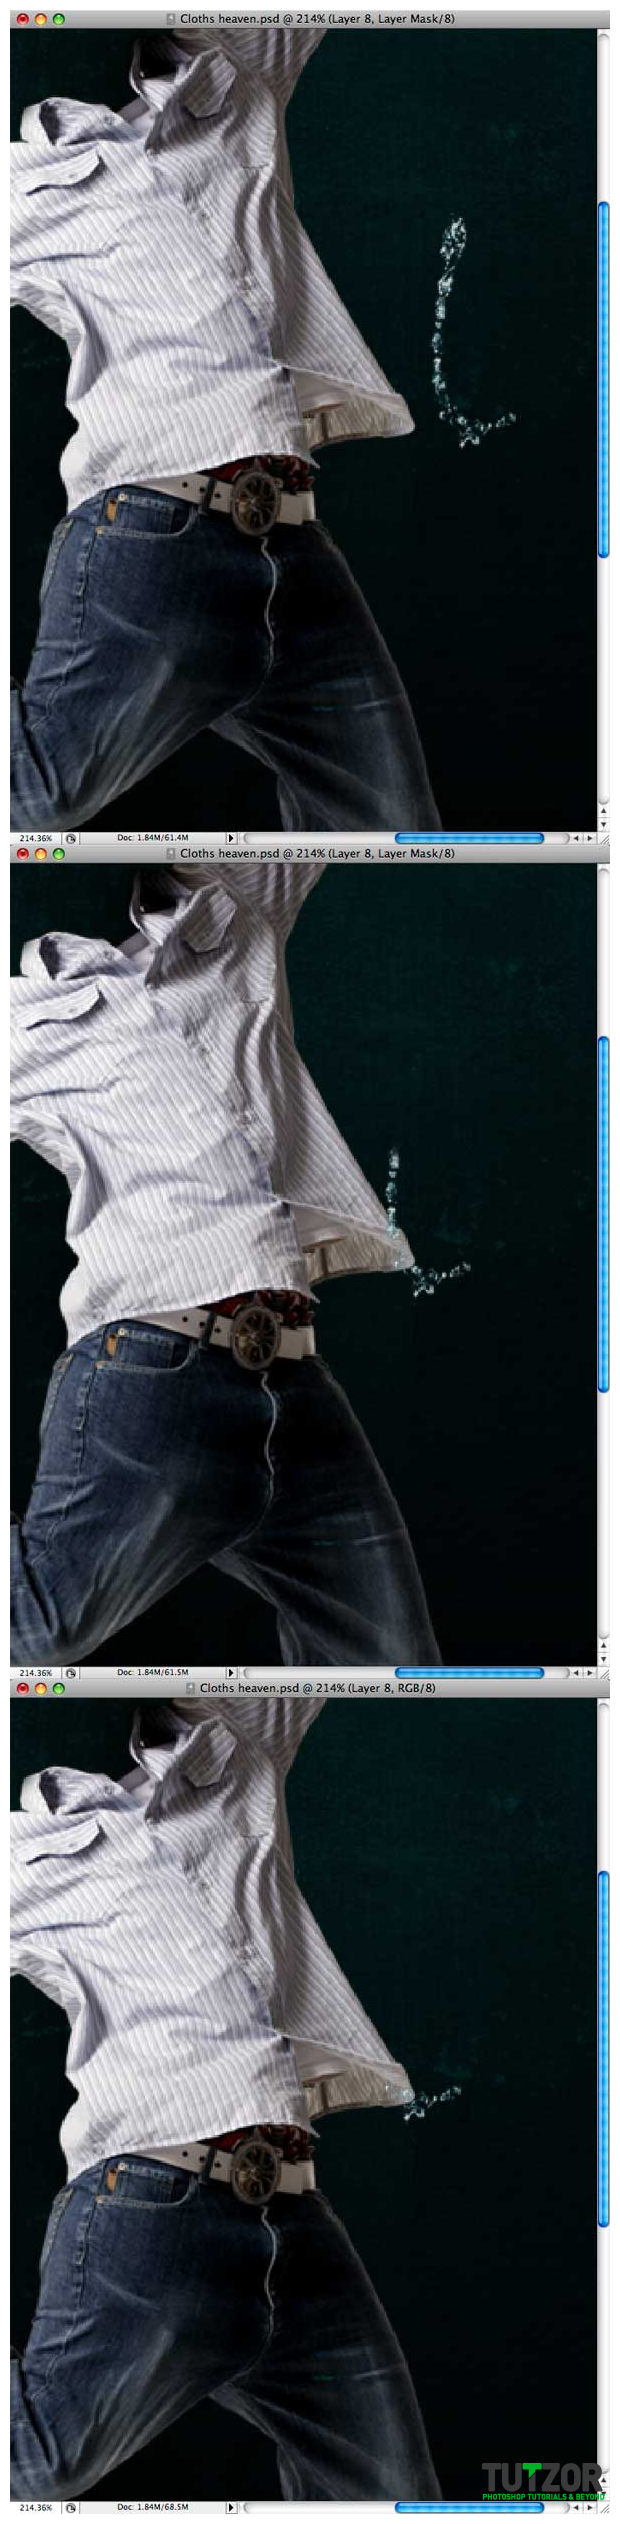
 Cpotorac

 Cpotorac
 Cpotorac
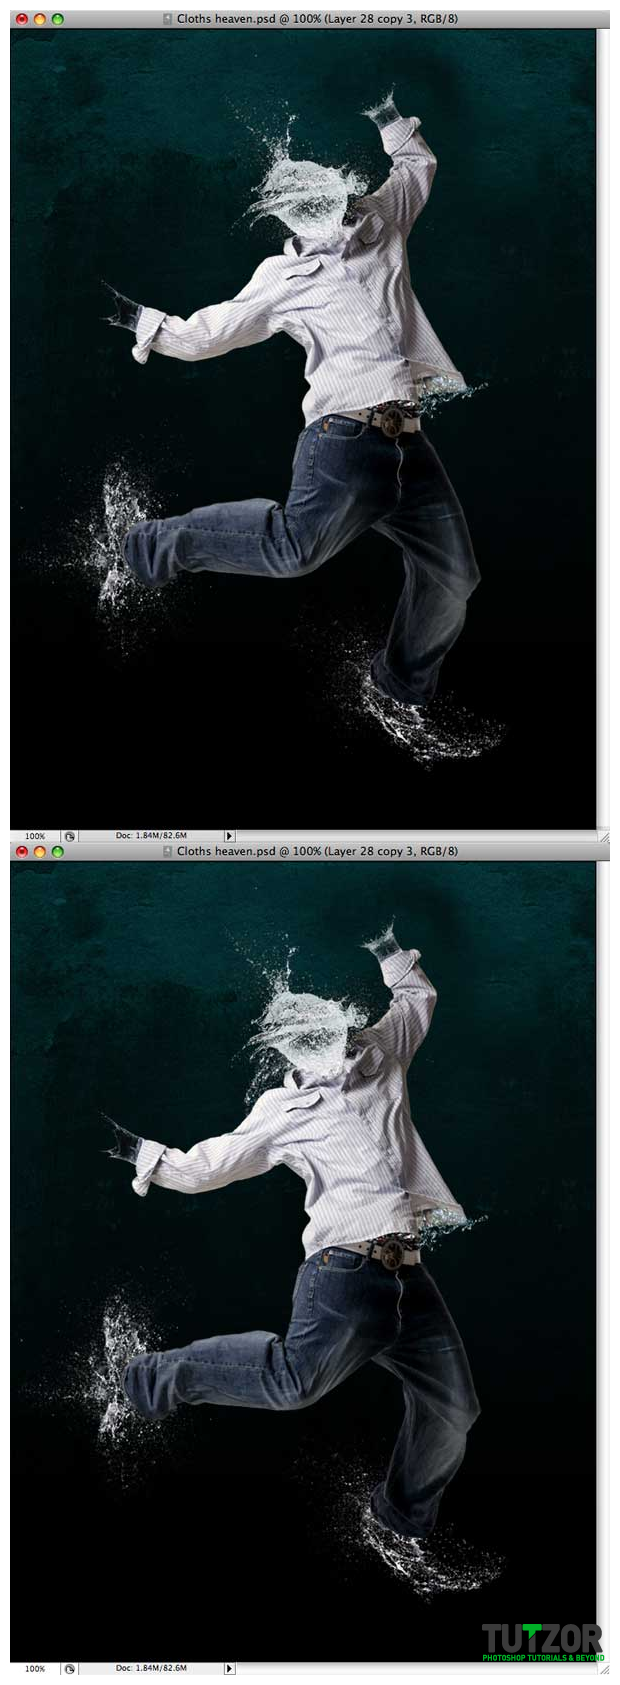 Cpotorac
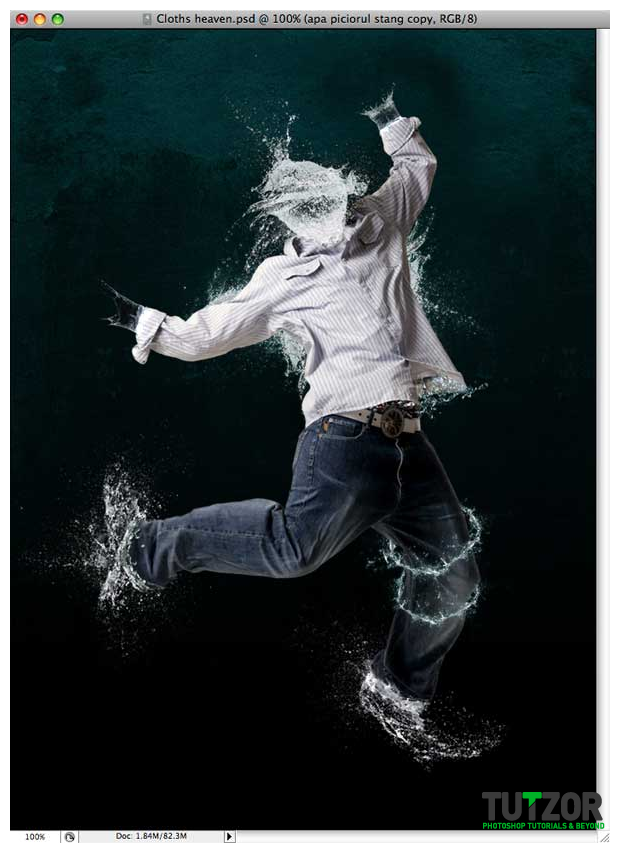
Copyright© 2012 Tutzor All Rights Reserved | Developed by: Iceous Design


Comments
Re: Water effect photo montage
Certainly, certainly.
Re: Water effect photo montage
Thank you a lot for sharing this info with us all, it has really served me that's for sure"
[url=http://pontefreno.bugs3.com/la-desesperacion-por-encontrar-el-amor/]blogs person[/url]
Re: Water effect photo montage
Hi Cpotorac,
Could you please get in touch with me? I would like to explain a project that I'm in charge of, involving a global awareness campaign for aquatic conservation. Your image is very compelling, fun, and appropriate to one of the themes of the campaign, which is that humans are made of 98% water, and I would like to see if you might consider supporting the project by allowing this image to be used in a poster. You can email me at reidridgway@yahoo.com.
Warm Regards,
Reid
Re: Water effect photo montage
Excellent, I like your link and tutorial.
Re: Water effect photo montage
Of course! :)
Re: Water effect photo montage
Could it be alright that will put thing about this in my small personal weblog if I post a reference to this webpage?
Re: Water effect photo montage
i enjoyed to do this..... amazing
Re: Water effect photo montage
Hey there this one is aweesome, but i´ve got some problems to do that, is there maybe a video about that tutorial?? will be great!
thanks, Tronko
Re: Water effect photo montage
Wonderful work.
Re: Water effect photo montage
It is a great work and good idea. thank u so much .
Re: Water effect photo montage
i enjoy this tutorials bt it's little bit dificulty to do the same i thk you need to tell in more details how to make the background ( i see your website 1st time ) normally i am learning frm psdtuts.com bt you have also done a g8 job so pls tell in more details.
Re: Water effect photo montage
nice its awesome...
Re: Water effect photo montage
Simple et doux. Je pense commencer un autre blog ou cinq très bientôt, et je vais certainement considérer ce thème. Gardez-les venir!
Re: Water effect photo montage
My companion and I really enjoyed studying this weblog publish, I used to be simply itching to know do you trade featured posts? I am all the time looking for someone to make trades with and merely thought I would ask.
Re: Water effect photo montage
It's a good process.
Re: Water effect photo montage
That is great i got a lot of experienced about water effect. You are best on my side !
Thank for the best tutorial!
Re: Water effect photo montage
wouldnt it be easier to just take a snapshot of a dancing guy that is made of water, and all splashy? like frosty the snowman, but you prank him into going outside to play in the snow, only its like the first week of august...
sometimes you just cant reproduce those kodak moments.
Eight years in the web & digital media industries
I had fun watching this tutorial and I've learned something. This is very creatively done. Thank you so much for posting.
Is it can be more than excellent!?
Dude...Thank you for the way you explain it. Very well teach. I really learn A Lot! This kind of work is kind of work that only the Godlike can do.
Re: Water effect photo montage
Nice....tutorial..!!! Amazing______
Good evening
Fine article, especially the second paragraph :)
Subcribed to your rss
Re: Water effect photo montage
Marion, thnx for your support. Sorry, we can't send out our tutorials.
Re: Water effect photo montage
This is amazing - is it possible that you could kindly send this turorial to my email address.
Thanking you.
Re: Water effect photo montage
brilliant;) i am really very impressed by this tutorial. can u send ur great tutorial to my email?
thanx
Re: Water effect photo montage
brilliant;) i am really very impressed by this tutorial. can u send ur great tutorial to my email?
thanx
Re: Water effect photo montage
Thank you Ice! Even if it looks to be more complicated to add milk on skin like in photos of razooma web site...
Re: Water effect photo montage
To add www.razooma.net/projects/milk/ effect,
you can use this tutorial and use this brush,
http://www.tutzor.com/free-photoshop-goodies/liquid-splash-brush
Enjoy!
Re: Water effect photo montage
Very cool!! Thanks ....I would like to know how to add a milk splash effect on face or body like this: www.razooma.net/projects/milk/
Re: Water effect photo montage
thats great..this is my favourite website..keep posting like this,i like it..i have some tutorials in photoshop too...in http://okmantap.comRe: Water effect photo montage
Awesome It's very realy greats job. so interesting with this technic.Thanks agains!