

 Seiorai
-----------This is just my own way of doing things. Not the best, not the worst out there, just mine :) I'm hoping to help somebody perhaps through this tutorial :) ------------
Today we'll leave behind for a second all those shapes and filters and automated Photoshop stuff and focus on something else for a change: painting. Yes, that means taking a blank canvas and with your awesome..or not so awesome yet drawing skills express yourself in a new way, by taking those original characters and settings in your mind and forsaking all attachment to pre-defined values and precise filters let your fantasy flow :)
For this tutorial it is strongly recommended that you have a graphics tablet. It is not imporrible to do it with a mouse however it would take ages more. I am currently using a Genius Mousepen 6x8 tablet, but you can use any other, of course.
First, I want to mention that this is not a tutorial to teach you HOW to draw (anatomy/etc), but how to use colors to bring an existing rough sketch to life.
Second, a small word of wisdom: learning how to paint is more than splashing some colors here&there. You definitely won't learn painting in this tutorial, you will learn some techniques only, which you can later improve and adapt to fit your own style as time goes by and you become better and better at this. It will take you months, perhaps years to be able to draw virtually anything you have in mind, so be patient and work with love ^_^
Third: before starting, here are a few awesome tutorials you should be interested in checking out:
These are just a tiiiny few, so always feel free to look for more ^^
Okay. That being said, let's go on to the juicy stuff :D
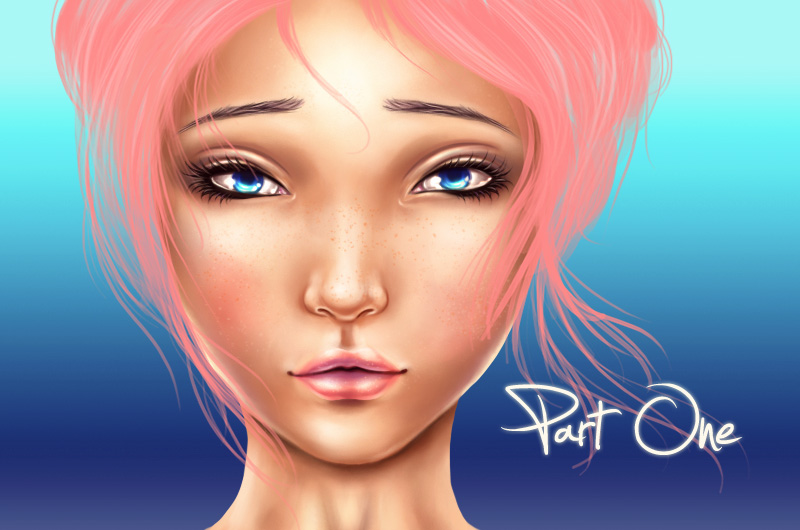
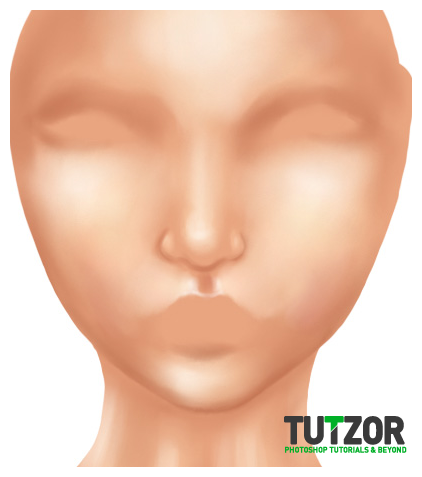
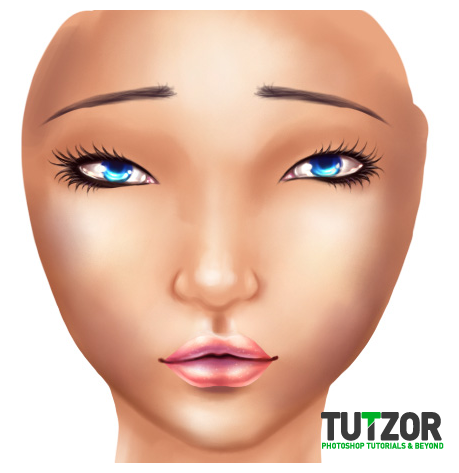
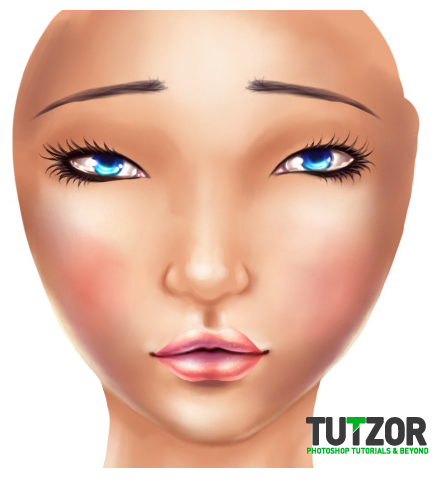
This is what we'll be making: a portrait of...Chloe. More exactly, MNF Chloe Amethyst BJD xD
You have no idea what a BJD is? Too bad. Here she is: http://dollfairyland.com/shop/step1.php?number=677
Wll my version of Chloe is more grown-up but hey! artistic license FTW ^__^
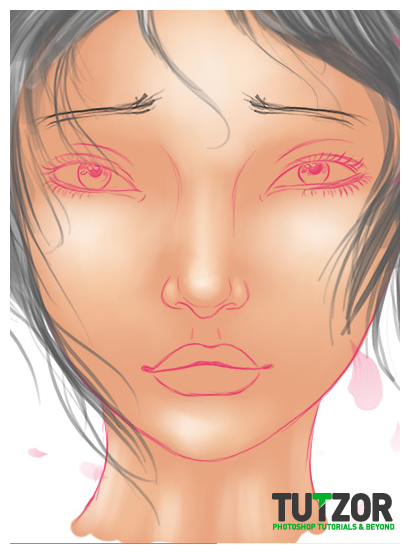
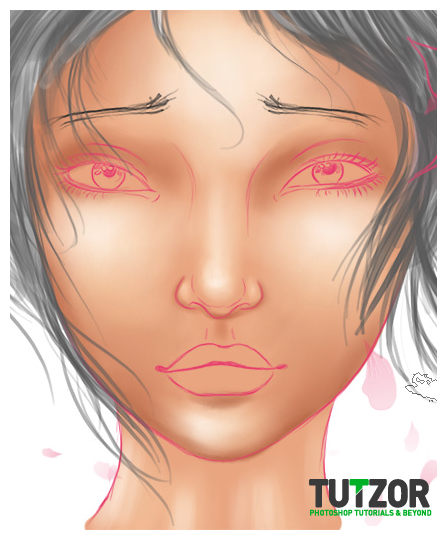
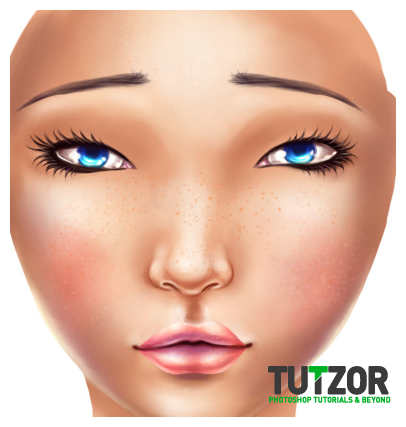
In this part of the tutorial we will focus only on the face itself, not the hair yet (but that doesn't mean we can't include the hair in your sketch ^_~ )
NOTICE: This is Part 1 of a longer tutorial. In this part we will ONLY deal with painting the faceand its elements :)
Part 2: Chloe's hair tutorial.
 Seiorai
 Seiorai
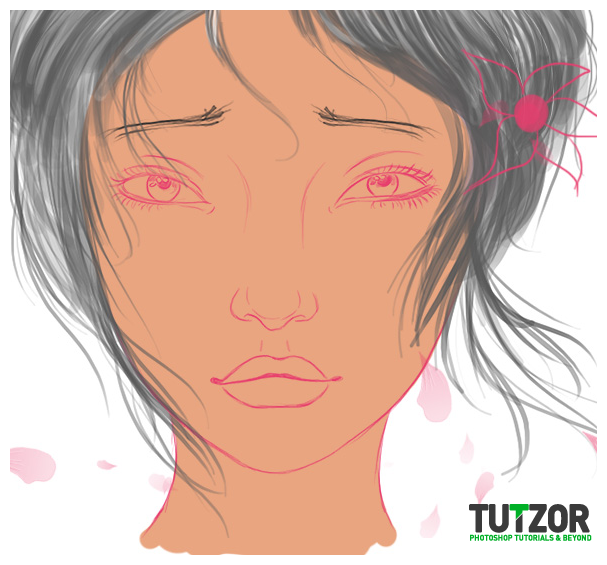 Seiorai
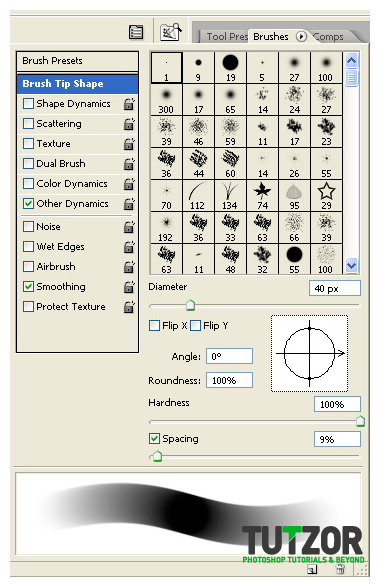
 Seiorai
 Seiorai
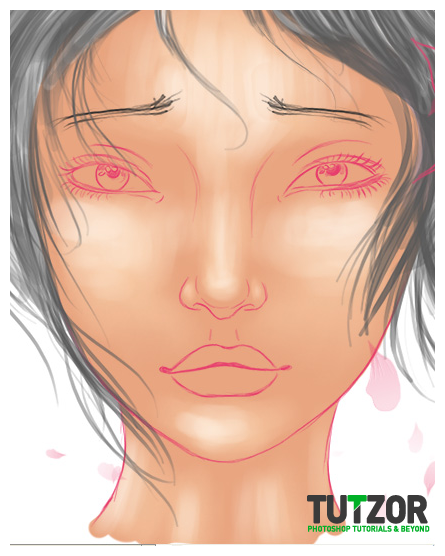
 Seiorai
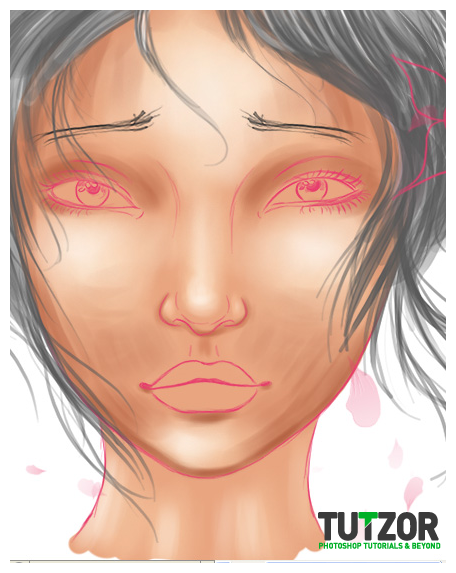
 Seiorai
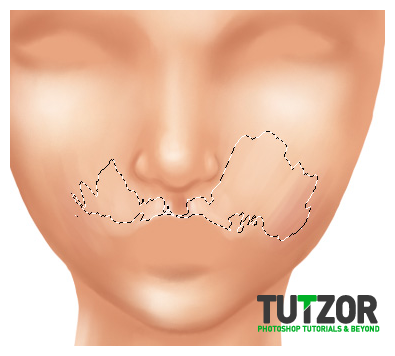
 Seiorai
 Seiorai
 Seiorai

 Seiorai
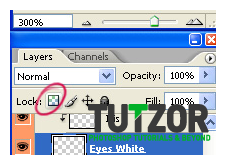

 Seiorai
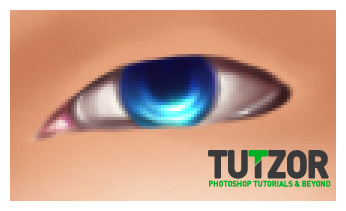
 Seiorai
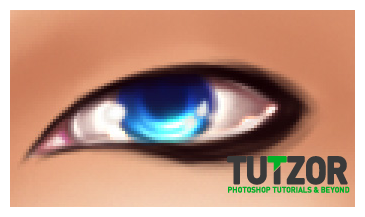
 Seiorai
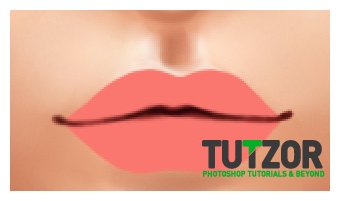
 Seiorai
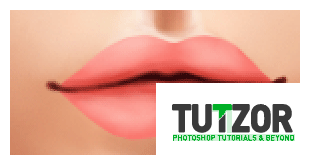
 Seiorai
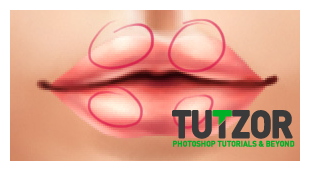
 Seiorai
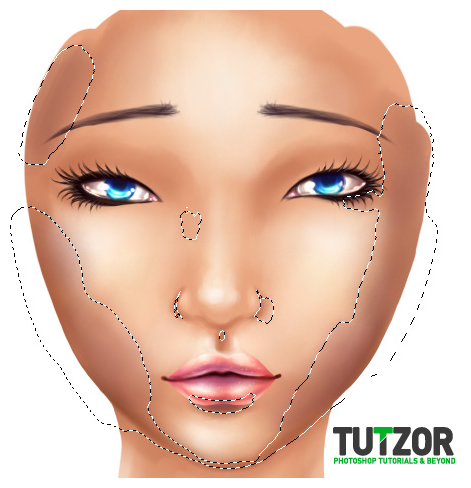
 Seiorai
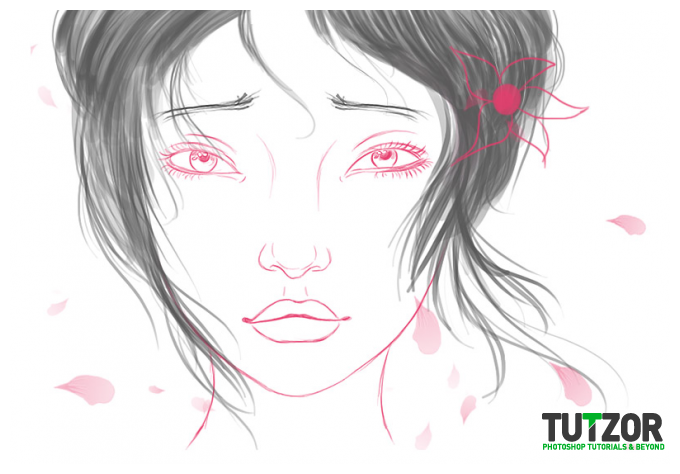
 Step 19:
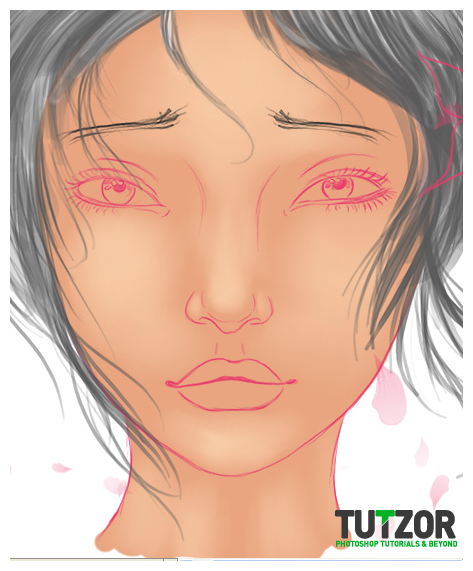
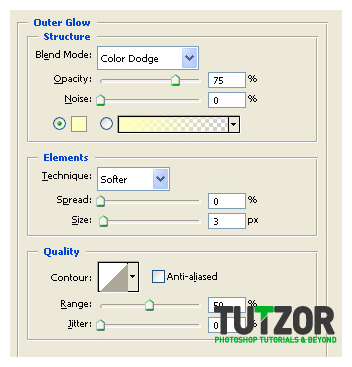
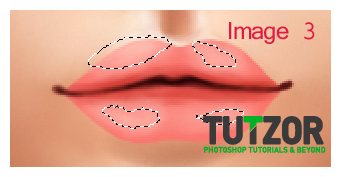
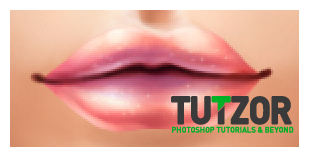
Oki, now we'll create anew layer, make sure it is a Clipping Mask to the "Base Color" layer...then move it so that it is its topmost clipping mask, right baove the "Fine Tuning" layer. Like in image 1 below---->
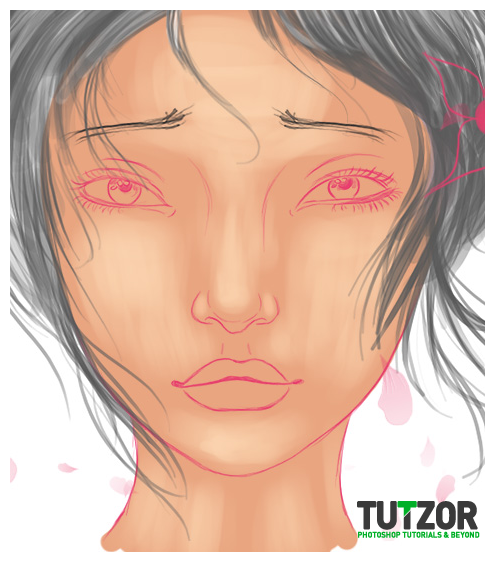
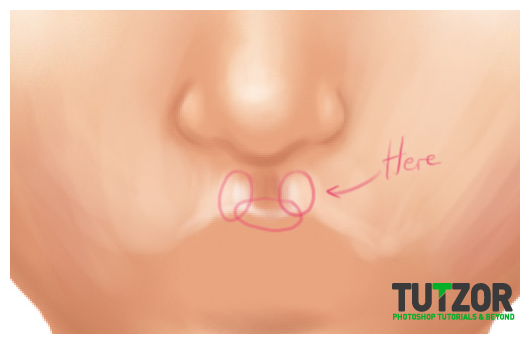
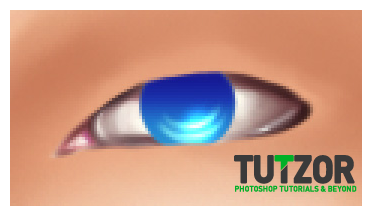
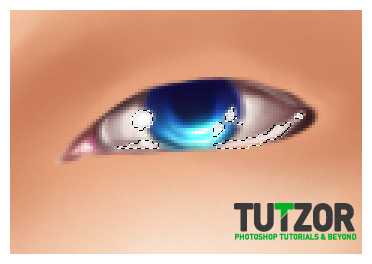
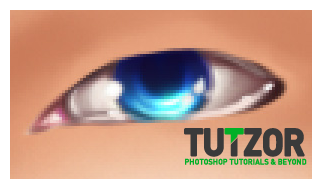
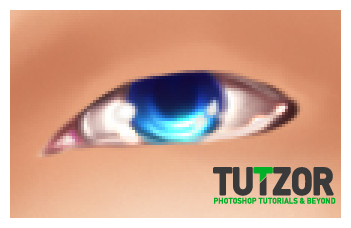
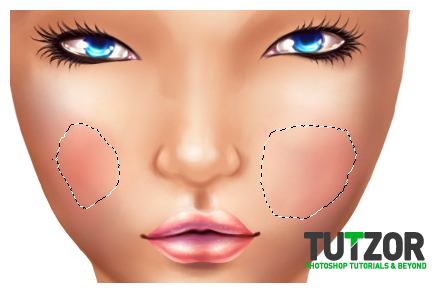
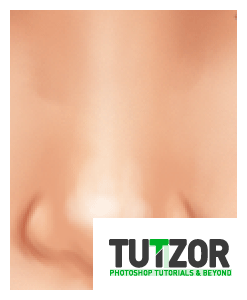
We'll use this layer to add more tuning to the skin between the lips and nose. So.
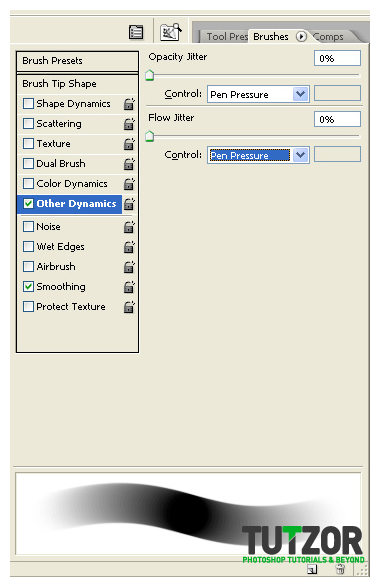
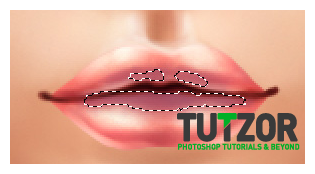
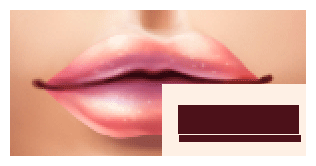
Take a small, round brush and set your Foreground color to about #4d1814 then gently shade the corners of the lips. Switch then your Foreground color to #f8ddcb and paint just above the upper lip. See the animation in image 2 below for an example:
Step 19:
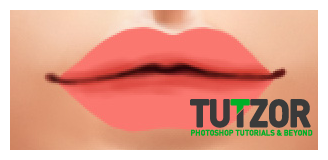
Oki, now we'll create anew layer, make sure it is a Clipping Mask to the "Base Color" layer...then move it so that it is its topmost clipping mask, right baove the "Fine Tuning" layer. Like in image 1 below---->
We'll use this layer to add more tuning to the skin between the lips and nose. So.
Take a small, round brush and set your Foreground color to about #4d1814 then gently shade the corners of the lips. Switch then your Foreground color to #f8ddcb and paint just above the upper lip. See the animation in image 2 below for an example:
 Seiorai
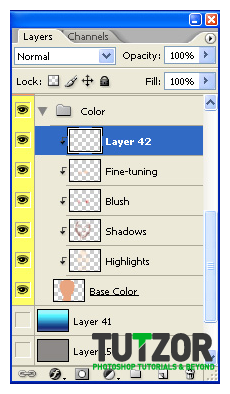
 Seiorai
 Seiorai
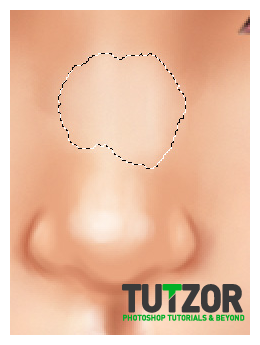
 Seiorai
 Seiorai
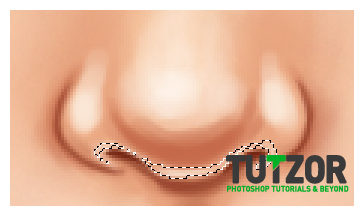
 Seiorai


 Seiorai
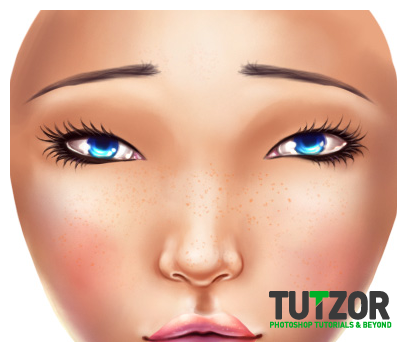
Copyright© 2012 Tutzor All Rights Reserved | Developed by: Iceous Design


Comments
Re: Digital Painting Tutorial
Great painting work in photoshop. Like it.
Digital Painting tutorial
Not just a wonderful tutorial but also a wonderful artwork. Every detail counts.
Re: Digital Painting Tutorial
Good artwork. The tutorial steps are really well explained.Thanks.
Re: Digital Painting Tutorial
Part 2 is still working progress. Since it is a very complex and involve a lot of steps, we are breaking it into multiple tutorials. Please understand, it takes a lot of time and efforts to create each tutorial. :)
Stay tuned for the rest of the tutorials.
Re: Digital Painting Tutorial
Where is part two?