wallpaper tutorial, using Photoshop CS5 extended - PART 2") cosmin
cosminHi everybody,
I'm gonna show you how to create "Fringe" tv show wallpaper, using the new photoshop cs5.
Here are the list of files I used.
I'm inspired from this following tutorial to achieve the 3d text effect:
Hope you guys would enjoy it.
cosmin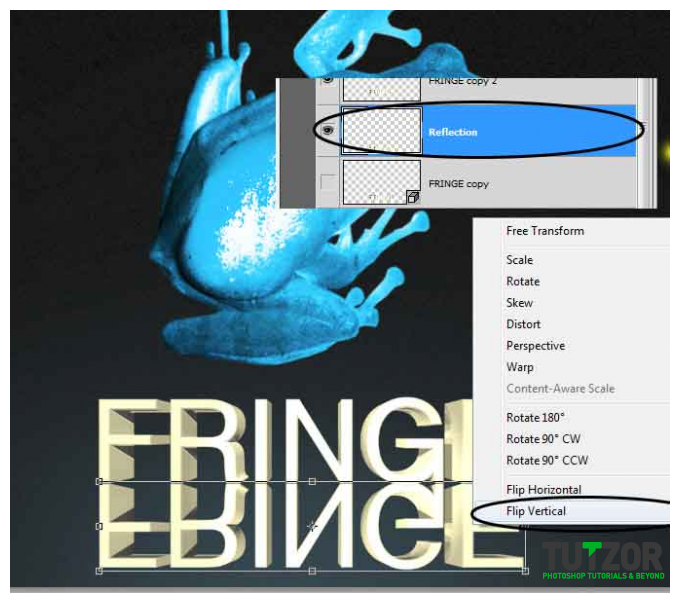 cosmin
 cosmin
 cosmin
 cosmin
 cosmin
 cosmin
 cosmin
 cosmin
Copyright© 2012 Tutzor All Rights Reserved | Developed by: Iceous Design