Candy Flavor Coloring
 Cpotorac
Member since:
Cpotorac
Member since:
Aug 2010
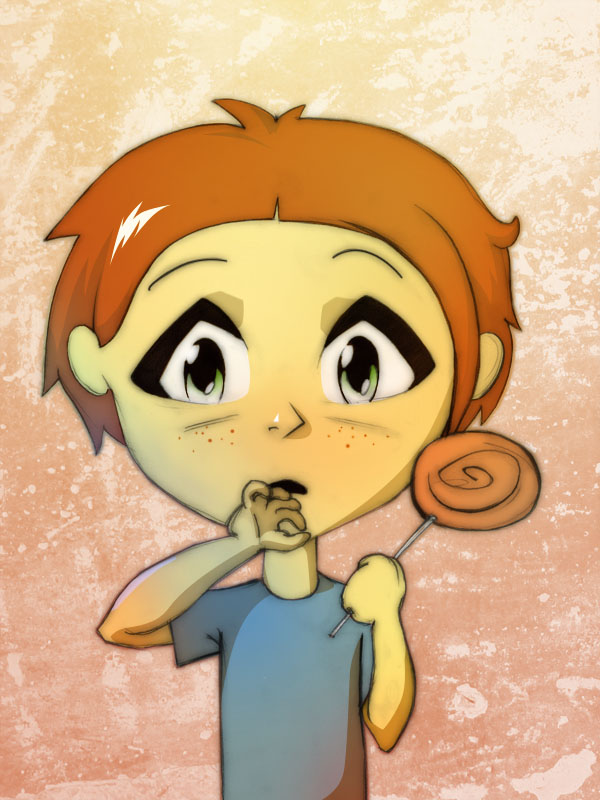
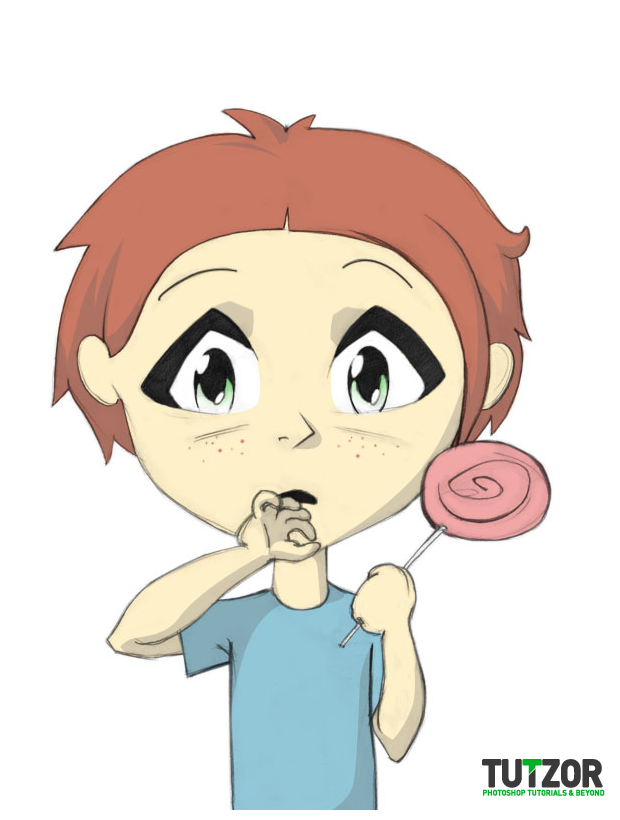
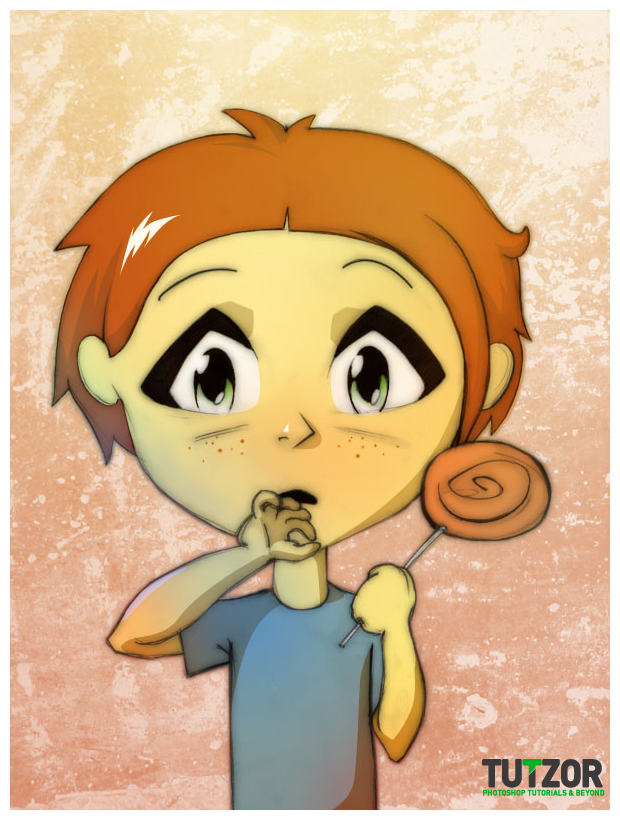
Hello! In this tutorial we are going to learn how to achieve a candy-like coloring over any kind of line-art.
Final Image

Cpotorac
Member since:
Aug 2010
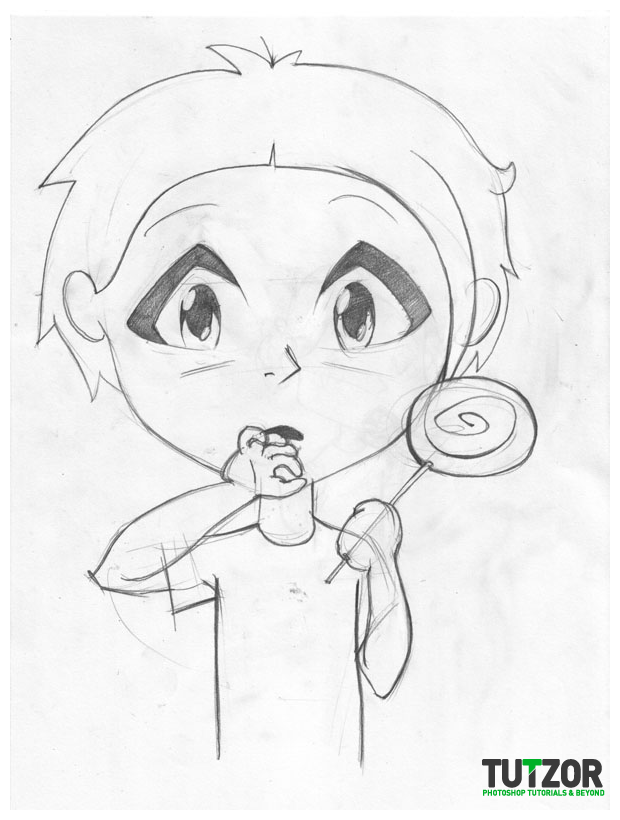
First we will need to draw a sketch that we will use for this tutorial. The image below is what I have made.
Cpotorac
Member since:
Aug 2010
As you can see it’s pretty dirty so the first step will be cleaning, but before anything else we should add a bit of contrast, it looks pale. Be careful not to exaggerate: between 10 and 20 is enough. Too much contrast is cheap.
You can find it in Image > Adjustments > Brightness/Contrast. After you enter your value click ok.
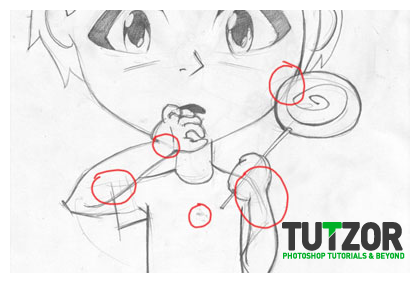
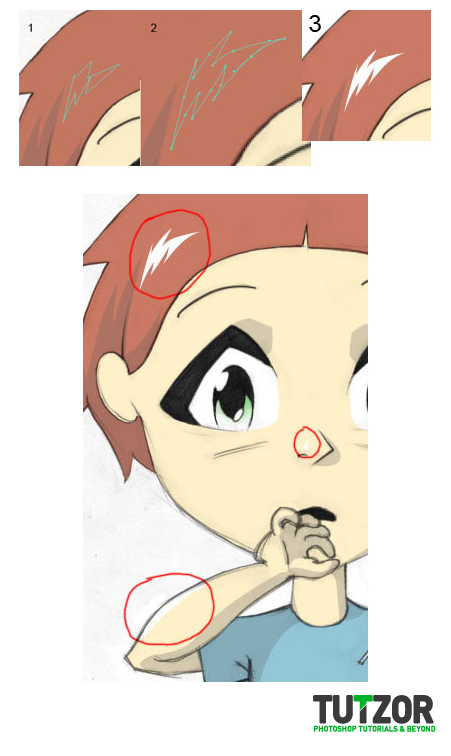
Use a soft eraser tool and keep in mind that you will be able to erase some more later. Focus on areas like the ones below.
Cpotorac
Member since:
Aug 2010
Notice I didn’t pay any attention to the outer “dirt”. That’s going to come off smoothly later in the tutorial.
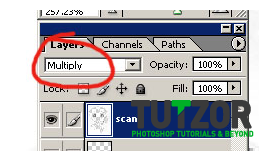
Change the blending options of the layer to “Multiply”. Multiply leaves only the dark areas visible while make the bright areas transparent. Nothing will happen on the screen, as there is nothing behind the image.
Cpotorac
Member since:
Aug 2010
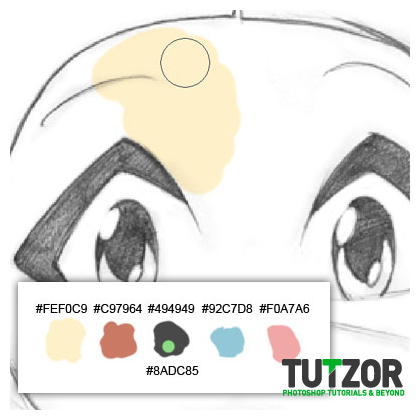
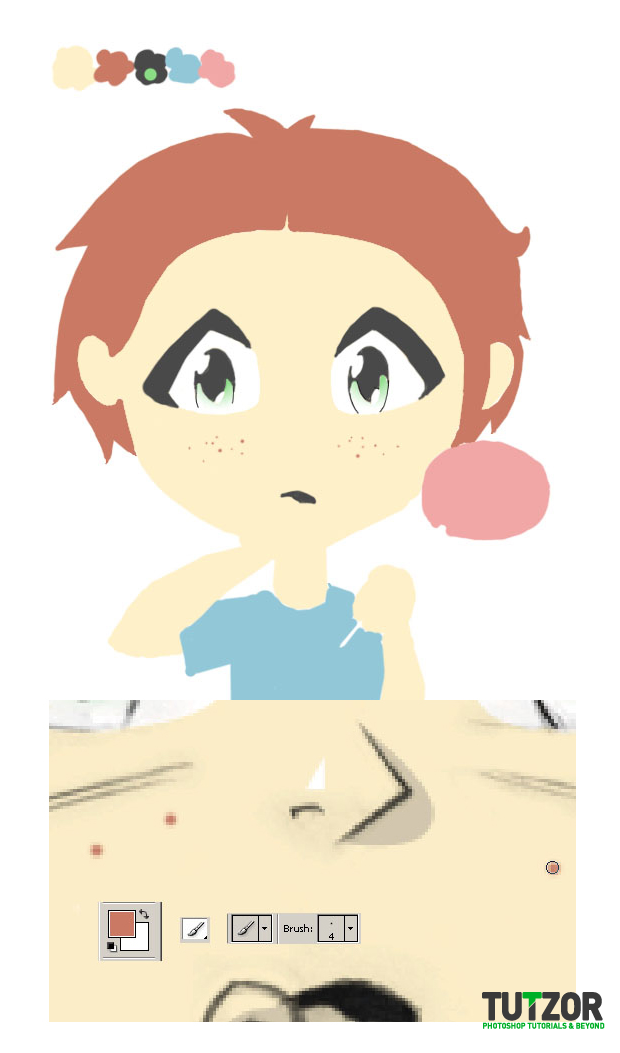
Create a new layer and place it under the line-art. Call it “flat”.
Start laying down some midtowns in whatever way you want. I used a round hard brush and the following colors.
Cpotorac
Member since:
Aug 2010
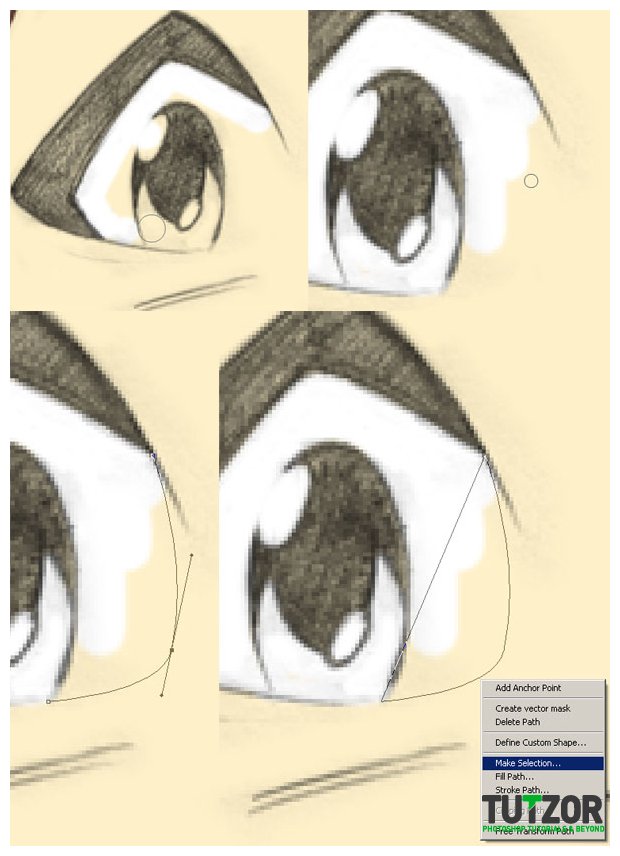
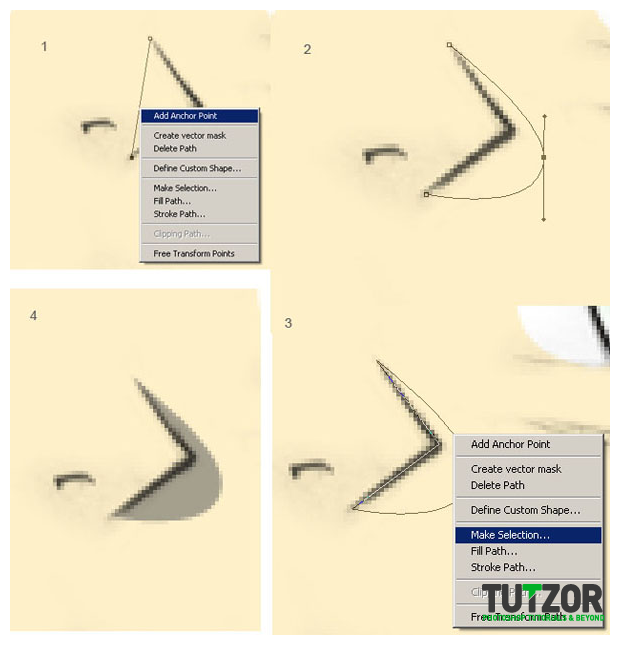
I’ll use paths on the eyes to better control the shape.
Cpotorac
Member since:
Aug 2010
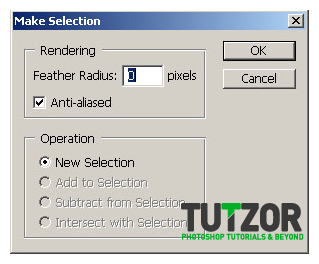
When you’re ready right-click on the path and choose “Make Selection”. If you’re settings correspond with the ones in the following image click ok and the fill that mask with white.
Cpotorac
Member since:
Aug 2010
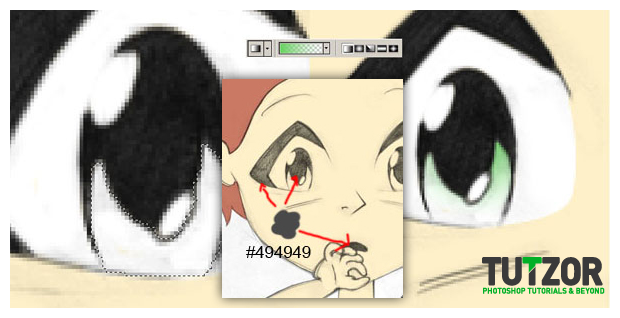
Don’t forget to paint the eyes with dark grey (black is too strong and leads to a big contrast) and the candy stick with white.
Cpotorac
Member since:
Aug 2010
I’m going to add some freckles using a small brush (sizes between 2 and 4) of the same color as the hair and just lay down a few random spots.
Cpotorac
Member since:
Aug 2010
Next we’re going to be adding shadows so create a new layer and name it accordingly. It should be under “scan” and on top of “flat”. We’ll use paths to make selections and then we fill with one color (avoid black; I used #5F5F5F). We will control the tone thought the Master Opacity of the layer.
Start with the nose first.
Cpotorac
Member since:
Aug 2010
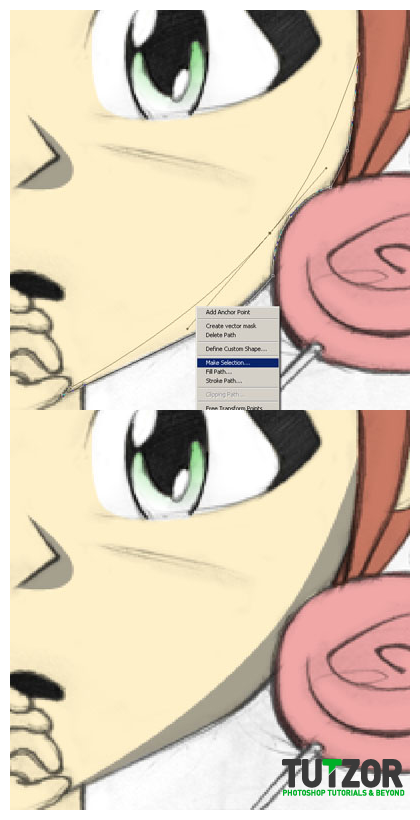
Next is the face.
Cpotorac
Member since:
Aug 2010
Continue with the rest of the body (Arms, shirt, hair). The result should be something like this.
As you can see I tried different degrees of opacity in order to find the one I like.
Cpotorac
Member since:
Aug 2010
Highlights. It’s the same procedure as the one we used for shadows. Path. Selection. Fill (white).
Cpotorac
Member since:
Aug 2010
Here is were the magic begins.
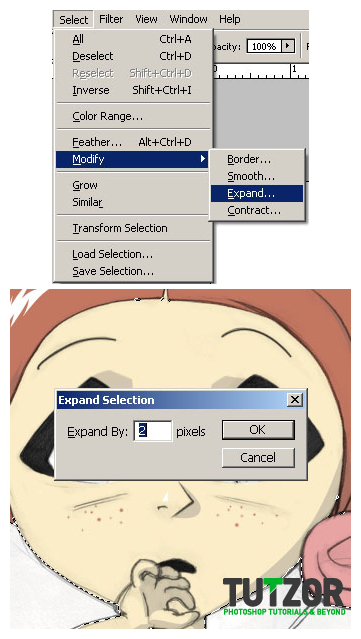
Make a selection of the “flat” layer (Hold down Ctrl and click on it in your layer panel). Go to Select > Modify > Expand and expand your selection by 2 px, then go to Select > Feather and enter 1px.
Cpotorac
Member since:
Aug 2010
Invert your selection (Select > Inverse or SHIFT+CTRL+I) and move to the “scan” layer. Press DELETE. This was to further clean our image.
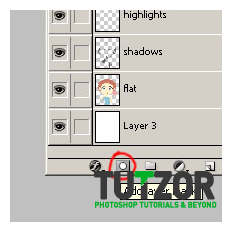
Invert the selection again and create another layer (put it on top of all of the other layers) and click the “Add Layer Mask” button.
Cpotorac
Member since:
Aug 2010
You have created a mask for your layer (which will be named “candy”), a b/w thumbnail will appear beside it. Click on the chain between them. Now that the chain has disappeared it means that the two layers are no longer linked and can act independently from one another.

Cpotorac
Member since:
Aug 2010
How do masks work? Masks show the white areas while hide the black areas. If your mask layer is fully-filled with black your mask won’t show anything, as if the layer doesn’t even exist, respectively, a white mask layer will show everything in that layer.
What about grays? A medium gray reduces visibility to 50% therefore dark-grays tend to hide and light-grays tend to show.
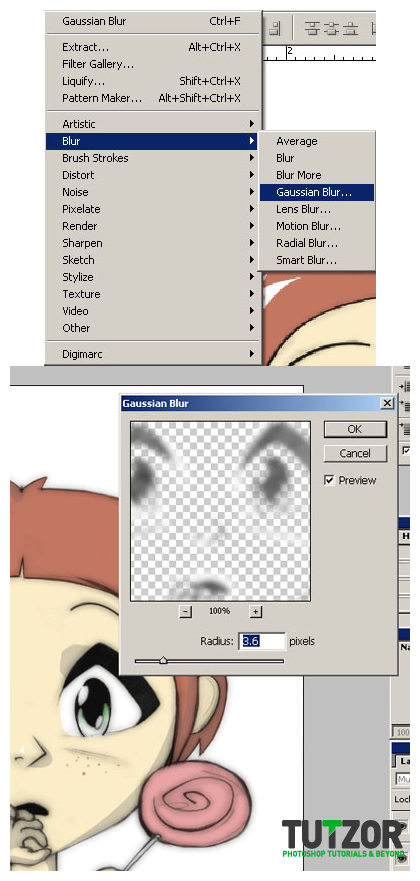
Duplicate the “scan” layer and go to Filter > Blur > Gaussian Blur.
Cpotorac
Member since:
Aug 2010
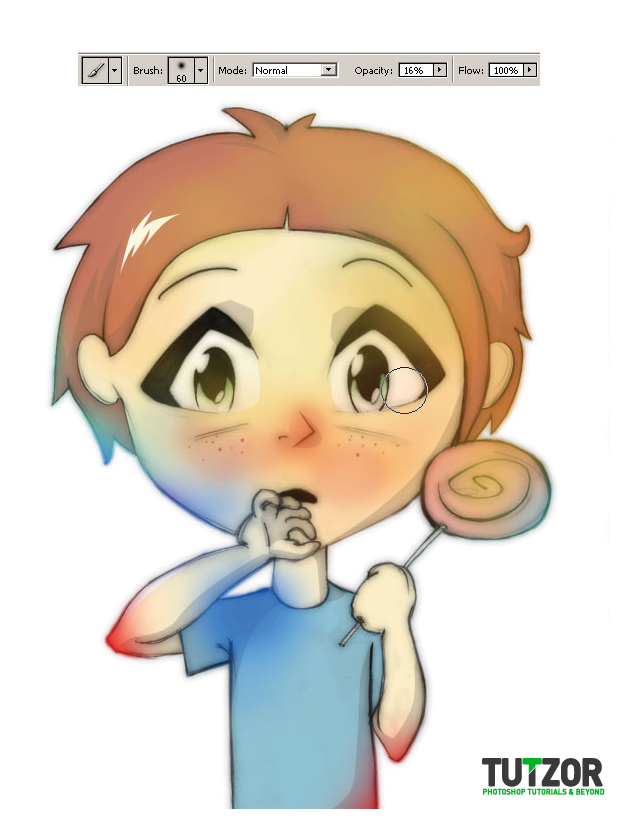
Beautiful effect, but it’s not enough. Go to the “candy” layer and with a huge and soft brush start spreading powerful colors like in the picture below. Notice the role of the mask when you go over the lines (going over the lines here is essential).
Use soft brushes, various brush sizes and use different opacity levels (as you go inside the line-art lower it; start from around 70%).
Cpotorac
Member since:
Aug 2010
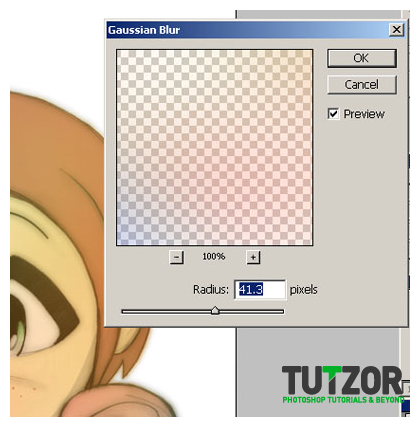
Apply another Filter > Blur > Gaussian Blur to make it look fuzzy.
Cpotorac
Member since:
Aug 2010
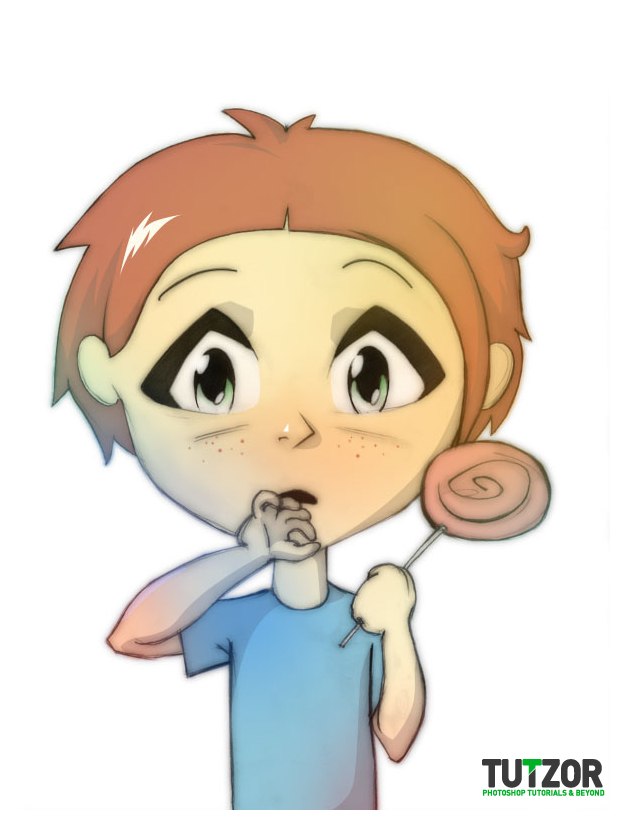
Now it looks too fuzzy. Select the mask of the “candy” layer and with a soft black brush and low opacity paint wherever you feel like hiding some of the fuzziness.
I did that on the eyes mostly and I also used a Polygonal Lasso Tool to make a selection of the nose highlight (filled it with black hiding the that part of the candy layer which was obscuring the highlight).
Finalize your work with a very nice and interesting background, maybe a texture and use the candy technique.
Thank you for reading.
very nice
Member since:
Aug 2010
Very Nice Work M impressed....
aan
Member since:
Aug 2010
how long time 4 make this image????
Photoshop Drawing Simple Candy Flavour Coloring using Photoshop Tutorial @ photoshoptutorialtour.com
Member since:
May 2010
[...] click here to: View Full Tutorial [...]
pratham
Member since:
May 2010
nice character sketch
http://www.scrapsforever.com
Eksy
Member since:
Feb 2010
Awesome tutorial. I rarely draw anymore, but if I get back into it, I might try this out.
I always wondered how that soft-like quality was achieved.
Tutoriales Photoshop
Member since:
Aug 2008
[...] al tutorial: Candy flavour coloring Si eres nuevo por aquí, te recomiendo suscribirte al canal RSS de mi blog para leerlo a [...]
Raj
Member since:
Jul 2008
very nice tutorial. pretty good sketch. Thanx!
rizallica
Member since:
Jul 2008
thanks for all! your tutor very2 help me.. mmuach!!
Mchilly
Member since:
Jul 2008
Great sketch and tutorial :-)
Edwin
Member since:
Jul 2008
Pretty cool drawing! I like it! :)
Constantin Potorac
Member since:
Jul 2008
Added a gradient on the kid and changed the blending option to color burn and another gradient for the background along with a few tweaks to create that texture
Hailey
Member since:
Jul 2008
I think it can be done easily using some grunge brushes or an image of grunge textures.
Thanks for the tut, really helpful!
admin
Member since:
Jul 2008
yeah Constantin could you explain how you did that last step? That would be really helpful.
dangish
Member since:
Jul 2008
i would more love to know how you got to the final result but sadly you didn't explain :(
dangish
Member since:
Jul 2008
yeyyy awesome new tutarial! :)
Nice