Create an E-Mail Icon
16
May'11
Member since:
Mar 2011
Step
26
Member since:
Mar 2011
Mmmkay.
Now make a new layer and move it so that it is a clipping mask to the Arrow Tail shape layer...and so that it is placed inbetween the Arrow Tail layer and the gray thingy layer :)
Set your Foreground color to #fdec77 and your Background one to #6a9b1f and take the Gradient Tool 9set on Foreground to Background) and drag like in image 1 below.
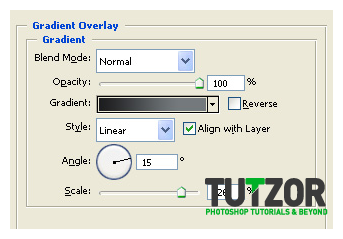
Then double-click on the gray thingy to get into its bending options, there give it the layer style in images 2&3.

Step
27
Member since:
Mar 2011
Right...Good :)
Next let's make another layer on top of all our others and taking the Pen Tool (set to shape layers of course) and setting our Foreground color to #74a324 let's draw the tip of the arrow :)
Like in image 1 below---->
Then name this shape layer "Arrow Tip" and create a new layer/clipping mask for it, on which we will use some nice gradients :)
First, set your Gradient to Linear Gradient, Foreground to Background. And set your Foreground to #90bf3b and your Background to #45770d.
Drag like in pic 2 below--->
The set your Gradient to Foreground to Transparent and Radial Gradient, and drag a bit int he areas selected in image 3 below to get a result similar to Image 4 below---->


Step
28
Member since:
Mar 2011
Rightttt...
Then let's create a new layer and move it under the 'Arrow Tip" shape layer. Name it "Arrow Thickness 1".
Take the blessed Pen Tool up again..hahaha..and draw following the sketch, the thickness of the arrow.
Like in pic 1 below--->
Then of course, create a clipping mask above it and set your Foreground color to #d1ee94 and your Background one to #45770d and using the Gradient tool set to Linear Gradient and Foreground to Background drag as shown in pic 2 below...so that the final result is pic 3 below :)


Step
29
Member since:
Mar 2011
We'll now follow a similar process for the thickness of the tip itself. Make a new layer under "Arrow Thickness 1" and name it..well..."Arrow Thickness 2".... and take the Pen Tool of course :)
Create the shape following the sketch....like in image 1 below.
Then of course, make a new layer on top of it and transform that into a clipping mask, and setting your Foreground color to #d2ef97 and your Background one to #487a0f drag like in pic 2 below to get the result in pic 3 ^___~


Step
30
Member since:
Mar 2011
Sweeeet! :3
Next let's take care of the gray undercolor of the arrow ;)
New layer, below all your other arrow-related layers and taking the Pen Tool draw the shape in pic 1:
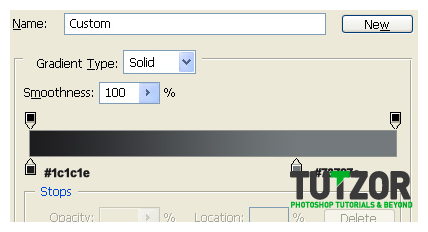
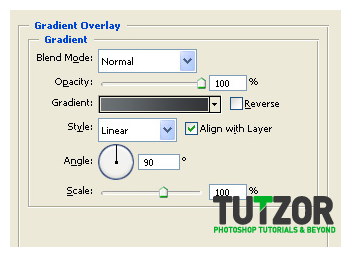
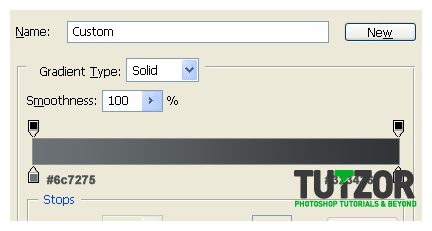
Then get into its Blending Options and give it these settings:

Step
31
Member since:
Mar 2011
Now we're almost done, yey ^^
Let's add the final touches :)
Know that "Envelope Body" shape layer?
Good :)
Let's pay it a visit ;)
Well, better said, let's give it a new clipping mask ^^
Of course, above the current gradient one it has now.
On that clipping mask take the Gradient tool, set it to Foreground to Transparent and Linear Gradient...and with the #fbf3d0 Foreground color drag like in image 1 below...so you get a result like in image 2 below.


Step
32
Member since:
Mar 2011
Rawr!
New clipping mask on top of the one we just made, this time we'll take the Pen Tool and make a shape similar to the one in pic 1 below:
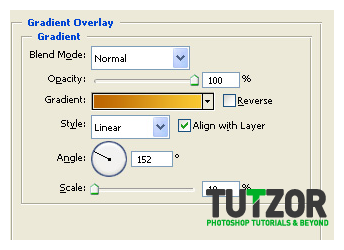
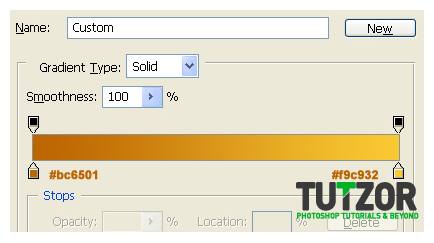
...to which we'll give the effect in images 2&3 below--> 9note, you might need to modify the degrees a bit depending on your own angle)
Then you should geta result like in image 4 below--->


Step
33
Member since:
Mar 2011
We'll follow the same process for the right-side one :)
See pic 1 below for the shape.....of course this is made on a new clipping mask what'd you think? xD
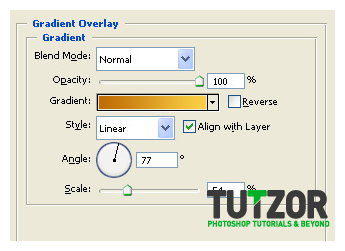
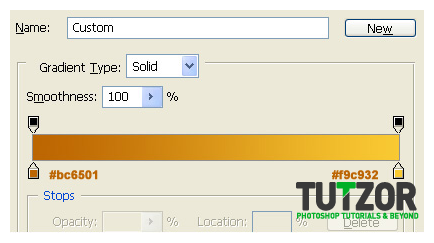
...then give it a layer style similar to pics 2&3 so that you get a result like in image 4 below.


Step
34
Member since:
Mar 2011
Then let's add a final nice touch by adding one more highlight :)
Know that white-ish glow we just made in step 31?
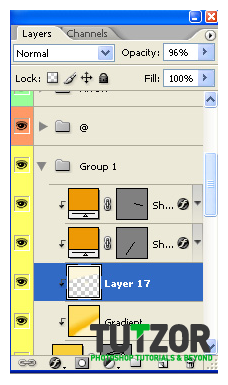
And the layer it is on? See screenshot 1 below for the layer-->
Then let's make that our working on layer and take the Rectangular Lassoo Tool and create a selection like in image 2 below--->
Then set your Foreground color to #fcf5da and taking your Gradient tool, set it to Linear Gradeitn and Foreground to Transparent. Then drag like in image 3 below...to get something like image 4 below--->



Step
35
Member since:
Mar 2011
...wait...we're done xD
Hehe, now this was fun ^^
Well of course you CAN go on with this icon, still loads of stuff can be done but the tut'll stop here for now, I've probably driven you mad with the shape layers and stuff <3333
Questions, queries, etc, please feel free to contact me via my Facebook at http://www.facebook.com/profile.php?id=100001907117980
or my DevArt account at http://seiorai.deviantart.com
Stay safe :)


