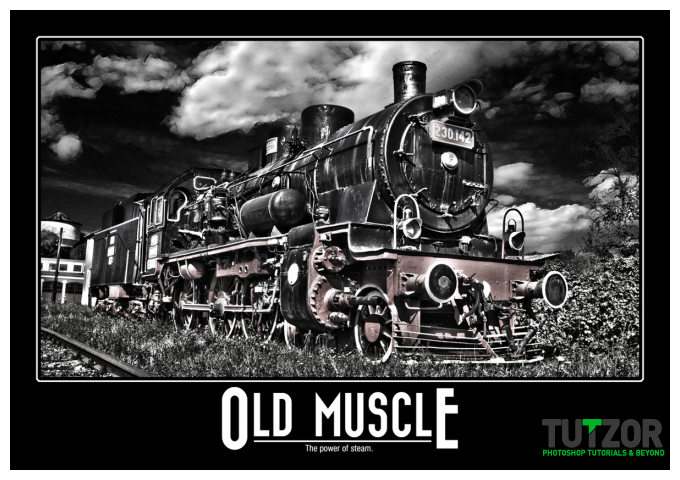
How to create a Black and White HDR inspirational poster
14
Oct'10
Member since:
Sep 2010
Step
01
Member since:
Sep 2010
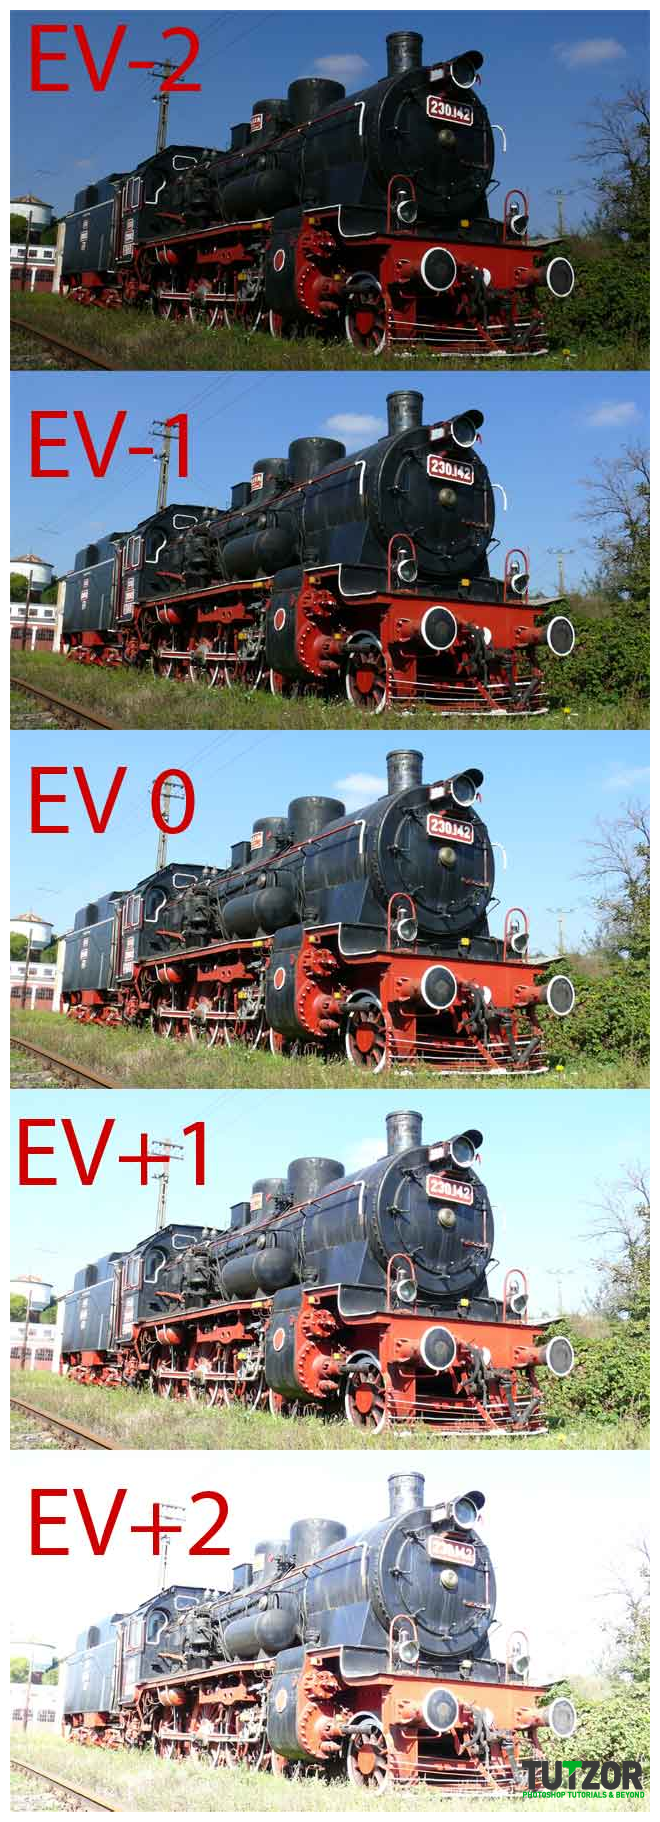
For this tutorial you can shoot your own RAW pictures or you can use mine. You need to take 3 to 9 pictures with different exposure of the same place. You need to use a tripod and make sure your camera is very still. Search for a great place in high details and you can explore this tutorial on your own images. I took 5 different exposure of this locomotive, as you see.

Step
02
Member since:
Sep 2010
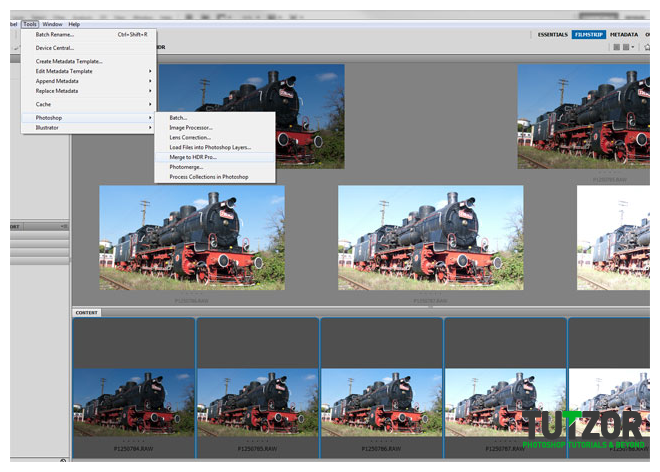
Now open adobe bridge ( You can do this from photoshop, go to file > browse in bridge ) and navigate until you find the place where you saved the raw files, select them and go to Tools > Photoshop > Merge to HDR pro.

Step
03
Member since:
Sep 2010
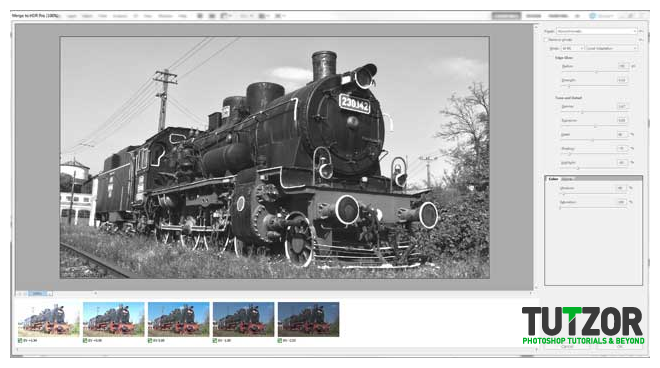
After waiting a bit (until photoshop does some processing) a new panel will appear. Here you are going to turn your image into HDR (High Dynamic Range). Start by selecting the Monochromatic preset for now.

Step
04
Member since:
Sep 2010
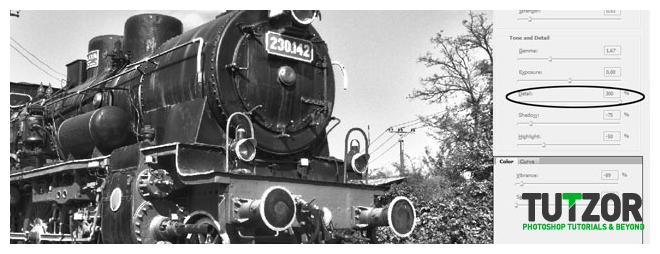
Next set the value of details to 300%, you will see now a lot of details on the locomotive

Step
05
Member since:
Sep 2010
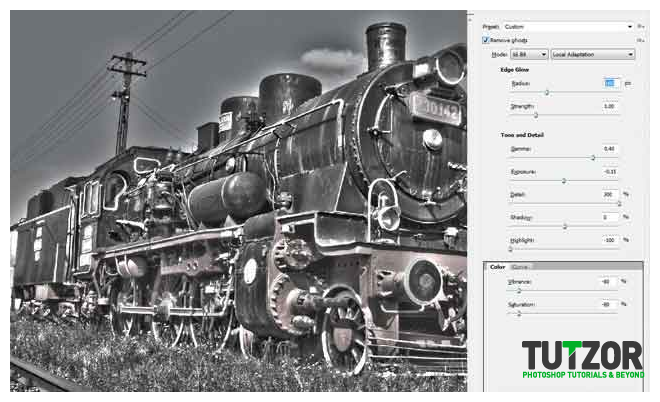
Use this settings next:
radius 160
strength 1,00
gamma 0,4,
exposure -0,15
shadow 0
highlight -100
vibrance -80
saturation -80
check “REMOVE GHOSTS”
Look at my result.

Step
06
Member since:
Sep 2010
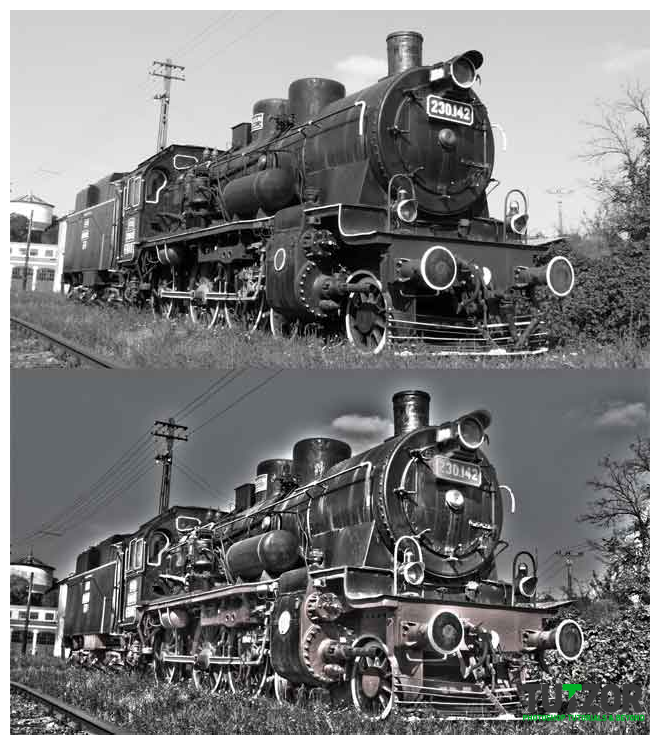
Now just take a look at a simple black and white photo and the HDR one.

Step
07
Member since:
Sep 2010
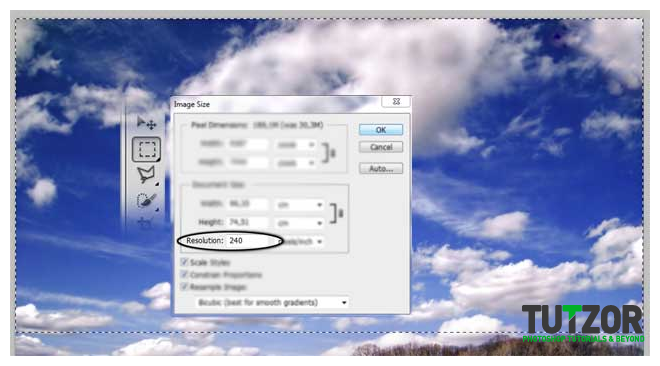
If I had a nice cloudy sky in my photos, this HDR would have been perfect. But it’s not a problem, we can do miracles with photoshop. Open the images you’ve downloaded with the sky and because our HDR photo has 240 px/inch we need to make the sky picture bigger. Go to Image > Image size and set the resolution to 240 px/inch, then using the rectangle marque tool make a selection like me.

Step
08
Member since:
Sep 2010
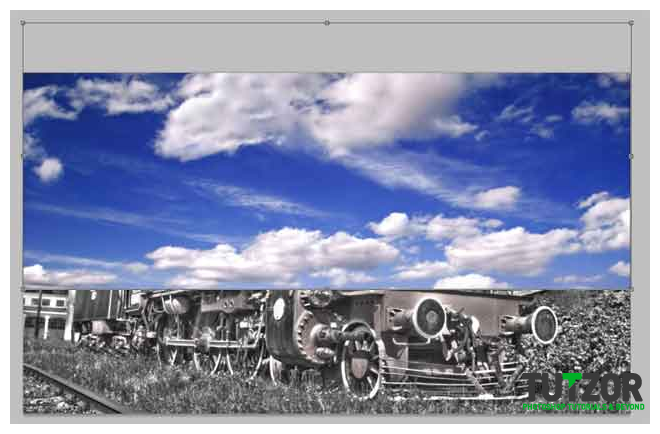
Cut the selection with the sky and paste it into our document. Scale the sky like I did (CTRL+T) and rename the layer “sky”.

Step
09
Member since:
Sep 2010
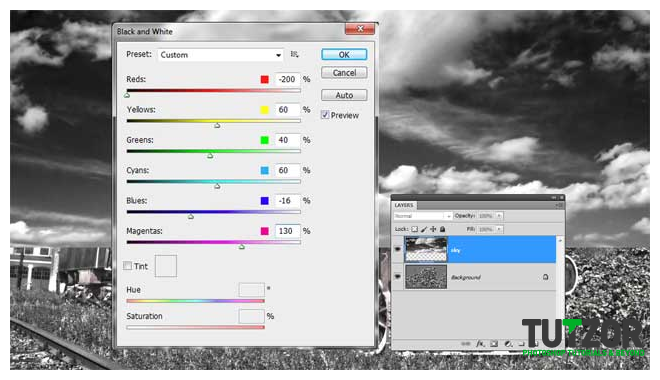
Now make the sky layer black and white, Image > Adjustments > Black & white and use my settings.

Step
10
Member since:
Sep 2010
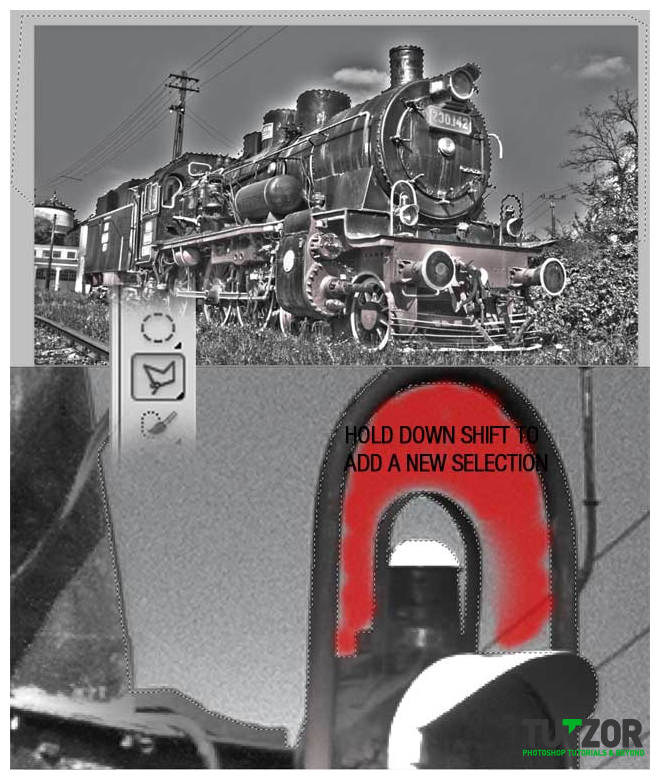
Disable the Sky layer for now and using the polygonal lasso tool or the pen tool make a selection like me, I like using polygonal lasso tool. Make the selection as perfect as you can and if you want to add another selection, after you’re done, hold down the shift key, you will see a “+” along the polygonal lasso tool, take a look what I mean.

Step
11
Member since:
Sep 2010
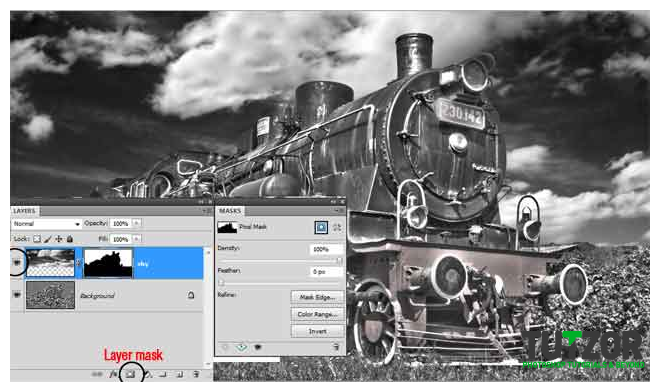
Make the sky layer visible again, and add a layer mask like I did. Now we just need to make the sky to look original.

Step
12
Member since:
Sep 2010
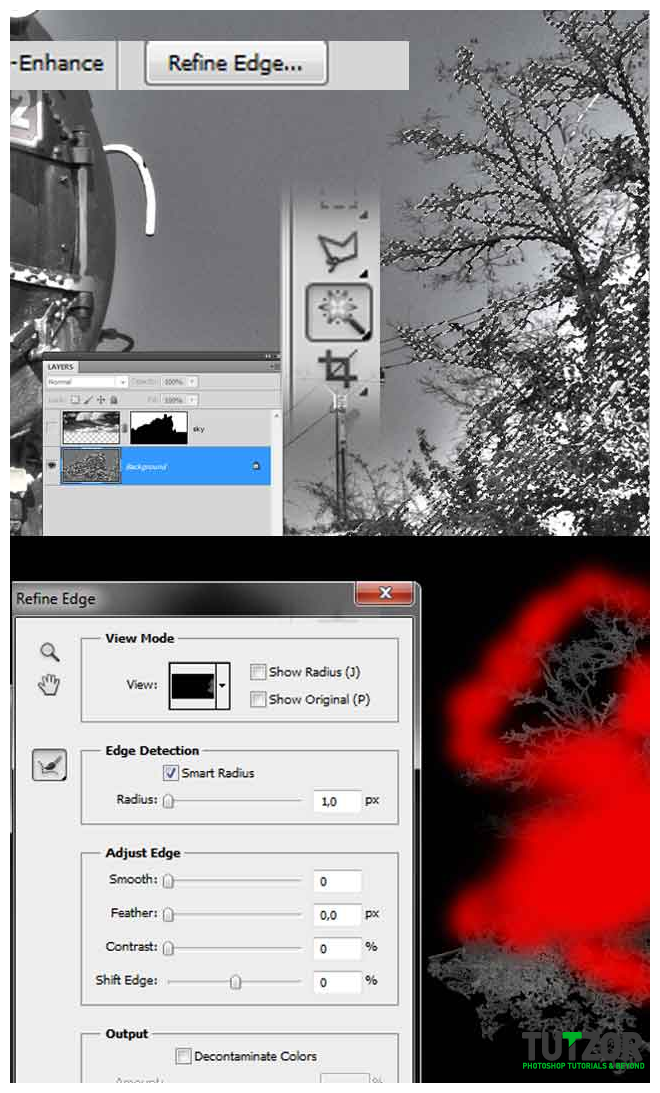
Disable the sky layer again and using the magic wand tool select multiple branches, holding shift. Try to select like I did then click on refine edge. Set the view on black, check smart radius, set it to 1 px and “draw” over the marked area.

Step
13
Member since:
Sep 2010
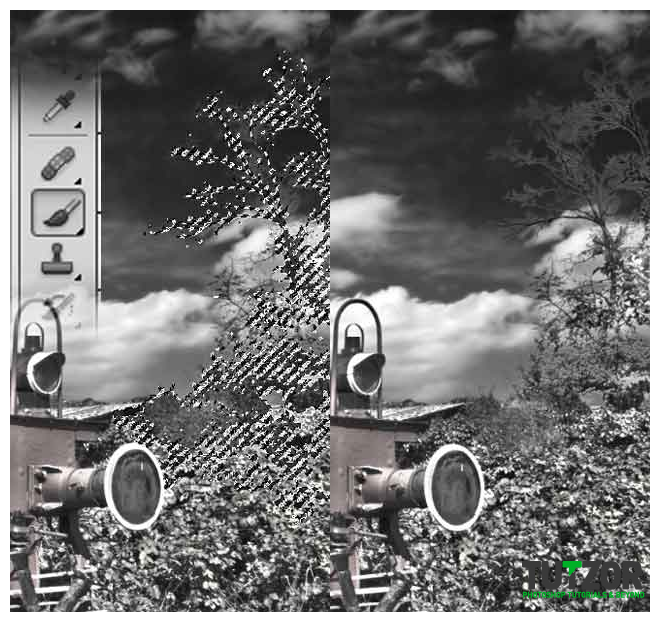
Make the sky visible again, select the mask and paint over the branches selection with black. You can use different opacity of a soft rounded brush, check my result.

Step
14
Member since:
Sep 2010
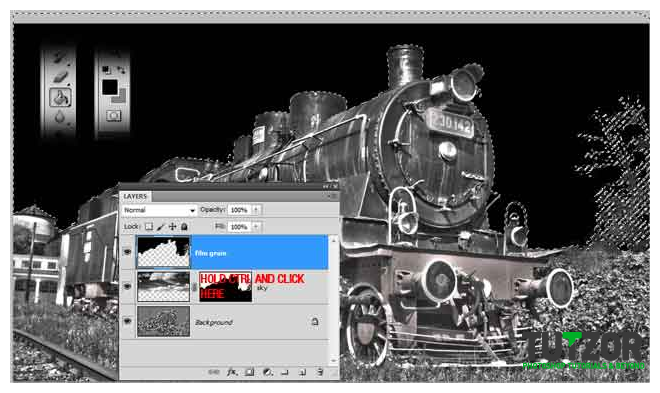
For the next effect we need to change the image mode from 16 bits to 8 bits, go to Image > Mode > 8 bits /channel. Then add a new layer, call it film grain. Hold down CTRL and click on the mask to make a selection then fill it with black on the film grain layer.

Step
15
Member since:
Sep 2010
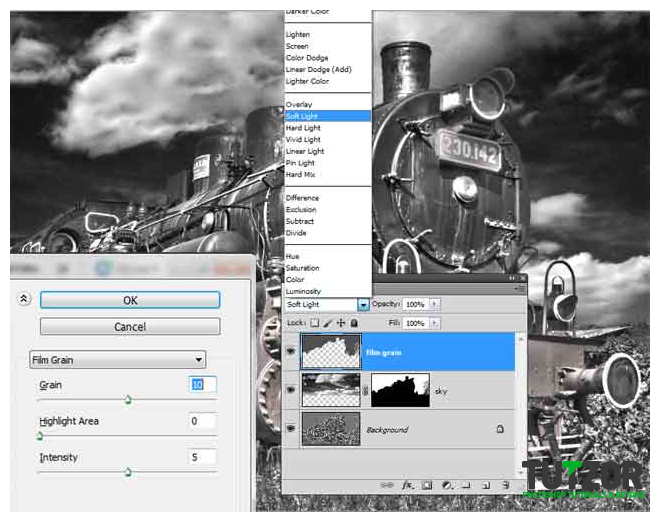
You can deselect now (CTRL+D) and go to filter > artistic > film grain (grain 10, highlight 0, intensity 5) then set the blending mode to soft light.

Step
16
Member since:
Sep 2010
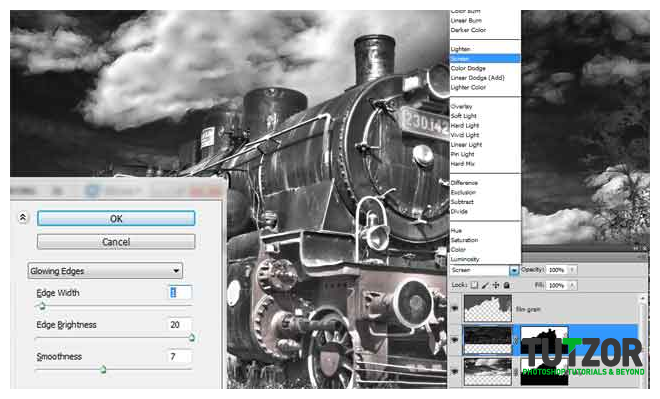
Duplicate the Sky layer (CTRL + J) and go to Filter > Stylize > Glowing edges (edge width 1, brightness 20, smothness 7) and set the blending mode to screen.

Step
17
Member since:
Sep 2010
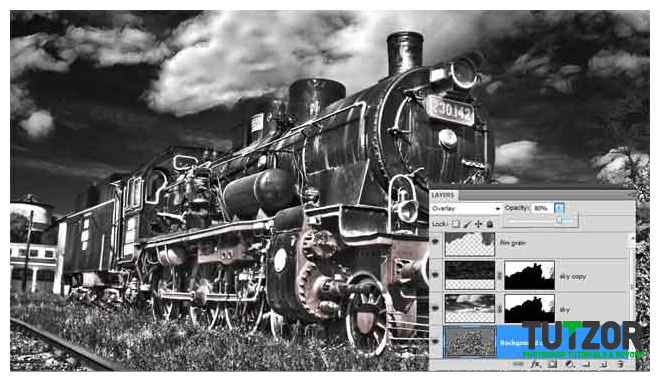
Duplicate the background layer, set the blending to overlay and the opacity to 80%.

Step
18
Member since:
Sep 2010
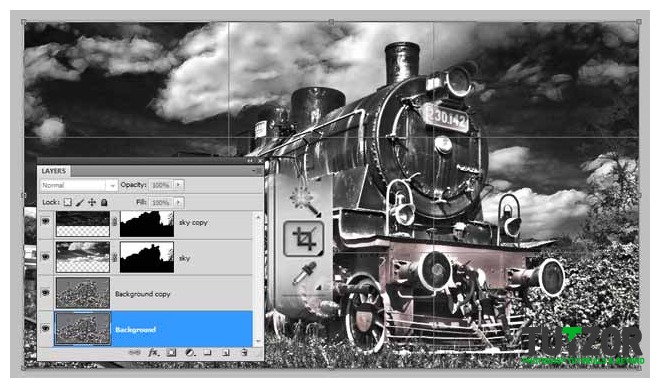
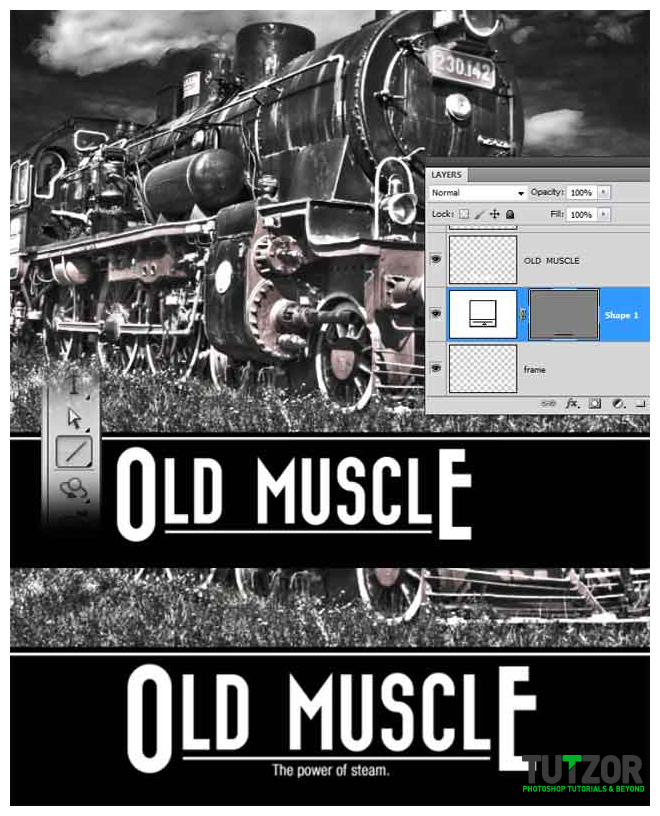
Let’s turn our HDR image into an inspirational poster. First you need to crop like I did ( because we have areas outside the canvas we need to cut them off), then double click the background layer to unlock it.

Step
19
Member since:
Sep 2010
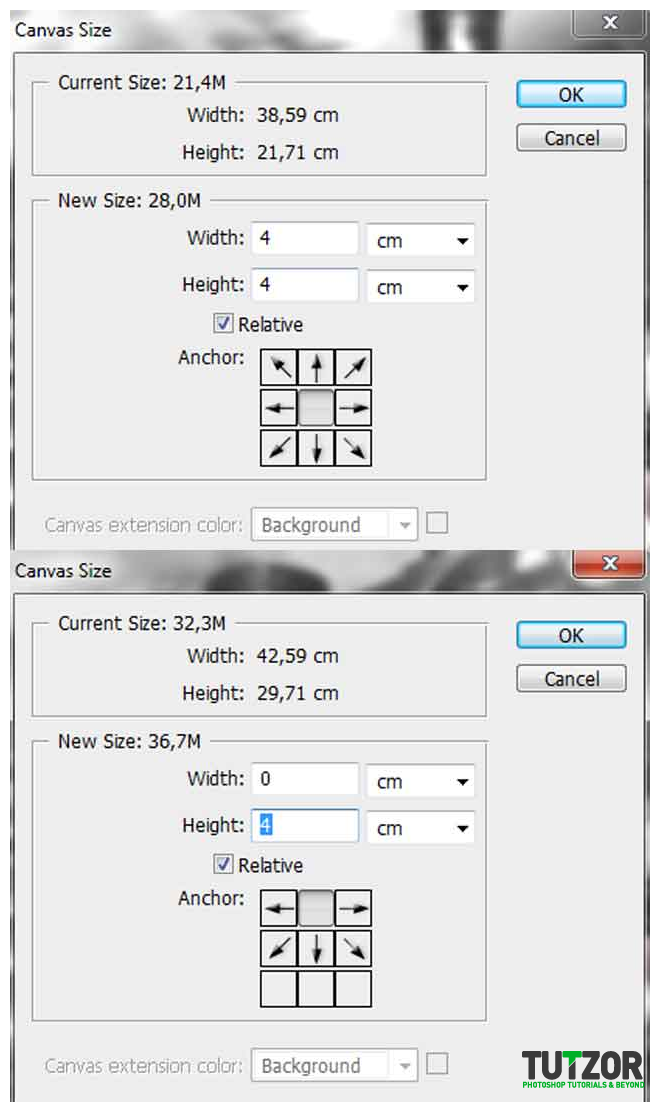
Go to Image > Canvas size ( I use centimeters so add 4 cm to width and 4cm to height), check the relative box. Go again to Image > Canvas size but now click on the top middle arrow and set the height to 4 cm (this will add another 4 cm to the bottom).

Step
20
Member since:
Sep 2010
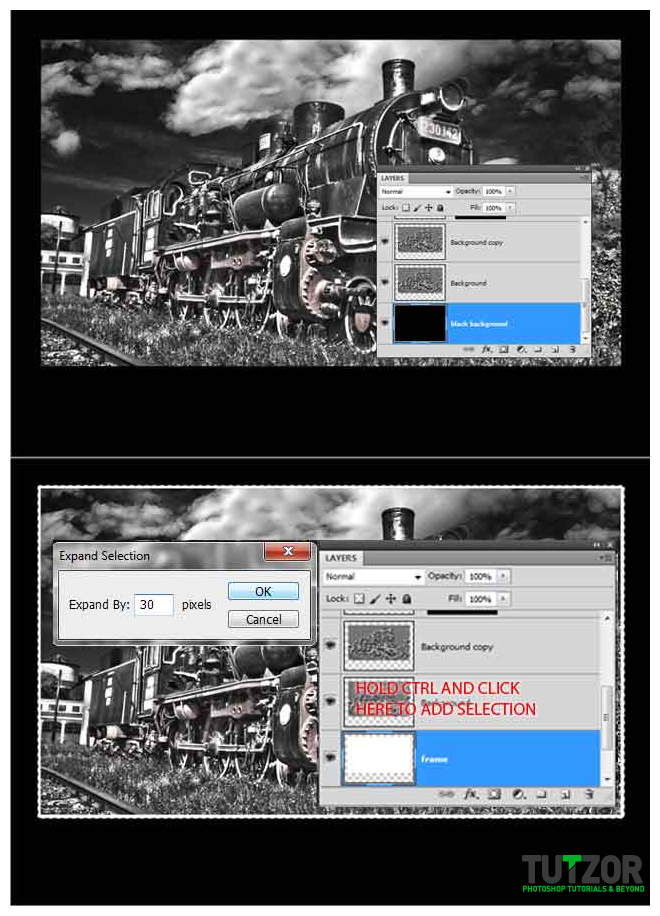
Add a new layer under the background layer and fill it with black, you can call the layer “black background”. Add a new layer on top of the black one and call it frame, hold down CTRL and click the background layer to make a selection. Go to Select > Modify > Expand the selection with 30 px and fill it with white.

Step
21
Member since:
Sep 2010
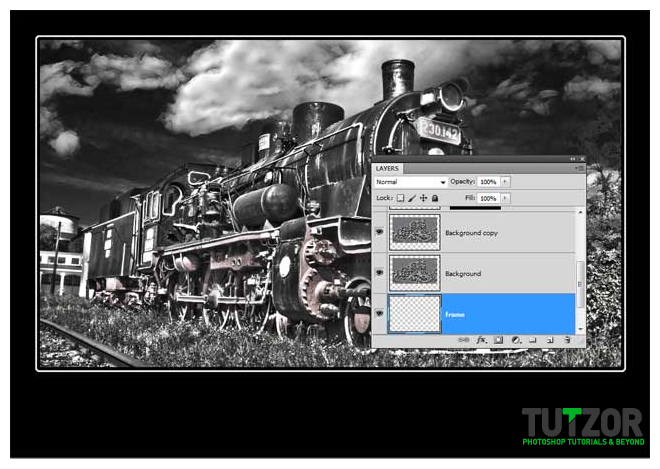
Hold Down CTRL again and click on the background layer and expand the selection only with 20 px. When the selection is done hit delete on the frame layer and you should get something like I did.

Step
22
Member since:
Sep 2010
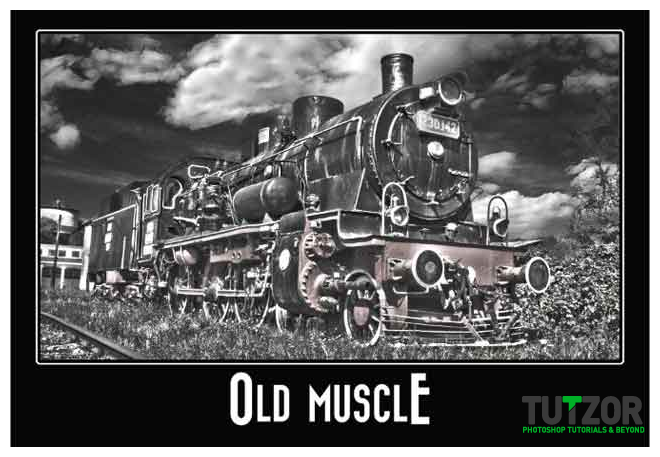
Using the font you’ve downloaded type, on the bottom “OLD MUSCLE”, a size of 100pt it’s enough. Now keep only the “O” and “E” with 100pt size and the other letters to 72pt, like I did.

Step
23
Member since:
Sep 2010
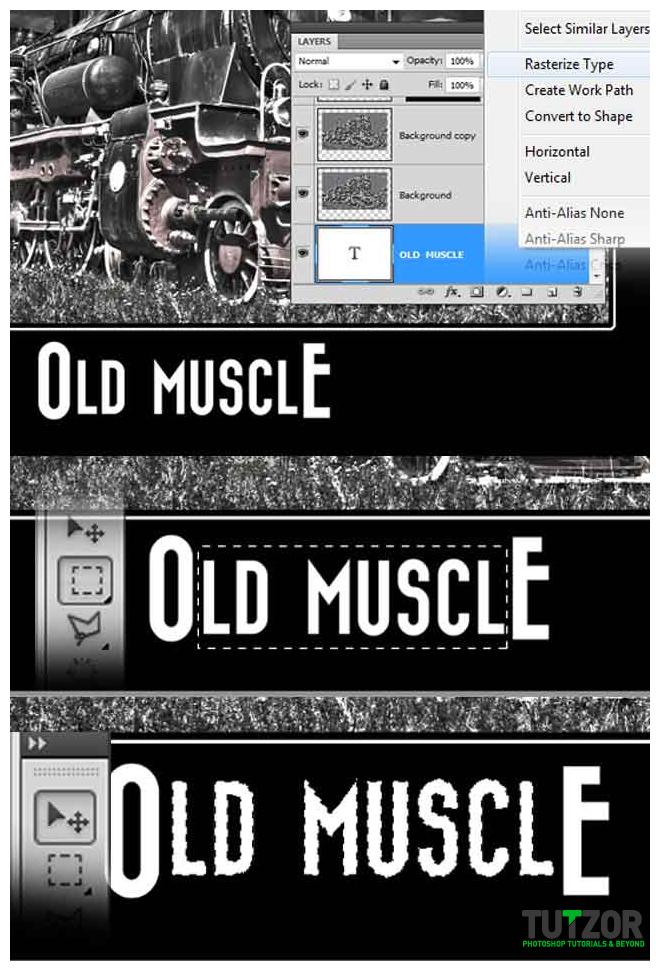
Right click on the text layer and go to rasterize type. Using the Rectangle Marquee tool make a selection around the small letters. Select your move tool and drag the letter upper like I did. You can make the text a bit bigger (Sale it CTRL+T, Hold down shift for proportions).

Step
24
Member since:
Sep 2010
Draw a 10 px weight line (hold shift for a straight line) under the smaller letters. Using Arial or Helvetica, type under the line “The power of steam”, use a small size.

Step
25
Member since:
Sep 2010
That's all, hope you'll enjoy it.


