How to design a retro poster.

26
Aug'11
cosmin
Member since:
Sep 2010

Hello,

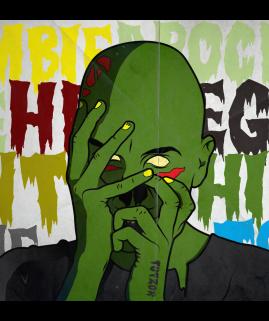
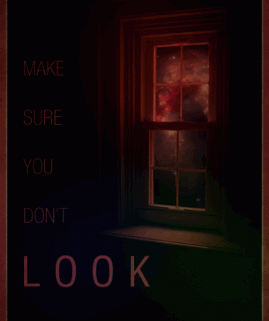
Maybe you always wanted to know how to design a retro poster, what texture or colors you should use. Today is your chance to learn some new stuff in Photoshop.

I've asked a friend of mine to shoot some pics for me, you can use them also.

Download this font:
http://www.fontinator.com/font-harlow.html

Enjoy!

Rating

Your rating: None Average: 3.9 (29 votes)

Required Files

Final Image

Step
01
cosmin
Member since:
Sep 2010
I used a photo a friend of mine took for this tutorial. I wanted something similar to a pin-up girl to make it look more or less retroish. Open the photo I used or any other photo you’d like to use for this tutorial in Photoshop , go to File-Open search for file.
Step
02
cosmin
Member since:
Sep 2010
Now we are going to cut the background out and leave only the model. It’s gonna be a long process but it’s easy to do using the Pen Tool.
Step
03
cosmin
Member since:
Sep 2010
With the pen tool selected click anywhere on the model to create an anchor point. After that click somewhere else to connect it with another anchor point hold down CTRL and click on the line between the anchor points to adjust it with the hand lines.
Step
04
cosmin
Member since:
Sep 2010
When u are done tracing the body with anchor points Hold Ctrl and click somewhere on the photo to deselect, then right click and chose Make Selection , after that make sure the Feather Radius is 0 and then click OK, you should now have the body selected.
Step
05
cosmin
Member since:
Sep 2010
Make sure you double click on the Background layer to unlock it, now you should have a Layer 0. With the body stil selected hold ctrl-shift-i to invert selection on the background and hit Delete. Delete any other trace of the background and we can move on to our next step.
Step
06
cosmin
Member since:
Sep 2010
You should now have only the body on the layer with no background. Open a new file with a width of 1300 and a height of 1793 and click ok.
Step
07
cosmin
Member since:
Sep 2010
Now drag the model layer in the new file. And resize it to fit the page more or less like I did. For this tutorial I’m using two textures made by a friend of mine. You can use those, or you can use any other vintage retro texture you have. But in order to get the same results I would recomend using the ones I did. Open Texture_1 and drag it in our file. Make it a bit smaller like I did, and place it over our Model layer. Then click CTRL-I to invert colors and set it as Exclusion
Step
08
cosmin
Member since:
Sep 2010
Open Texture_2 and drag it in, resizte it like I did, place it under texture1 and over Model layer, and set it as Linear Burn.
Step
09
cosmin
Member since:
Sep 2010
Duplicate the Model Layer (Layer > Duplicate), and name the new layer Model 2. Click on Model, while making sure black is your foreground color then go to Filter > Sketch > Halftone Pattern Set Size to 1, Contrast to 5 and Pattern Type as Dot Click ok. Now Click on Model 2 and set it as Overlay.
Step
10
cosmin
Member since:
Sep 2010
Now we’ll create a simple circle behind our model using the Ellipse Tool. Click U then chose the Ellipse Tool. Now select a color you’d like to use , i chose 95% Gray. Make sure you place it under the Model layers. Simply Rasterize the layer Layer>Rasterize>Shape and we can move on.
Step
11
cosmin
Member since:
Sep 2010
Create a new layer under all the layers name the layer Sun. And Select the Polygonal Lasso Tool (L). Next click somewhere in the middle of the sheet, and start making ray type shapes like I did. Connect the final line with the first one and you’ll have a selection, now fill it up with a color, i used Yellow.
Step
12
cosmin
Member since:
Sep 2010
Now duplicate the Sun layer and go to Edit>Transform>Flip Vertical and place it on the other part of the sheet . Then Merge the two Sun layers into one. Ctrl E.
Step
13
cosmin
Member since:
Sep 2010
Click on Model 2 and merge that layer with Model . Now you’ll only have one layer named Model. Right click on that layer and go to Blending Options then click on Drop Shadow and make the same adjustments as I did and click OK. Right click on drop shadow under the layer and select Create Layer click Ok to that avertisment and you’ll have a new shadow layer under the model one named Model’s Drop Shadow.
Step
14
cosmin
Member since:
Sep 2010
Select that layer go to Filter>Blur>Gaussian Blur And set the radius as 25 pixels. Click Ok.
Step
15
cosmin
Member since:
Sep 2010
I will add two camera’s on the side of the model. I have a photo of the camera she was holding to use for this tutorial, you can either use that one, or place anything interesting to fill that space. Open camera_psd and place it on our working sheet.
Step
16
cosmin
Member since:
Sep 2010
Name the layer Camera. Place the camera somewhere behind the model and make it smaller to fit in nicely ( like I did ). Duplicate the camera layer and then click CTRL-I to invert colors. And go to Filter>Sketch>Halftone Pattern. Set the settings like I did and click Ok.
Step
17
cosmin
Member since:
Sep 2010
Set the opacity to that layer to 76% and set it to Color Dodge And merge the two Camera layers together.
Step
18
cosmin
Member since:
Sep 2010
While stil on the Camera layer, right click and select Blending Options >DropShadow and make the same settings like I did. Duplicate the layer, and go to File>Edit>Flip Horizontal And place it on the other side of the model.
Step
19
cosmin
Member since:
Sep 2010
For the text part I used Harlow Solid Italic for "Retro On", I used 310pt size and CMYK Mangenta color R:236, G:0, B:140. Duplicate the text layer and go to Blending Options Color Overlay And set it to R:61,G:54,B:54. place it under the other layer like I did. Then Ctrl click on the Retro On and then Retro On Copy and go to Edit>merge layers.
Step
20
cosmin
Member since:
Sep 2010
For the "Get Your" text part I used R:0,G:174,B:239. Duplicate it, and go to belinding options , color overlay, and make it white. You can place it like I did or wherever you want. And then add Shadow, right click on the layer blending options Drop Shadow and set settings like I did.
Step
21
cosmin
Member since:
Sep 2010
Duplicate the Retro On layer and go to Filter>Halftone Pattern. Make sure your foreground color is black Set the Size : 2 Contrast : 2. Click Ok. Set the layer as Lighten.
Step
22
cosmin
Member since:
Sep 2010
Repeat the same steps for "Get Your" layer Duplicate it and set the settings at Halftone Pattern like I did But set the Size:2 Contrast:1 And the Layer to Soft Light.
Step
23
cosmin
Member since:
Sep 2010
Create a new layer under the text layers. We are going to add some ribons with the Polygonal Lasso Tool. And make something simillar to what I did. When the selection is done color it with Light Red color. R:242,G:108,B:79. And place it under the text and the Model layers. Now duplicate it and place one on the other side too.
Step
24
cosmin
Member since:
Sep 2010
You can add more ribbons or text by now if you want , just make sure to place them under the texture layers to give them a nice look. I will now place a sticker on top and add the website logo, you can add any other text on it if you want. Select the Ellipse tool ( like previously) and make a circle somewhere in the left or right corner. Here you can choose any kind of color I will go with Magenta like the one for the Text. Select the Pen Tool and make sure you are on Paths And make a path similar to what I did. Right Click then click on Make Selection and make sure the Feather Radius is 0, click Ok .
Step
25
cosmin
Member since:
Sep 2010
Create a new layer and with the selection stil on, color it white Now go back to the magenta sticker and erase the part that is left out. You can merge the two layers now. Right click and go to blending options and set the settings like I did for the Shadow. You can now add the text and you are finished with your Retro poster.

Comments

Comments

15
Feb'12
Anonymous

Re: How to design a retro poster.

Or you can take the super easy route, and hire me to make your retro poster for you. I work SUPER cheap, but my designs look like they came out of a time machine!