Sleek Phone Advertisement Flyer - PART 2

19
Aug'10
Cpotorac
Member since:
Aug 2010

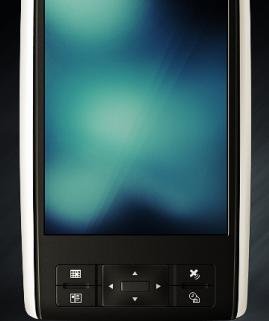
This is continuation from Sleek Phone Advertisement tutorial.

Rating

Your rating: None Average: 4.5 (11 votes)

Required Files

Final Image

Step
26
Cpotorac
Member since:
Aug 2010
Next you need to set the ring to Linear Dodge (Add) and erase the part that is over the phone.
Step
27
Cpotorac
Member since:
Aug 2010
Duplicate the layer.
Step
28
Cpotorac
Member since:
Aug 2010
Activate the Pen layer again and also move in into a Folder that you will name Stick. Also make a new layer, Ctrl + Click on the Pen to make a selection and fill that selection with black. Then set it to Soft Light.
Step
29
Cpotorac
Member since:
Aug 2010
Create a new layer below the Stick folder. Again make sure you have the foreground set to white and background set to black. Go to Filter – Render – Clouds. Make a selection like I did then go to Filter – Distort – ZigZag. Use 100 for the Amount and 5 for the Ridges. For the Style use Pond Ripples.
Step
30
Cpotorac
Member since:
Aug 2010
Now go to Edit – Transform – Distort. Distort the layer until you get the right perspective. After that, change the Blend Mode to Soft Light. Again, as we are using Render Clouds, the results may vary. So, you might need to erase some parts to make it more realistic.
Step
31
Cpotorac
Member since:
Aug 2010
Go down to the Clouds layer. Above that make a new layer and name it light. using the brush tool draw with white as I did. Then set it to 51% Opacity and Soft Light.
Step
32
Cpotorac
Member since:
Aug 2010
Make a new folder above that and name it Dots. In this folder we will brush some nice dots that will go in the back of the Phone. Use these settings for the brush.
Step
33
Cpotorac
Member since:
Aug 2010
Your brush color needs to be black. Make a new layer and start brushing something close to what I have done. Than set it to Opacity 30% and Soft Light.
Step
34
Cpotorac
Member since:
Aug 2010
Ctrl + Click on the layer to make a selection. Then create a new layer and with the Lasso Tool Right Click on the screen and select Stroke. Use my settings. Then set the layer to Opacity 40%.
Step
35
Cpotorac
Member since:
Aug 2010
Repeat step 34 but this time make white dots.
Step
36
Cpotorac
Member since:
Aug 2010
Making the movement is simple. Make a new folder above the Dots folder and name it Movement. You need to copy the phone and merge all the layers you copied into a single layer. Also move the copied Phone in the Movement folder.
Step
37
Cpotorac
Member since:
Aug 2010
Next you need to transform the copied phone. Move it into position and rotate it.
Step
38
Cpotorac
Member since:
Aug 2010
Now go to Filter – Blur – Motion Blur. Use my settings:
Step
39
Cpotorac
Member since:
Aug 2010
Copy the phone again 5 more times. Repeat step 37 and if needed step 38 to add more blur. Also Change the opacity of all the layers so that is fades out.
Step
40
Cpotorac
Member since:
Aug 2010
Make a new layer and place this layer on top of all the layers. Name the layer Sparkles. Now go to Brush settings and use these settings:
Step
41
Cpotorac
Member since:
Aug 2010
In the Sparkles layer draw as I did. Use a white color. You might not have the same results. I use a tablet and this gives me better handling. Also when you finish drawing use my settings for the Blending Options.
Step
42
Cpotorac
Member since:
Aug 2010
Last thing we will do is to make a new folder that will sit on top of all the other layers. In this folder make a new layer. Make a selection and using the Gradient Tool just click and drag from left to right. Make sure you use a white color for this.
Step
43
Cpotorac
Member since:
Aug 2010
Using your Eraser Tool simply erase the gradient so it fades out perfectly. Next set the layer to Soft Light and rotate, scale and move it into position.
Step
44
Cpotorac
Member since:
Aug 2010
Next use the Line Tool set to 1px. Click and drag on the shape you just made like so:
Step
45
Cpotorac
Member since:
Aug 2010
Use the Eraser Tool and erase sides so it will fade out nicely. And last set the line to Soft Light and Opacity 50%.
Step
46
Cpotorac
Member since:
Aug 2010
Now that you know how to make this you will need to make a lot more. Before you start you can take a break and come back when you are ready. All you need to do is to duplicate this shape as many times you want and change it’s settings for each different shape or redo each of them from scratch.
Step
47
Cpotorac
Member since:
Aug 2010
Before you are finished with the design you need to work more on the details and add some more things to it. Use what you have learned here and create your own designs, as there are so many more ways to achieve what I have taught you in this tutorial. Have fun.

Comments

Comments

19
Aug'11
Anonymous

Re: Sleek Phone Advertisement Flyer - PART 2

GREAT!

The tut is excellent. thx.

Impressive how using simple tools can achieve such an amazing result :-)

10
Aug'11
guille3f

Image step 41

The image of step 41 does not correspond to that step, are images of step 16.
For my part I understand everything, and you can also download the original PSD and make comparisons of the case.
Congratulations, excellent tutorial, it is explicit of all, I liked a lot.

14
Apr'11
Cyrgaan

Re: Sleek Phone Advertisement Flyer - PART 2

Hi there!

Its a very useful and complete tutorial. Nearly the best I've ever seen.
I found only one, small flaw in it: in Step #28, you create the pen's shadow, but you left out the horizontal flip and positioning substeps including the result image. Though its a very-very minor flaw, I just mention it because the full tutorial is soo good. :D

Sincerely,
Cyrgaan

15
Dec'10
SN the Cracker

Sleek Phone Advertisement Flyer - PART 2

Really Impressive man.. Love it